How to Use DSLR Camera Step by Step: A Beginner's Guide
A practical, step-by-step guide to using a DSLR camera for beginners. Learn essential settings, composition, and safe handling to start capturing sharp, well-exposed photos.

Learn how to use a DSLR camera step by step, from powering on and selecting a shooting mode to adjusting exposure and capturing sharp images. This quick guide covers essential controls, common settings, and safe handling tips so you can start shooting with confidence. Whether you shoot portraits, landscapes, or action, you'll gain a practical framework to practice consistently.
Understanding the DSLR layout and controls
A DSLR camera combines a mechanical mirror system with an electronic sensor to capture light. To begin the journey of how to use dslr camera step by step, you need to know the core layout: a mode dial on top, a shutter release near the grip, a memory card slot, and a display screen on the back. Lenses attach to the front, and many DSLRs allow quick lens changes. Familiarize yourself with the primary controls: the power switch, the shutter button, the command dial, and the menu button. Knowing where these are located and what they do will make every subsequent decision easier. Remember that practice builds muscle memory; the more you touch the dials, the quicker you’ll respond in changing light conditions. For beginners, starting with your camera’s auto settings is fine, but the goal is learning the logic behind exposure, focus, and composition so you can apply the step-by-step approach to any scene.
Essential settings you should know
Mastering DSLR basics starts with core parameters that govern every shot. Key settings include shooting modes (Auto, Program, Aperture Priority, Shutter Priority, Manual), ISO, White Balance, and metering. In practice, try starting with Aperture Priority (A/Av) to control depth of field while the camera selects a suitable shutter speed. ISO should be kept as low as possible for clean images, raising it only when light drops. White Balance ensures colors look natural under different lighting. Metering helps the camera judge exposure across the frame; in tricky scenes, switch to Evaluative/Matrix metering and adjust as needed. Understanding these settings makes it possible to translate creative intent into accurate exposure and pleasing color.
Step-by-step setup before your first shoot
Before you shoot, perform a quick preflight check to ensure you’re ready. Charge the battery, insert a memory card with sufficient space, and attach a lens. Set the date and time, format the card if you’re starting fresh, and confirm the autofocus mode suits your subject. If you’re new to DSLRs, begin with Auto or Aperture Priority to learn how exposure and depth of field interact. Finally, enable image review after capture so you can learn from each frame by checking the histogram and exposure levels.
How to shoot in different modes: Auto, P, AV, TV, M
Each mode serves a purpose. Auto chooses settings for you, which is useful in unfamiliar situations. Program (P) gives a blend of automation and control, while Aperture Priority (AV) lets you decide depth of field, and Shutter Priority (TV) prioritizes motion control. Manual (M) provides full creative control over both aperture and shutter speed. For each mode, you’ll learn to balance ISO, exposure, and focus to achieve sharp, well-exposed results. Start in Auto or AV, then gradually experiment with P and M as you gain confidence.
Focusing, exposure, and color: getting it right
Autofocus points determine where the camera sharpens. Use One-Shot AF for still subjects and AI Servo/Continuous AF for moving subjects. Ensure your exposure value is balanced via the histogram; a clamped histogram (peaks at either end) signals under- or overexposure. White Balance should reflect the scene’s lighting (sunny, cloudy, tungsten, etc.). In post-production, you’ll adjust color balance, contrast, and saturation to achieve your intended look, but great DSLR work starts with accurate in-camera settings.
Practical shooting scenarios and sample settings
Portraits: Use a wide aperture (f/1.8–f/2.8) for shallow depth of field; try ISO 100–400 and a 50mm lens for flattering perspective. Landscape: Use a small aperture (f/8–f/11) for maximum sharpness from foreground to background; a tripod helps keep the shot steady. Action: Use a faster shutter speed (1/500s or faster) with AI Servo/Continuous AF; increase ISO as needed to maintain proper exposure. In each case, start in AV or TV, observe the exposure, and adjust ISO first if the scene shifts, then tweak exposure compensation to fine-tune brightness.
Common beginner mistakes and how to avoid them
One common error is treating ISO like a brightness setting; high ISO introduces noise. Instead, raise ISO only when necessary and prefer wider apertures or slower shutter speeds with stabilization. Another mistake is relying on Auto mode alone; learning a couple of dedicated modes (AV, TV) gives you creative control. Forgetting to review images on the LCD can hide exposure or focus problems. Finally, neglecting basic care—clean lenses, proper storage, and safe handling—leads to preventable issues and degraded images.
Basic post-processing tips
Post-processing improves what you captured, especially for RAW files. Start with adjusting exposure, white balance, and contrast. Use global adjustments first, then selective edits on specific zones using masks. Keep a consistent color profile and monitor calibration to ensure your edits reflect real-world tones. Save edits as a non-destructive workflow by using sidecar files or editing in RAW format and export JPEGs for sharing. Organization matters: create separate folders by date and subject to streamline your workflow.
Safety and handling tips for long-term DSLR use
Always support the camera with a strap when shooting; never hang the camera by the strap from the lens itself. Keep the body clean with a microfiber cloth and avoid touching the sensor. When changing lenses, do so in a clean environment to minimize dust. Protect lenses from rain and dust by using a weather-sealed bag or protective cover. Regularly back up your files to a computer or cloud storage to prevent data loss.
Tools & Materials
- DSLR camera body(Ensure firmware is up to date)
- Charged camera battery(Carry a spare for longer shoots)
- Memory card (SD/CFexpress)(Format new cards before first use)
- Interchangeable lens(es)(Start with a versatile zoom (18-55mm) or 50mm prime)
- Lens cap and rear cap(Protect optics during storage)
- Microfiber cleaning cloth(Use for lenses and screens)
- Camera manual or quick-start guide(Helpful for model-specific controls)
- Tripod (optional)(Stabilizes long exposures and landscapes)
- Remote shutter release (optional)(Avoid camera shake in long exposures)
Steps
Estimated time: 15-30 minutes for initial setup and practice
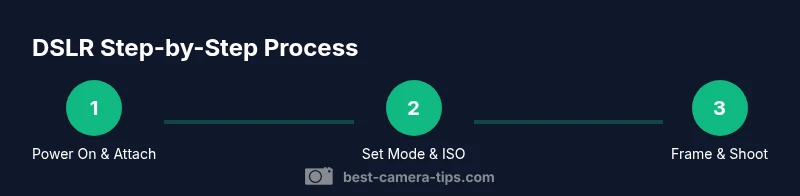
- 1
Power on and attach lens
Turn on the camera, attach a lens securely, and verify the date/time are correct. A fresh lens and charged battery set the foundation for reliable shooting. This first step establishes your base configuration and prevents misfires in critical moments.
Tip: Always detach the lens cap and clean the front element before shooting to avoid hidden smudges. - 2
Set baseline shooting mode
Choose a baseline mode such as Auto or Aperture Priority (AV). Auto lets the camera decide settings, while AV gives control over depth of field. Starting with AV helps you learn how aperture affects background blur while the camera handles exposure.
Tip: If eyes or background are not emphasized correctly, switch to Manual (M) after a few practice shots. - 3
Adjust ISO and white balance
Set ISO to the lowest acceptable value for the scene (usually 100–400). Choose a white balance preset that matches lighting (sunny, cloudy, tungsten). These choices influence color accuracy and noise levels.
Tip: Keep ISO as low as possible; increase it only if shutter speed drops below 1/125s in dim light. - 4
Fine-tune focus and metering
Select an AF mode that matches your subject (single-point for still subjects, zone for moving). Confirm the metering mode fits the scene (evaluative/matrix is a good default). Check the LCD histogram after a test shot to verify exposure.
Tip: Use autofocus assist light only in dim scenes to avoid unnatural looks in portraits. - 5
Frame and shoot
Compose with the Rule of Thirds or a preferred composition technique. Lock exposure and lock focus if needed, then press the shutter smoothly. Review the image to confirm sharpness and exposure.
Tip: Experiment with different focal lengths to see how perspective changes subject emphasis. - 6
Review and adjust
Review shots on the LCD or computer, check exposure histograms, and adjust settings for subsequent frames. Take multiple frames to ensure you have a good selection with varying angles.
Tip: Use bracketing in tricky lighting to ensure you capture a usable exposure range. - 7
Transfer and back up files
Copy RAW or JPEG files to a computer or cloud storage. Create organized folders by date and subject, and back up regularly to prevent data loss.
Tip: Keep a simple backup routine to avoid last-minute file losses after a shoot.
Common Questions
What is the difference between a DSLR and a mirrorless camera?
DSLRs use a reflex mirror and optical viewfinder, while mirrorless bodies rely on electronic viewfinders and a shorter flange back. DSLRs tend to have longer battery life and strong lens ecosystems, whereas mirrorless systems offer compact bodies and live electronic previews. Both can deliver excellent image quality with the right technique.
DSLRs use a mirror and optical viewfinder, while mirrorless cameras use electronic previews. Both are capable of great photos once you learn your settings.
Which lens should a beginner start with?
A versatile 18-55mm kit lens is a common starting point for learning framing and perspective. A 50mm prime is also excellent for portraits and low-light practice. As you grow, add lenses that suit your favorite subjects.
Start with a versatile kit lens, then consider a 50mm prime for portraits and low light.
How do I shoot in low light with a DSLR?
Open the aperture wide (low f-number), use a slower shutter only with a tripod, and raise ISO gradually while checking noise. Use a lens with a wide maximum aperture and enable Image Stabilization if available.
For low light, open the aperture, stabilize with a tripod, and increase ISO carefully to manage noise.
What is the best beginner camera setting to start with?
Begin with Aperture Priority for creative control over depth of field while the camera handles exposure. Practice with a few different apertures to see how background blur changes your subject separation.
Start with Aperture Priority to learn depth of field while the camera sets exposure.
How do I transfer photos to a computer?
Use a card reader or connect the camera via USB. Copy files to a dedicated photography folder, then back them up to an external drive or cloud service. Organize by date and subject for easy retrieval.
Connect the camera or card reader, copy files, then back up to keep your photos safe.
How often should I format memory cards?
Format memory cards after you transfer data to your computer, especially if you notice corruption or unusual behavior. Regular formatting in-camera ensures optimal performance and reduces fragmentation.
Format cards after backing up to keep performance smooth and reliable.
Watch Video
The Essentials
- Master the layout to speed up shooting
- Learn core modes and how they affect exposure
- Keep ISO low and manage white balance for color accuracy
- Review images and adjust with purpose
- Back up files promptly to prevent loss