How to Learn Camera: A Practical Beginner Guide
A practical, step-by-step guide to learning camera skills—from exposure basics to practical drills—designed for beginners seeking confident, hands-on photography.

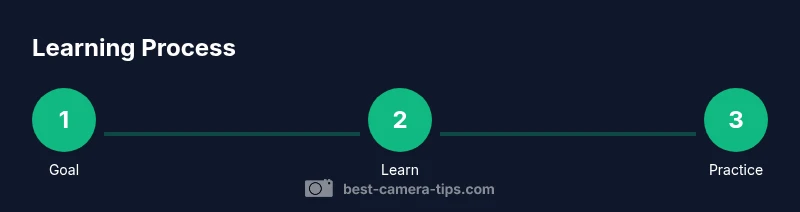
Goal: learn to use a camera with confidence by mastering exposure, lenses, and practice routines. This guide outlines a practical learning path, essential tools, and a repeatable 8-step plan to progress from beginner to capable shooter. According to Best Camera Tips, structured practice and deliberate drills accelerate camera skills dramatically.
Why learning camera matters
In photography, the difference between guessing and intentional results comes down to knowledge and practice. Learning the camera empowers you to control exposure, depth of field, motion, and storytelling. When you understand how settings interact, you can translate your ideas into images rather than rely on luck. This section explains why a solid foundation matters for beginners and how a structured approach accelerates progress. With a clear plan, you’ll avoid common traps like overshooting in auto mode or missing critical lighting opportunities. A steady learning path also builds confidence, reduces frustration, and makes photography more enjoyable, because you can predict how your camera will respond in different scenes. By committing to regular practice, you’ll start seeing steady improvements in your shots and gain the creative freedom to experiment without fear.
Learning camera skills isn’t just about mastering knobs; it’s about translating observations into deliberate actions. You’ll develop a reliable workflow that supports your creative goals, whether you’re documenting family moments or pursuing a personal project. Start with small, repeatable exercises that reveal how each change in settings affects exposure, color, and sharpness. Over time, your intuition will grow, and you’ll make faster, more confident decisions in dynamic lighting conditions. This section will guide you through a practical path that respects your time and aims for real, observable progress.
Core building blocks: exposure triangle, aperture, shutter speed, ISO
Understanding the exposure triangle is the first step toward camera mastery. Aperture controls the amount of light and depth of field; Shutter speed governs motion capture and stability; ISO affects sensitivity and noise. When you adjust one setting, you must consider the impact on the others. A practical rule of thumb is to practice with a single subject and vary one parameter at a time while keeping the others constant to observe cause-and-effect. In this section, you’ll learn how each element interacts and how to balance them to achieve your creative intent. We’ll also cover white balance, dynamic range, and basic noise management so you can make informed choices in varied lighting.
A strong foundation in these concepts enables you to switch from auto to manual with confidence. You’ll discover how to use exposure compensation to fine-tune brightness, how to read histograms, and how to recognize under- or overexposed scenes. Blanket recommendations are avoided here because every scene dictates a unique combination of settings. The goal is to internalize the relationships so you can predict results rather than rely on trial-and-error.
If you’re new to photography, expect a learning curve. Commit to practical exercises that isolate each variable, and review your shots to see how changes manifest in the final image. With time, your ability to pre-visualize outcomes will improve, helping you create images that closely match your intent.
Getting to know your gear: cameras, lenses, and accessories
A solid learning path starts with the gear you’ll actually use. For beginners, a reliable entry-level camera—mirrorless or DSLR—paired with a versatile kit lens covers most foundational needs. The choice between mirrorless and DSLR matters less than your understanding of how the camera handles exposure, autofocus, and file management. Lenses define perspective and depth, so start with a general-purpose option (around 24-70mm on full-frame or 18-55mm on cropped sensors) to practice a range of focal lengths. Accessories such as a tripod, extra batteries, and a memory card become learning aids as you advance. Based on Best Camera Tips analysis, beginners benefit from starting with a single versatile kit lens and expanding later as needed. Your goal is consistency and comfort with your primary setup, not chasing gear parity with professionals.
Take time to read your manual or quick-start guide and watch a few beginner tutorials to familiarize yourself with controls, menus, and safety precautions. Organize your gear in a simple box or pouch so you’re ready to practice on schedule. As you grow, you’ll learn to tailor your setup for different projects—portrait work with a fast prime, or landscape with a wider zoom—while keeping your learning focused and repeatable.
A practical 8-week learning plan
This section maps out a structured plan designed to build competence quickly while avoiding overwhelm. Week 1 focuses on fundamentals and safe handling. Week 2 introduces the exposure triangle and practical shooting in controlled light. Week 3 emphasizes aperture and depth of field, followed by Week 4 exploring shutter speed and motion. Week 5 covers ISO performance and noise management, Week 6 tackles white balance and color accuracy, Week 7 centers on composition and framing, and Week 8 culminates in a mini project that synthesizes all skills. Each week includes 2–3 short tasks, a small photo assignment, and a brief review to reinforce learning. Throughout, aim for consistent practice sessions of 20–45 minutes, plus one longer weekly shoot to apply what you’ve learned in real-world scenarios.
As you proceed, remember to document what you did, what you observed, and how you’d adjust next time. This habit converts passive viewing into actionable improvement and makes the learning process transparent and repeatable.
Essential exercises you can do today
- Exercise 1: Point-and-shoot in RAW mode with auto settings to understand baseline performance. Observe histogram shapes and how they reflect exposure. Pro tip: compare JPG and RAW to see how post-processing can rescue under- or overexposed shots.
- Exercise 2: Take a series of three shots of the same subject with different apertures to see depth of field changes. Pro tip: use a shallow DOF for portraits and a deeper DOF for landscapes.
- Exercise 3: Swap between 1/125s and 1/500s to capture motion and freeze action. Pro tip: stabilize with elbows tucked in and brace your camera against a solid surface when possible.
- Exercise 4: Practice white balance in warm indoor lighting and cool daylight. Pro tip: shoot a white card under both lighting conditions to calibrate color correctly.
- Exercise 5: Build a simple photo essay of 6–8 frames on a single topic. Pro tip: plan a narrative arc and vary composition to support it.
If you keep these drills short but repeat them consistently, you’ll see meaningful gains in a matter of weeks. You’ll also start building a mental catalog of how settings affect images in different lighting situations.
How to create a learning workflow and track progress
A practical workflow turns theory into habit. Start a learning journal where you record the date, location, lighting conditions, camera settings, and a quick reflection on what worked and what didn’t. Create a simple review routine: after every session, pick one or two shots that represent your best effort and explain why. Over time, you’ll notice recurring patterns—moments when your technique improves, and areas where you still stumble. Use checklists to keep your practice consistent: handle the camera safely, set up lighting if needed, shoot three frames, review results, and log insights. If possible, schedule a weekly review session to compare your current work with earlier attempts to visualize progress. This practice not only accelerates learning but also fosters confidence as you see measurable improvement.
Additionally, build a small library of reference images and notes. You’ll benefit from a personal catalog that you can reference when tackling new subjects, enabling faster pre-visualization and more purposeful shooting decisions. The goal is to create a repeatable routine that makes progress visible and satisfying rather than vague and slow.
Finally, engage with a learning community or mentor who can provide constructive critique. A second pair of eyes often reveals blind spots and offers new ideas to push your work forward. Consistency, reflection, and feedback are the cornerstones of real growth.
Common mistakes and how to avoid them
- Mistake: Overreliance on Auto modes. Solution: Force yourself to work in one semi-manual mode first (A or Av) before returning to full Auto.
- Mistake: Ignoring post-processing. Solution: Develop a basic editing workflow to recover details in shadows and highlights.
- Mistake: Shooting without a plan. Solution: Set a concrete objective for each session and align your settings to it.
- Mistake: Not reviewing results. Solution: Schedule a weekly critique of your best and worst shots to learn from mistakes.
- Mistake: Neglecting gear basics. Solution: Learn routine battery and card management and safe handling to avoid interruptions mid-shoot.
By identifying these common traps early, you’ll stay on track and maximize learning without getting frustrated. The key is to practice with purpose and to keep a clear record of what you did and why.
Verdict: Next steps and continuing growth
The learning journey continues well beyond the initial eight weeks. The Best Camera Tips team recommends keeping a learning log, pursuing small, themed projects, and gradually expanding your toolkit as your confidence grows. In 2026, the best photographers blend structured practice with creative exploration, using feedback loops to refine technique. Commit to a steady cadence of practice, and your camera skills will evolve from basic handling to expressive imaging. The path is deliberate, repeatable, and ultimately rewarding for anyone who treats learning as a long-term habit.
Tools & Materials
- Camera body(Any camera you plan to learn on (mirrorless or DSLR))
- One versatile kit lens(Start with a general focal range (e.g., 18-55mm or 24-70mm equivalent))
- Extra memory card(8–32GB, Class 10 or higher; format before use)
- Battery and charger(Fully charged before practice sessions)
- Manual or quick-start guide(Keep for quick reference on settings and safety)
- Learning journal or notebook(Track settings, shot ideas, and reflections)
- Tripod (optional)(Useful for low light or long exposure drills)
Steps
Estimated time: Total time: 4-6 weeks
- 1
Define learning goals
Set clear, measurable objectives for what you want to achieve with your camera. Write down your goals and plan how you will assess progress weekly.
Tip: Write a minimum of two specific goals and review progress every week. - 2
Learn the exposure triangle
Study how aperture, shutter speed, and ISO work together. Use manual mode to control all three and observe effects on exposure and depth of field.
Tip: Change one variable at a time to see its impact. - 3
Practice with a single subject
Choose a simple subject and shoot it in different lighting. Compare how exposure changes with each setting.
Tip: Keep the light source consistent when comparing shots. - 4
Master focus and depth of field
Experiment with focus modes (single, continuous) and varying focal lengths to control what appears sharp.
Tip: Use focus peaking or magnified focus assist if available. - 5
Explore white balance and color
Shoot under different lighting (sunny, shade, tungsten) and compare color casts. Learn to calibrate with a gray card or white balance presets.
Tip: Calibrate white balance for consistent color in post-processing. - 6
Practice composition and framing
Apply the rule of thirds, leading lines, and framing to improve visual storytelling in every shot.
Tip: Pause briefly before shooting to evaluate composition. - 7
Build a learning workflow
Create a simple routine: plan, shoot three frames, review, and log insights. Repeat weekly.
Tip: Attach a short note about what you learned for future sessions. - 8
Complete a small project
End with a mini-project that combines all skills: exposure, focus, color, and composition.
Tip: Select a single theme and tell a compact visual story within 8–12 frames.
Common Questions
What is the best starting method to learn camera?
Begin with understanding the exposure triangle and safe handling. Practice in manual mode with a simple subject, then gradually introduce more variables as you gain confidence. A structured approach helps you see cause-and-effect, not just random results.
Start with the exposure triangle and manual practice. Build confidence by controlling one variable at a time and reviewing what changes in your images.
How long does it take to learn camera?
Learning speed varies by person, but regular, focused practice over several weeks typically yields noticeable improvement. Set realistic weekly goals and review outcomes to stay motivated.
It varies, but with consistent weekly practice you’ll see steady progress in a matter of weeks to a couple of months.
Do I need expensive gear to learn?
No. Beginners can learn effectively with an entry-level camera and a versatile kit lens. The most important factor is understanding fundamentals and developing deliberate practice habits.
You don’t need top gear to start learning; focus on fundamentals and consistent practice first.
Should I learn on my own or join a course?
Both can work. Self-study with a structured plan is practical, but a course or mentor can provide feedback, accountability, and faster corrections.
A mix of self-study and occasional mentorship often yields the best results.
What should I practice first?
Start with the exposure triangle and basic framing. Practice daily with short, focused sessions and build toward longer shoots with purposeful outcomes.
Begin with basics like exposure and framing, and gradually add complexity as you gain confidence.
Watch Video
The Essentials
- Master exposure basics before complex features
- Practice daily with a simple project
- Log settings and results for review
- Experiment with lenses/settings to learn cause-effect
- Seek feedback to accelerate growth