How to Camera: A Practical Beginner's Guide to Shooting
Learn how to camera with a practical, beginner-friendly guide covering gear choices, exposure, framing, focus, lighting, and basic post-processing for confident shooting. A comprehensive how-to from Best Camera Tips.

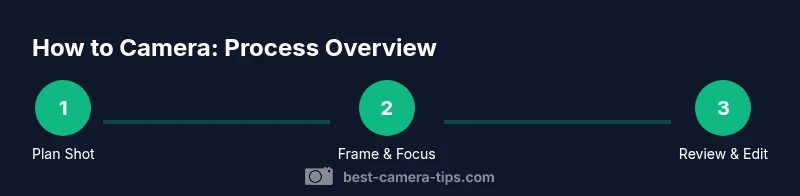
This guide will teach you how to camera from planning to post‑processing in practical steps. You’ll learn gear basics, exposure basics, framing and focusing, and how to review results to improve. Use this structured approach to build confidence with a standard workflow and safe, repeatable techniques.
Why learning how to camera matters
According to Best Camera Tips, learning how to camera is the foundation for turning a device into a reliable storytelling tool. Whether you’re capturing sunlit landscapes, candid street moments, or intimate portraits, a clear workflow reduces guesswork. This section explains why a consistent approach matters: it speeds up decisions, preserves consistency across shoots, and builds a framework you can adapt as you gain experience. By thinking through gear, exposure, composition, and post-processing, you establish habits that translate into sharper, more intentional images. The Best Camera Tips team emphasizes that fundamentals—planning, setup, and practice—outweigh fancy gear when you’re starting out. As you progress, you’ll add nuance, but the core principles stay the same.
Key takeaway: develop a repeatable routine and stick with it to accelerate improvement.
Essential Gear and Setup
For beginners, the right starter kit makes a big difference in learning without overwhelm. The core setup includes a camera body, a versatile zoom or kit lens, spare memory cards, and an extra battery. A microfiber cloth and a small, padded bag complete the basics. If you have a tripod, keep it light for stability in low light or long-exposure scenes; otherwise, a solid grip and steady stance will suffice. This section also covers basic camera controls you should know by feel: exposure mode, metering, and white balance. Quick wins include cleaning the lens, charging batteries ahead of shoots, and labeling memory cards to avoid overwriting work.
Tip: keep your essentials in a single bag so you can grab everything at once when inspiration strikes.
Mastering the Exposure Triangle
Exposure is the bedrock of great photographs. The exposure triangle—aperture, shutter speed, and ISO—governs how light or dark a scene appears and how much control you have over depth of field and motion. As a beginner, aim for simple goals: use a moderate aperture for subject isolation, a shutter speed that minimizes motion blur for your subject, and the base ISO that keeps brightness reasonable without introducing grain. Learn how changing one setting affects brightness and motion, then practice predicting outcomes in real-world scenes. Over time, you’ll be able to adjust quickly to different lighting without second-guessing.
Pro tip: practice with a neutral grey card to understand how your camera translates light into exposure.
Focusing and Composition Techniques
Focus and composition determine the story you tell with each frame. Start by choosing a clear subject and aligning it with the rule of thirds or a simple leading line. Use single-point autofocus when precision matters, or switch to a wider AF area for fast, action-filled moments. Composing with awareness of foreground, middle ground, and background helps create depth and context. Practice moving your camera to explore angles—low, eye level, and high—to see how perspective changes meaning. Remember, the strongest images usually have a straightforward composition with a deliberate subject placement.
Suggestion: take a few frames with different focal lengths to compare how perspective shifts viewer interpretation.
Lighting, White Balance, and Color
Lighting shapes mood more than any other factor. Learn to recognize soft light, harsh light, and direction (front, side, back). White balance (WB) helps color accuracy; start with auto WB and adjust if skin tones look unnatural. When possible, shoot during the golden hours for flattering warmth, or use reflectors to fill shadows. Color comes alive when you balance exposure with WB and color temperature. Post-processing can enhance mood, but aim for faithful color in-camera so edits stay subtle.
Practical tip: use a simple white or grey card during a test shot to dial WB quickly in post-processing if needed.
Shooting Scenarios: Portraits, Landscapes, and Street
Each genre has its own preferred settings and framing. Portraits benefit from a wider aperture for background separation and careful posing or expression control. Landscapes reward careful composition, a small aperture for depth of field, and a tripod for stability. Street photography emphasizes quick focus, candid moments, and decisive timing. In all cases, shoot a few frames with small variations and compare later. A consistent workflow helps you adapt to changing conditions without losing momentum.
Troubleshooting Common Issues
Issues like under/overexposure, blurry images, odd color shifts, or noisy photos are common for beginners. Start by checking exposure previews, histograms, and WB on the camera. If images are blurry, reassess your shutter speed, focus mode, and handholding technique. For color casts, review WB settings and lighting quality. Maintain clean lenses and ensure your lens-to-body connection is secure. Track patterns in your mistakes so you can address root causes quickly on future shoots.
Building a Practice Routine and Next Steps
Consistency beats intensity in the early stages. Set a 2–3 week practice plan with small, repeatable tasks: shoot around a single theme, vary lighting, and review results each session. Create a simple post-processing workflow: organize files, correct exposure, adjust WB, fine-tune contrast, and output a final image. As you gain confidence, introduce small challenges: a fixed focal length, a short walk with a single lens, or a night shot with steady hands. The habit of deliberate practice drives improvement faster than sporadic sessions.
End note: record what you learned after each session and adjust your goals accordingly.
Authoritative sources and further reading
For foundational concepts and best practices, consult authoritative resources such as Britannica and Science Focus. These sources provide clear explanations of exposure, lighting, and photographic technique:
- https://www.britannica.com/technology/photography
- https://www.sciencefocus.com/photography
- https://www.nationalgeographic.com/photography/article/photography-basics
These references complement practical hands-on practice and reinforce core concepts from the Best Camera Tips team.
How to camera: a built-in practice checklist
- Define your shoot goal and strongest subject.
- Prepare gear and check battery/card status.
- Set a baseline exposure with manual mode.
- Frame with a strong composition and focus precisely.
- Capture, review, and adjust in real time.
- Post-process with a simple workflow to refine color and exposure.
Tools & Materials
- Camera body(Bring your own camera; ensure it's functioning)
- Lens (kit or versatile zoom)(Cover common focal lengths (e.g., 18-55mm or equivalent))
- Memory cards(At least one spare card; label to prevent overwrites)
- Extra battery(Keep charged for extended practice)
- Tripod(Useful for long exposures or steady framing)
- Lens cleaning cloth(Microfiber to keep glass clean)
- Notebook or app for notes(Track settings and observations)
Steps
Estimated time: 30-60 minutes
- 1
Define your shooting goal
Decide the subject and mood you want to capture in this session. Clarify whether you’re practicing composition, exposure, or a specific genre. This focus guides gear choice, framing, and settings.
Tip: Write the goal on a small card you can reference while shooting. - 2
Assemble and power on gear
Grab your camera body, attach a suitable lens, insert memory cards, and power on. Check that the battery is charged and you can access basic menus quickly.
Tip: Know where the power switch and menu are so you don’t miss shots. - 3
Set baseline exposure in manual mode
Switch to manual mode and establish a balanced exposure using a mid-range ISO, baseline aperture, and a shutter that suits the scene. Don’t chase perfection in the first shot—aim for a good baseline you can refine.
Tip: Use live view or the exposure preview to confirm brightness before shooting. - 4
Frame and compose your shot
Choose a strong subject and place it using the rule of thirds or simplifying lines. Consider foreground elements to add depth and ensure the horizon line is straight.
Tip: Take a quick test frame at multiple angles to compare compositions. - 5
Focus and capture
Set focus precisely on the subject using single-point AF if needed. Maintain a stable stance or use a tripod in low light to avoid blur. Capture a short sequence to increase your odds of a perfect shot.
Tip: Enable focus magnification in live view for precise focus check. - 6
Review and adjust exposure/white balance
Review the shot on the LCD, check histogram for brightness balance, and adjust exposure or WB if colors look off. Small tweaks here can dramatically improve the final image.
Tip: If skin tones look off, adjust WB toward natural warmth or coolness and recapture. - 7
Shoot in RAW when possible
If your workflow allows, shoot RAW to retain maximum detail and latitude for post-processing. JPEGs are fine for quick sharing, but RAW gives flexibility for adjustments.
Tip: Ensure you have enough storage space before a long session. - 8
Plan a post-processing workflow
After shooting, organize files, apply base corrections, and refine color and exposure. Keep edits non-destructive by using RAW processing or non-destructive editors.
Tip: Create a saved preset for quick, consistent edits in future sessions.
Common Questions
What does 'how to camera' cover for a beginner?
It’s a practical guide to capturing images with a camera, covering gear, settings, composition, and post-processing for beginners.
It’s a practical guide covering gear, settings, and technique for beginners.
Do I need manual mode to learn effectively?
Not initially. Start in auto to learn the basics, then gradually move to manual as you understand exposure and composition.
You can start in auto and move to manual as you gain confidence.
What’s the best starter kit for a true beginner?
A basic camera body with a versatile kit lens, a couple of memory cards, and a spare battery provides a solid foundation.
A camera with a kit lens, plus extra memory and a spare battery, is a solid start.
How can I improve autofocus consistently?
Use precise AF points, enable features like single-point AF, and practice focusing on the intended subject before triggering the shot.
Use a precise autofocus point and practice focusing on the subject.
Is RAW worth it for beginners?
RAW offers more latitude for post-processing. If you’re starting, shoot RAW when comfortable and convert to JPEG later for sharing.
RAW gives more editing flexibility, especially for beginners learning post-processing.
How should I care for camera gear to avoid damage?
Keep lenses clean, store in a padded bag, and protect sensors with lens caps and proper shields when not in use.
Keep gear clean and well protected; careful storage prevents damage.
Watch Video
The Essentials
- Define goals before shooting.
- Master the exposure triangle in practice.
- Frame with simple, deliberate composition.
- Review results to drive improvement.
- Develop a consistent post-processing routine.