How Can Camera Capture Image: A Practical Guide for Beginners
Learn how cameras capture images from light to pixel. This step-by-step guide covers exposure, sensor basics, lenses, and workflows for beginners seeking practical tips to improve image quality.

By understanding the interplay of light, sensor, and optics, you can capture a clear image with any camera. The essential steps involve lighting, proper exposure, focusing, and framing. This quick guide confirms that the core aim is to convert photons into a faithful digital representation. Best Camera Tips highlights practical steps for beginners to start capturing images confidently.
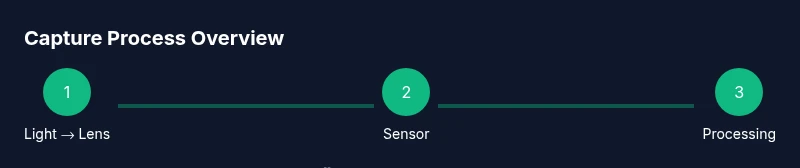
How can camera capture image: overview of the capture process
The question "how can camera capture image" is not a mystery; it’s a process that translates photons into digital data. According to Best Camera Tips, every image starts with light entering the lens, which focuses a scene onto a sensor. The sensor converts light into electrical signals, which are then transformed by the camera’s processor into a digital image. In practice, capturing a good image depends on managing three pillars: light, optics, and exposure control. If you can balance these three, you’ll consistently produce photographs that reflect what you saw and felt at the moment of capture. This section lays the foundation for the more detailed steps that follow.
The light and exposure: how illumination shapes your image
Light is the lifeblood of photography, and how you use it determines mood, texture, and clarity. Brighter scenes allow faster shutter speeds and lower ISO, while dim scenes require more sensitive settings or additional lighting. The camera’s exposure triangle—aperture, shutter speed, and ISO—lets you tailor brightness and depth. Good light often means soft, directional illumination, while harsh mid-day sun can create strong shadows that obscure detail. Practically, beginners learn to read light by checking shadows, highlights, and texture. The goal is not to chase brightness alone but to achieve a faithful representation of your subject’s form and color. As you practice, you’ll discover when to seek natural light versus adding a reflector or a modifier to shape it.
Sensor basics: how photons become pixels
A camera sensor is a grid of photosites that detects photons and converts them into electrical charges. Each photosite feeds data into a color filter array to produce red, green, and blue values. The processor then demosaics this data, applies noise reduction, and compresses the image for storage. Different sensor technologies (CCD, CMOS) and sizes influence dynamic range, noise performance, and color accuracy. For beginners, the takeaway is that sensor quality matters, but technique matters even more. Learning how to position subjects, control motion, and frame composition will have a larger impact on your results than chasing the latest sensor spec.
Lenses, focus, and depth of field: shaping sharpness and perspective
Lenses control sharpness, perspective, and background separation. A wide-angle lens captures broad scenes with more depth, while a telephoto lens compresses space and isolates subjects. Focus determines whether the intended detail is crisp from foreground to background. Depth of field—the range of acceptable sharpness—depends on aperture, focal length, and distance to subject. Beginners often start with a mid-range focal length and a moderate aperture to balance sharpness and depth. Practicing precise focusing, using magnified focus check and live-view peaking if available, reduces the risk of soft images.
The exposure triangle: aperture, shutter speed, and ISO explained
Aperture, shutter speed, and ISO form the core levers for exposure. Aperture controls how much light reaches the sensor and influences depth of field. Shutter speed determines how long the sensor collects light and affects motion blur. ISO sets the camera’s sensitivity to light; higher ISO increases brightness but adds noise. The trick is to find a balance that matches your scene: a bright landscape may use a small aperture, fast shutter, and low ISO; a dim indoor scene may require a wider aperture, slower shutter, and higher ISO. Practice with manual or semi-manual modes to internalize how these settings interact under varying lighting conditions.
Color, gamma, and white balance: ensuring true-to-life tones
White balance adjusts color temperature to prevent unnatural hues. Different light sources—sunlight, tungsten, fluorescent—cast distinct color biases. Setting white balance manually or choosing a preset helps keep whites neutral and colors accurate. Beyond white balance, gamma curves and tonal adjustments in post-processing influence contrast and midtone rendering. Beginners benefit from shooting in RAW to preserve color data and dynamic range, then applying controlled white balance in editing. The goal is to reproduce colors that resemble what you saw, without extra artificial shifts.
File formats and image quality: raw vs JPEG and compression effects
File format choice affects post-processing flexibility and storage. RAW files preserve maximum data, enabling extensive adjustments to exposure, color, and detail without degrading quality. JPEGs are smaller and ready-to-share, but compression reduces tonal range and may obscure subtle details. Beginners should start with RAW when possible to gain flexibility, and save JPEGs for quick sharing or previews. Understanding compression, bit depth, and color space (sRGB vs Adobe RGB) helps you manage color accuracy and future edits. Consistent white balance and a well-calibrated monitor also improve overall results.
Practical shooting workflows: planning, shooting, and review
A repeatable workflow helps you improve faster. Start with a quick plan: location, lighting, camera settings, and a rough composition. During the shoot, shoot a few frames at different exposures or focal lengths to compare results. Review images on a reliable display, checking histograms, sharpness, and color; adjust accordingly. When possible, shoot in RAW, bracket exposures for difficult lighting, and capture reference shots for later comparison. This iterative approach builds confidence and technique over time.
Troubleshooting common capture problems: how to fix on the fly
If images look flat, consider adjusting lighting, white balance, and exposure. If focus is soft, refine autofocus points, switch to manual focus, or use magnified live view. Noise and grain appear in low-light shots; raise ISO sparingly or add light sources. Banding and color shifts often come from under- or overexposure; review your histogram and adjust settings to push shadows and highlights within a safe range. Finally, camera shake can ruin sharpness; use a tripod or higher shutter speeds, especially for longer exposures. Consistent practice reduces these issues over time.
Tools & Materials
- Camera body(Any digital camera that supports RAW is ideal for learning.)
- Interchangeable or kit lens(Choose a versatile focal length to start; 18-55mm is common for beginners.)
- Memory card(At least 16GB; consider faster write speeds for RAW.)
- Extra battery(Helps prevent mid-shoot power loss.)
- Tripod(Useful for low light and long exposures.)
- Lens cloth(Keep optics clean for sharp images.)
- Remote shutter or intervalometer(Reduces camera shake during long exposures.)
- User guide/manual(Helpful for model-specific settings.)
Steps
Estimated time: 15-25 minutes
- 1
Prepare your scene
Power on the camera, wipe lenses, and frame your subject. Assess lighting and shadows to decide if you need supplemental light or reflectors. This step sets the stage for consistent results.
Tip: Check the light direction first; side lighting often yields more texture. - 2
Set a base exposure mode
Choose Manual or Semi-Auto (A/Av) to have predictable exposure. Start with a neutral baseline shutter and ISO that won’t introduce immediate noise, then adjust as needed.
Tip: Using a base shutter speed around 1/125s for typical subjects helps minimize motion blur. - 3
Meter the scene
Use the camera’s built-in meter or a handheld meter to evaluate brightness. Note whether highlights clip or shadows lack detail, and plan adjustments accordingly.
Tip: Refer to the histogram; avoid heavy clipping on the right or left edges. - 4
Adjust exposure triangle
Set aperture to control depth of field, pick a shutter speed that freezes motion, and tune ISO to achieve the target brightness. Avoid extremes unless necessary.
Tip: In dim light, prioritize shutter speed to avoid blur, then raise ISO as needed. - 5
Focus precisely
Choose autofocus points or switch to manual focus if needed. Magnify the view in live view to confirm critical sharpness on the subject.
Tip: For small subjects, use focus peaking if available. - 6
Compose and shoot
Frame using the rule of thirds or leading lines; shoot multiple frames with slight variations to compare later.
Tip: Include a couple of bracketing shots to review exposure options. - 7
Review and adjust
Review on a bright display; check exposure, white balance, and color. Adjust settings and re-shoot if necessary.
Tip: Use a quick look at the histogram to confirm balanced exposure. - 8
Post-process for refinement
Open RAW files in your preferred editor, fine-tune exposure, white balance, contrast, and color; export copies for different uses.
Tip: Save a master RAW and generate smaller JPEGs for sharing.
Common Questions
What is exposure in photography?
Exposure is the amount of light that reaches the camera sensor, determined by aperture, shutter speed, and ISO. Proper exposure reveals detail in shadows and highlights without clipping.
Exposure is the amount of light hitting the sensor, controlled by aperture, shutter speed, and ISO. It determines how bright or dark the image appears.
Should beginners shoot in RAW or JPEG?
RAW preserves maximum data for post-processing, while JPEG is compressed and ready-to-share. Beginners often start with RAW for flexibility and transition to JPEG for quick sharing.
RAW gives you more editing flexibility, while JPEG is faster to share. Start with RAW if your camera supports it.
Can I rely on auto mode for good results?
Auto mode is convenient, but it doesn’t always optimize for your scene. Learning to control exposure and focus yields consistently better results as you gain experience.
Auto mode is handy, but learning manual controls gives you better consistency and creativity.
What’s the best beginner setting to start with?
A good starting point is Manual or Aperture Priority with a moderate aperture (around f/5.6) and a shutter speed that freezes motion. Adjust ISO to maintain proper exposure without excessive noise.
Try starting with a middle aperture like f/5.6, then adjust shutter speed and ISO to keep exposure balanced.
How can I improve color accuracy in photos?
Shoot in RAW when possible, calibrate your monitor, and set proper white balance for the lighting. Editing with neutral target references helps maintain true-to-life tones.
Calibrate your monitor and use correct white balance; RAW helps you fix color later if needed.
Watch Video
The Essentials
- Master the exposure triangle to control brightness
- Light quality shapes mood and texture
- Practice precise focusing for sharp subjects
- Shoot RAW for best post-processing results
- Review histograms to validate exposure