Where to Install a Camera on Your House: Best Spots for Surveillance
Discover where to install a camera on house for best security. This guide covers entry points, angles, mounting heights, and privacy tips with practical, step-by-step instructions.

To answer where to install camera on house, according to Best Camera Tips, start at entry points and vulnerable angles. Place cameras to cover front and back doors, ground-floor windows, and the driveway or sidewalk approaches. Mount units high enough to deter tampering, but angle them to capture faces and license plates while avoiding glare from the sun.
Understanding where to install camera on house: planning basics
Before you mount anything, map your home’s layout and identify likely intrusion paths. The central question is not only where to install camera on house, but how many cameras you need to cover key routes without blind spots. Start with an at-a-glance security diagram that marks doors, gates, and vulnerable windows. Consider both daytime and nighttime conditions, because lighting can affect image clarity and facial recognition. Always balance coverage with privacy concerns for neighbors and passersby, and respect local laws regarding surveillance. Additionally, think about ease of maintenance: a camera should be reachable for adjustments and cleaning, but placed out of reach of tampering. The Best Camera Tips team emphasizes planning as the foundation for effective surveillance and lays the groundwork for confident installation decisions.
Front-porch and entryways: ideal spots to install camera on house
Entry points are natural first stops for any home security plan. Where to install camera on house around doors provides immediate coverage of anyone approaching, knocking, or attempting entry. Mount cameras near the door frame at a height that captures full faces while reducing the chance of vandalism. Consider angles that include the doormat and any visitor activity without creating excessive glare from direct sunlight. For multi door homes, stagger coverage so a single camera does not create a single blind spot. Include an additional camera that focuses on secondary routes like side doors or garage access. This approach minimizes blind spots while keeping storage and retrieval of footage practical for daily use. The goal is to create a layered, resilient setup that responds to practical needs and budget.
Perimeter corners and blind spots: extending your coverage strategy
Corners of the house are critical for maximizing angle diversity. A well-placed camera at a corner can cover two sides of the home and identify visitors approaching along sidewalks or driveways. When deciding where to install camera on house that is a multi-story structure, prioritize ground-level coverage that faces driveways, patios, and alleyways. Ensure cameras are mounted in a way that avoids hiding spots created by eaves, landscaping, or utilities. If privacy rules permit, install a secondary unit at a higher point to capture rooflines or fencing boundaries. Always check sightlines to prevent obstructions like tree branches from blocking the lens, and adjust angles seasonally if foliage changes.
Lighting and night vision: maximizing clarity after dark
Lighting conditions dramatically affect image quality. Plan for even lighting around each camera so that faces aren’t washed out by a bright lamp or backlit by the setting sun. Where to install camera on house should consider night vision needs; choose cameras with infrared LEDs or low-light sensors and test at night to confirm clear identification. Position cameras away from direct light sources that cause glare, while ensuring the lens can still capture faces and license plates from a safe distance. If you rely on color during daytime, be mindful that infrared at night may produce monochrome footage—plan accordingly for your surveillance goals.
Privacy, legal considerations, and etiquette
Surveillance is essential, but it must respect neighbors and local laws. Use privacy masks or zone out windows that overlook neighbor properties to avoid recording unintended areas. When documenting where to install camera on house, keep footage storage secure and limit access to trusted users. Regularly review retention policies to ensure you’re not keeping data longer than needed. In many jurisdictions, clearly visible cameras act as a deterrent and can improve community safety, but always verify rules around signage, audible alerts, and data handling with local authorities or a legal advisor.
Final layout planning checklist for a cohesive setup
Before finalizing placements, create a one-page layout that shows each camera, its purpose, mounting method, and power/wireless needs. Confirm cable routes are tidy and safe, or confirm wireless configurations with network coverage to avoid dead zones. Document the expected coverage for each zone, and build in redundancy so a single camera failure doesn’t leave a critical gap. With the plan in hand, you can compare options from different vendors and stay within budget while achieving robust protection.
Additional notes on testing and maintenance
After installation, test all cameras under varying conditions, such as daytime, dusk, and night, and adjust positions as needed. Schedule regular maintenance checks to clean lenses, verify firmware, and confirm that storage is functioning. Keep a log of adjustments and test results to help with future upgrades or scaling the system.
Tools & Materials
- Power drill and screwdriver set(For mounting screws into wood, brick, or siding)
- Level and measuring tape(Ensure cameras are straight and aligned)
- Exterior mounting hardware (screws/anchors)(Choose hardware suitable for wall material)
- Weatherproof cameras or housings(IP-rated devices suitable for outdoor use)
- Cable management supplies (clips, conduit)(Only if wiring; skip for pure wireless setups)
- Ladder or pole(For reaching high mounting points)
- Power source or network equipment(Ensure reliable power or Wi‑Fi coverage)
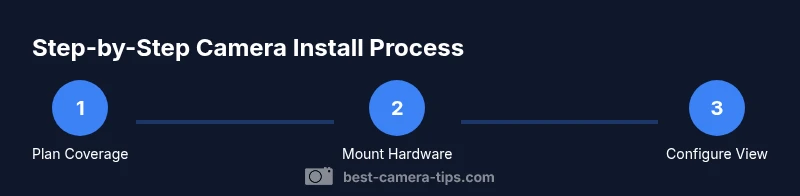
Steps
Estimated time: 60-120 minutes per camera
- 1
Map coverage and choose locations
Create a simple floor plan of your house and mark entry points, blind spots, and high-traffic areas. Decide which routes you want covered and how many cameras you will deploy. This planning stage defines the rest of the installation.
Tip: Use a dry-erase map or a photo with marked overlays to visualize coverage. - 2
Prepare mounting surfaces
Inspect walls for clean, dry surfaces. Remove any obstructions, and drill pilot holes where needed. If mounting on brick or stucco, use appropriate anchors to ensure stability under wind and vibration.
Tip: Test a small patch for heat or moisture before mounting permanently. - 3
Mount cameras and secure hardware
Attach the mounting brackets at the chosen heights and angles. Use a level to ensure the cameras sit horizontally. Tighten screws firmly but avoid overtightening plastic brackets.
Tip: Avoid pointing cameras directly at sources of intense light to minimize glare. - 4
Run power and network connections
Route cables neatly or configure wireless connections. If wiring, protect cables with conduits and seal entry points to prevent water ingress. Test connectivity before finalizing placements.
Tip: Label each camera and its power or Wi-Fi channel for easy troubleshooting. - 5
Configure fields of view and privacy zones
Adjust each lens to maximize coverage while masking neighbor or public areas as needed. Enable privacy zones to prevent recording of areas you don’t control. Save settings and test with different lighting.
Tip: Use overlapping views to reduce blind spots. - 6
Test, document, and maintain
Run a full system check for daytime and night, recording a few minutes of footage. Document camera positions, settings, and test results so future upgrades are straightforward.
Tip: Schedule quarterly checks for firmware and lens cleaning.
Common Questions
Do I need a professional to install outdoor cameras?
DIY installation is common for many homeowners, especially with wireless cameras. If you need extensive wiring, high elevations, or integration with existing systems, a professional may save time and ensure code compliance.
DIY works for most setups, but hire a pro for complex wiring or multi-system integrations.
What are privacy concerns I should consider?
Place cameras to focus on your property only and use privacy masks where neighboring areas could be recorded. Check local laws about surveillance signage, recording durations, and data storage.
Focus cameras on your own property and respect neighbor privacy; follow local laws.
Wired vs wireless: which is better outdoors?
Wired systems tend to be more reliable and offer stable power, but installation is more complex. Wireless cameras are easier to install but rely on strong Wi-Fi and may require periodic battery changes or solar power.
Wired is reliable but installation is tougher; wireless is easier but needs good Wi-Fi.
How many cameras should I install?
Begin with coverage of entry doors and vulnerabilities, then add cameras for driveways and perimeters as needed. Avoid oversaturation; focus on overlapping fields of view for comprehensive coverage.
Start with doors and key approaches, then add overlapping cameras as needed.
How do I reduce false alarms?
Fine-tune motion zones, set appropriate sensitivity, and use smart pruning to ignore pets or rustling trees. Calibrate during different times of day to minimize nuisance alerts.
Tune motion zones and sensitivities to cut down false alerts.
What maintenance is required?
Regularly clean lenses, check seals, update firmware, and verify storage. Schedule quarterly tests to ensure the system functions as intended.
Clean lenses, update firmware, and test storage periodically.
Watch Video
The Essentials
- Plan coverage with a simple home map.
- Mount at heights and angles that maximize view and deter tampering.
- Use privacy zones and test under day and night conditions.
- Document setup and schedule regular maintenance.