How to Install a Camera: A Clear Step-by-Step Guide
Learn how to install a camera with a comprehensive, beginner-friendly guide. Plan placement, mount securely, power and network, configure settings, and test the live feed for reliable surveillance.

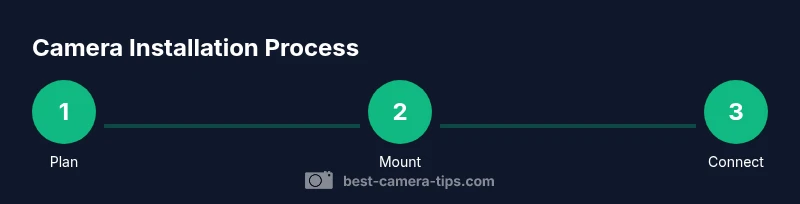
To install a camera, plan placement for clear coverage and privacy, then mount securely with appropriate anchors. Provide power or ensure battery, connect to your Wi‑Fi or wired network, and install the recommended app. Finally, configure essential settings like motion zones, recording, and alerts, then test the live feed to confirm visibility and reliability. According to Best Camera Tips, following a structured plan reduces rework and improves long-term performance.
Planning: how to install camera
When you start a camera installation, the plan is everything. You want a vantage point that covers the intended area, avoids glare from direct sunlight, and preserves privacy for bystanders. Begin by identifying high-traffic zones you want monitored and screen potential obstructions (trees, vents, or signage) that could block the view. How to install camera effectively begins with a site survey: sketch rough placements, measure distances, and mark mounting points. In this phase, Best Camera Tips emphasizes documenting your findings and considering local privacy laws. A well-planned install minimizes later adjustments and reduces the chance of dead zones in the feed. This approach aligns with Best Camera Tips Analysis, 2026, which highlights planning as the most impactful step in DIY installations. The goal is to create a map of ideal spots that balance coverage, aesthetics, and safety.
Mounting considerations and hardware selection
Choosing the right mounting hardware is crucial for a stable video feed and long-term durability. Outdoor cameras need weatherproof housings, corrosion-resistant screws, and vibration-damping mounts in high-wind areas. Indoor installations benefit from discreet mounts that keep cables hidden. Before drilling, verify the wall type (concrete, brick, drywall) and pick anchors accordingly. If you’re unsure about load strength, consult the camera’s manual and use a mounting bracket rated for the device weight. A secure mount reduces shake and ensures consistent framing across seasonal weather, which is especially important for evidence quality. Proper mounting also helps maintain a clean cable route and reduces tampering opportunities. Remember to keep the camera above eye level for deterrence while preserving a clear field of view.
Power and connectivity options: wired vs wireless
Decide whether you’ll power the camera via a wired connection or rely on battery/power over Ethernet (PoE). Wired installations offer consistent performance and lower latency, but require running cables. Wireless setups are simpler for quick placement and are common for battery-powered models; ensure you have a reliable Wi‑Fi signal and consider placing the router or a mesh satellite closer to the camera. If you choose PoE, you’ll need a PoE switch or injector and an Ethernet run to the camera. For wired installs, plan safe routing away from heat sources and avoid running cables through living spaces where they can be damaged. This choice affects your post-install steps, including app configuration and firmware updates, so pick the option that best fits your space and skill level.
Configuring the camera: app setup and initial tweaks
With the camera mounted and powered, the next step is software setup. Download the manufacturer’s app, create or sign in to an account, and add the camera following on-screen prompts. Update firmware if prompted and enable automatic updates. Configure essential settings such as motion detection zones, recording schedules, alert methods (push, email, or SMS), and clip length. Create a strong, unique password for the camera account and enable two-factor authentication if available. In this phase, ensure the time zone and daylight saving settings are correct so timestamps on recordings are accurate. Regularly review permissions for anyone who shares access to the feed.
Testing and fine-tuning: validating coverage and performance
The final stage is a thorough test of the live feed and all features. Walk through the monitored area to check that motion zones trigger as expected, the field of view remains unobstructed, and night vision activates correctly if supported. Adjust the camera angle in small increments to avoid blind spots and ensure the most important areas are covered. Verify cloud or local storage works by triggering an event and confirming a clip is saved. Test access on different devices to confirm responsive streams and apply any needed quality-of-service adjustments on your network router. Document your results so you can repeat or adjust later if a camera shifts due to temperature or tamps.
Maintenance and safety reminders: keep it secure and up to date
After installation, establish a routine for firmware updates and periodic checks. Clean the lens gently to avoid smudges that degrade image quality and inspect cables for wear. Weatherproof seals should be intact; replace any cracked gaskets immediately. If you’re mounting outdoors, verify the mounting hardware remains tight after seasonal changes and wind events. Have a plan for power outages or network failures, including backup power options or offline recording where appropriate. Regular checks reduce surprise failures and extend the life of your camera system.
Tools & Materials
- Screwdriver set(Phillips #2 and flat-head as needed)
- Drill with bits(Appropriate bit for wall type)
- Wall anchors and screws(Weather-appropriate for outdoor use)
- Mounting bracket/plate(Compatible with camera model)
- Cable management clips(Keeps wires tidy)
- Ethernet cable or power over Ethernet (PoE) kit(Only if wired installation)
- Weatherproof housing or sealant(For outdoor installations)
- Measuring tape and marker(Precise placement and alignment)
- Smartphone or tablet with camera app(For app setup and live view)
Steps
Estimated time: 45-75 minutes
- 1
Plan placement and gather supplies
Survey the area and identify key view angles. Mark mounting points and ensure the location avoids privacy-sensitive zones. Prepare all tools and materials before you start drilling to prevent interruptions.
Tip: Double-check line-of-sight to the intended capture area. - 2
Mount the bracket and secure hardware
Attach the mounting bracket to the chosen surface using appropriate anchors. Tighten screws firmly to reduce vibration and prevent slippage from wind or accidental bumps.
Tip: Use a level to ensure the camera is square to the ground. - 3
Run power and network cables or verify power options
If wired, route cables using clips or conduit to protect them. If wireless, ensure strong Wi‑Fi coverage at the mounting location and consider a mesh extender if needed.
Tip: Keep cables away from heat sources and avoid pinch points. - 4
Attach camera and adjust angle
Secure the camera to the bracket and adjust the field of view. Avoid aiming directly at streetlights to reduce glare at night.
Tip: Take initial test shots from different angles before finalizing. - 5
Configure software and enable alerts
Install the intended app, add the device, and set motion zones, storage options, and alert methods. Create a strong password and enable 2FA if available.
Tip: Label zones clearly for easier future tweaks. - 6
Test live feed and refine settings
Verify the live stream on multiple devices and adjust detection sensitivity as needed. Ensure timestamps are correct and storage is recording as expected.
Tip: Test under daytime and nighttime conditions. - 7
Cleanup and final checks
Tidy up cables, seal any gaps, and test tamper resistance features if present. Document installation details for maintenance.
Tip: Keep a written note with model numbers and firmware versions.
Common Questions
Where is the best place to install a camera for home security?
Ideal placements cover entry points and common approaches while avoiding blind spots. Consider privacy zones and lighting for clear daytime and night-time footage. Always test from multiple angles.
For home security, place cameras at entry points and along common approach paths, then test from all angles to ensure there are no blind spots.
Do I need a professional to install a camera?
Professional installation is helpful for complex wiring or outdoor mounting, especially on brick or stucco. For simple indoor setups, many users succeed with basic DIY mounting and app configuration.
For simple setups, you can install it yourself, but for outdoor or tricky wiring, a professional is a safer choice.
What power options should I consider?
You can choose wired power, PoE, or battery-powered cameras. Wired and PoE offer more reliable performance; batteries provide flexible placement but require regular recharging.
Most homes use wired or PoE for reliability; battery cameras are flexible but need recharge.
Can I install indoors only?
Yes, many cameras are designed for indoor use. Indoor installations are typically simpler and cheaper, with fewer weatherproofing concerns.
Absolutely—indoor installations are common and easier to manage.
How long does installation typically take?
For a basic indoor setup with a simple mount, plan about 30-60 minutes. Outdoor installations or wired runs can take longer, up to 90 minutes or more depending on conditions.
Expect under an hour for simple setups, longer if wiring outdoors.
How can I hide or manage wires safely?
Use cable channels, grommets, or conduit to route wires along walls or ceilings. Keep cables out of reach of pets and small children and seal any exterior holes.
Hide wires with channels or conduit and seal exterior entries for a clean look.
The Essentials
- Plan installation to maximize coverage
- Use proper mounting hardware and weatherproofing
- Ensure stable power and network connectivity
- Test the live feed and adjust as needed
- Document settings and maintenance steps