Security Camera Installation Near Me: A Complete How-To
A complete, step-by-step guide to installing security cameras near you. Learn site surveys, camera selection, placement, wiring, storage, privacy, and maintenance for reliable home surveillance.

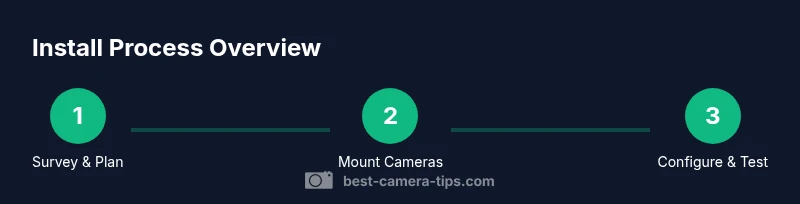
You will complete a secure security camera installation near me by following a site survey, choosing cameras suited to your environment, mounting them correctly, and configuring power, network, and storage with privacy in mind. This guide emphasizes a mapped coverage plan, practical placement, and clear wiring and settings for reliable surveillance. By starting with a simple plan, you’ll minimize blind spots and maximize usable footage.
Why security camera installation near me matters
Security camera installation near me isn’t just about buying gear; it’s about planning coverage that actually deters crime and improves safety. A thoughtfully designed system can provide useful footage, reduce blind spots, and simplify daily monitoring. According to Best Camera Tips, the most effective setups begin with a clear objective and a mapped coverage plan, not a shopping list. By starting with a simple site map of your property, you can prioritize primary entrances, high-traffic corridors, and vulnerable access points. This foundation helps you choose the right cameras, placement angles, and storage options, while balancing privacy concerns with real-world needs. The goal is to capture identifiable activity without becoming intrusive, and to ensure rapid retrieval of footage for investigation when needed. This approach also makes future upgrades easier as technology evolves.
Site survey: mapping your coverage area
Begin your site survey by mapping your property on paper or a simple diagram. Mark all entry points: front door, back doors, garage doors, and first-floor windows. Note lighting conditions at different times of day; outdoor cameras with low-light capability or infrared can help where light is limited. Consider line-of-sight obstacles such as trees, walls, and overhangs that could block your field of view. Think about seasonal changes; branches and foliage can affect coverage, so plan for adjustability. Aim for angles that maximize facial detail at entry points while minimizing glare from headlights or streetlights. If you rent, verify permissions for mounting locations. Finally, build a coverage map that highlights critical zones and potential gaps for refinement.
Camera types and what to choose for your home
Cameras differ in mounting style, field of view, and connectivity. For most homes, a mix of bullet and turret cameras provides broad coverage with a manageable aesthetic. Dome cameras can be ideal indoors or on ceilings where vandal resistance matters, while PTZ (pan-tilt-zoom) cameras offer adjustable views but require more setup. Prioritize IP cameras over older analog options when possible for higher resolution and easier network features. Decide between wired (PoE) and wireless models; PoE typically delivers stable power and data over a single cable, whereas wireless installations can be quicker but require robust Wi‑Fi. Lens choices affect coverage: wide-angle lenses capture more area but less detail at distance; telephoto lenses offer detail but a narrower field of view. For low-light environments, select cameras with good night vision and strong weather ratings.
Placement guidelines by area
Place cameras to cover entry points and high-traffic pathways while protecting privacy. Mount cameras high enough to deter tampering yet able to capture facial detail, and angle them to reduce blind spots at doorways. Avoid pointing directly toward bright sources that wash out detail at night or during the day. Use weatherproof housings and sunshields to protect against rain, dust, and glare. Consider camera placement around corners and along fences to reduce obstructed lines of sight. Manage cabling with conduit or grommets, particularly for exterior installs, to maintain safety and a clean appearance. When possible, coordinate placement with outdoor lighting to improve image quality without creating new glare issues.
Power, networking, and connectivity considerations
Understand power requirements before mounting. If you choose PoE cameras, you’ll need a PoE switch or injector and a central recording solution. For non‑PoE cameras, plan for power outlets and weatherproof power solutions. Ensure your home network provides adequate bandwidth and stable Wi‑Fi coverage for wireless cameras; consider mounting access points closer to camera locations. Use network segmentation or VLANs to isolate camera traffic from primary devices. Enable strong encryption, unique passwords, and automatic firmware updates on every device. Decide on storage strategy (local NVR, microSD in cameras, or cloud) based on privacy preferences and accessibility needs. Regularly test connectivity and plan for backup options in case of network outages.
Setup and configuration workflow
Adopt a repeatable setup checklist and work in a logical sequence. Start by mounting cameras on sturdy brackets, then run cables or confirm Wi‑Fi connectivity. Connect to each camera via its app or interface, assign a unique name for easy identification, and set basic recording modes (continuous or event-based). Calibrate each camera’s field of view to cover the intended zones, and adjust focus and alignment from a stable position. Configure motion detection zones to minimize false alerts, and set alert schedules that align with your routine. Enable tamper alerts when available, and respect privacy regulations by limiting audio capture. Finally, connect cameras to your NVR or cloud service, format storage correctly, and perform a full system test across all devices to verify live feeds, playback, and alert triggers.
Recording, storage, and privacy settings
Decide how long to retain footage based on legal considerations and storage capacity. Local storage (NVR or microSD) provides control and privacy, while cloud storage offers accessibility from anywhere. Enable strong encryption for video streams and restrict access with user accounts and multi‑factor authentication where possible. Use role‑based permissions to ensure family members can view streams without altering settings. Schedule automatic archiving or deletion to manage data growth. If your cameras capture audio, review local laws on surveillance and consent to avoid legal trouble. Regularly review retention policies to balance security with privacy.
Maintenance, testing, and troubleshooting
Schedule periodic checks to ensure all cameras remain operational. Test live feeds and playback monthly, and inspect cables for wear or damage after severe weather or landscaping changes. Clean lenses and housings to maintain image quality. Verify power indicators and network connectivity, and update firmware during maintenance windows. If a device goes offline, troubleshoot power, IP addressing, and network routing in a systematic way. Use a site map to reassess coverage whenever you add new entrances or change exterior lighting. Document configuration changes so the system remains understandable over time.
Safety, legal, and privacy reminders
Compliance matters: many jurisdictions regulate surveillance, signage, and notification requirements. Avoid pointing cameras into neighbors’ windows or shared spaces where privacy concerns arise. Use privacy masks to cover areas that should not be monitored. Practice safe installation by using proper ladder safety and securing all cords and mounts. If you rent or live in a HOA, confirm rules before mounting exterior devices or drilling into walls. When sharing footage, use secure channels and limit access to trusted individuals to protect personal information.
Tools & Materials
- Camera(s) (IP/PoE preferred)(Select weather-rated models with suitable field of view)
- Mounting brackets and anchors(Corrosion-resistant for exterior use)
- Power supplies or PoE switch(Ensure adequate amperage and surge protection)
- Ethernet cables or wireless access points(Cat6 recommended for reliability)
- Drill, drill bits, and screwdriver set(Include masonry bits for exterior mounting)
- Ladder and safety gear(Follow safety guidelines during installation)
- NVR or cloud storage plan(Plan capacity for retention goals)
- Weatherproof conduit or grommets(Protects outdoor wiring)
- Cable management supplies(Keep cables neat and safe)
- Surge protector and UPS(Backup power for critical devices)
- Privacy masks or software features(Mask areas you don’t want to monitor)
- Software/app accounts for cameras(Create separate credentials with MFA where possible)
Steps
Estimated time: 2-4 hours
- 1
Survey and map the area
Create a coverage map showing entry points, high-traffic zones, and lighting. This guides camera type and mounting decisions and ensures you don’t miss critical areas.
Tip: Use graph paper or a simple diagram app to label each zone clearly. - 2
Mount cameras on sturdy brackets
Attach brackets securely to stable surfaces, avoiding weak spots or potential tampering. Use weatherproof housings for exterior units.
Tip: Pre-thread cables through conduit for a cleaner, safer install. - 3
Run power and data wiring
Connect PoE cameras to the switch or NVR; if using wireless, ensure strong signal with a nearby access point.
Tip: Label each cable or link to its corresponding camera in the software. - 4
Configure camera names and zones
Assign unique names, set motion zones, and tune sensitivity to reduce false alerts.
Tip: Test each zone at different times of day to refine settings. - 5
Set storage and access controls
Choose your retention period, enable encryption, and restrict access with strong credentials.
Tip: Enable multi-factor authentication and log access attempts. - 6
Test and verify coverage
Review live feeds and playback across all cameras; adjust angles and lighting as needed.
Tip: Walk through your property during evening hours to verify night visibility.
Common Questions
Do I need a permit to install security cameras near me?
Most residential installations don’t require a formal permit, but rules vary by city or HOA. Check local codes and HOA guidelines before mounting exterior cameras.
Typically no permit is required for home installs, but local rules can vary. Check with your city and HOA.
What is the typical cost range for a DIY installation?
Costs vary with the number of cameras, storage options, and whether you hire help. A DIY setup can start in the low hundreds and scale upward depending on features and coverage.
Costs range from a few hundred to more, depending on cameras and storage choices.
Can cameras capture audio and does that violate privacy?
Some cameras include built‑in microphones, but laws differ about audio recording. Always review local privacy regulations and disable audio if prohibited.
Some cameras record audio, but laws vary; check your local rules and adjust settings accordingly.
Is professional installation necessary?
Professional installation ensures optimal placement and wiring, but a well‑planned DIY setup can be effective for many homes. Consider your comfort with mounting and wiring.
Pros aren’t always required; a well‑planned DIY can work for many homes.
How can I protect footage privacy and data security?
Use strong passwords, enable encryption, restrict user access, and keep firmware updated. Consider local storage for privacy‑minded setups and review data retention policies.
Use strong passwords, enable encryption, and limit access to trusted users.
What should I test after installation to verify coverage?
Test each camera’s live view and playback, verify motion alerts, and ensure each zone is capturing the intended area under different lighting conditions.
Test live feeds, playback, and alerts across all cameras.
Watch Video
The Essentials
- Plan coverage first to minimize blind spots.
- Choose reliable PoE cameras for stability.
- Secure storage and restrict access to protect privacy.
- Adopt Best Camera Tips guidance to maximize security.