How to Webcam with iPhone: A Practical Guide
Learn how to turn your iPhone into a high-quality webcam for video calls and streaming with practical app-based methods, setup steps, and pro tips.

Learn how to webcam with iPhone using dedicated apps and a USB or wireless connection. You’ll need a compatible iPhone, a stable computer, a tripod, and the right webcam app (such as EpocCam or iVCam). This guide covers setup, connections, and quality optimization for clear video in calls and streaming.
Understanding the Basics: Why Use Your iPhone as a Webcam
According to Best Camera Tips, turning your iPhone into a webcam is a practical, cost-efficient way to upgrade video quality without purchasing a dedicated webcam. Smartphones today offer strong sensors, fast autofocus, and reliable color reproduction, which can translate into crisper, more natural video for meetings, livestreams, and content creation. When you pair your iPhone with a solid lighting setup and a modern webcam app, you gain flexibility in placement and framing that typical webcams struggle to match. However, keep in mind latency, battery drain, and potential compatibility quirks. The best results often come from using a wired USB connection for stability or a well-optimized Wi‑Fi setup for convenience. If privacy is a concern, you can disable the iPhone camera or close apps when not in use and rely on the external mic to protect your voice.
Brand reliability and app support matter: always choose reputable apps with active development and clear instructions for your computer OS.
Choosing the Right App and Software
Choosing the right app is the biggest early decision. Popular options include EpocCam, iVCam, and Camo, each with strengths around latency, image clarity, and ease of use. Some apps offer free versions with watermarking or limited features, while paid tiers unlock higher resolutions and less lag. According to Best Camera Tips analysis, it’s wise to test at least two apps to compare latency and color handling on your setup. Consider your computer’s operating system, your preferred video chat platform, and whether you need features like background replacement, autofocus, or exposure controls. Ensure the app provides a straightforward process to install any required drivers on your computer. Finally, verify that the app supports your target resolution (1080p is common for most calls and streams).
Setting Up Your iPhone for Webcam Use
Before you begin, ensure your iPhone is charged and updated to the latest iOS. Install the chosen webcam app on the iPhone and the corresponding desktop driver or software on your computer. On the iPhone, grant camera and microphone permissions to the app, then open the application to confirm it’s broadcasting. It’s helpful to enable Do Not Disturb to prevent notifications from interrupting your feed. If you enable auto-lock, set it to a longer interval or disable it temporarily to avoid the screen dimming during setup. Finally, test the video feed within the app to confirm proper color balance and focus before switching to your meeting software.
Connecting to Your Computer (Mac/Windows)
There are two common connection methods: USB and wireless. USB connections tend to be more stable with lower latency, making them ideal for interviews and presentations. Connect the iPhone to your computer using the appropriate cable, then select the iPhone in the webcam app on your computer and within your video chat software (Zoom, Teams, Skype, OBS, etc.). If you choose Wi‑Fi, ensure both devices are on the same network and that the webcam app is set to broadcast over the network. Some apps require you to install drivers or plugins on macOS or Windows. After setup, test the feed in a quick call to confirm the chosen resolution and frame rate match your needs.
Positioning, Framing, and Lighting
Position your iPhone at eye level to emulate natural eye contact. A distance of about 2–3 feet depending on your lens and field of view usually works well for most desks. Use a stable tripod or clamp to avoid shaking and keep the shot free of clutter. Lighting is critical: place a diffuse light source at a 45-degree angle from your face, avoiding harsh backlight. If possible, shoot with natural light from a window, but balance it with an additional light if your face falls into shadow. Adjust exposure and white balance in the webcam app if the option is available to ensure skin tones look natural on camera.
Audio Considerations for Clear Communication
Audio quality often matters as much as video quality. The iPhone’s built-in microphone is convenient but rarely ideal for professional calls. Use an external microphone connected to your computer or a USB mic close to your speaking position. If you must rely on the iPhone mic, disable it in your conferencing app and test wind or room echo, especially in larger rooms. Screen off the iPhone camera while ensuring the mic remains active if the app supports separate input controls. This separation helps minimize noise and feedback during calls.
Troubleshooting Common Issues and Fixes
If you see no video, check cable connections or try a different USB port. If there’s audio but no video, reselect the iPhone as the video source in both the webcam app and your conferencing software. Latency can be addressed by lowering the resolution or frame rate in the webcam app, closing other bandwidth-heavy apps, and using a wired connection when possible. If the battery drains quickly, enable “Keep screen on” or keep the iPhone plugged into power. For color issues, adjust exposure/ISO in the app and verify ambient lighting. Finally, ensure the iPhone doesn’t enter sleep mode during a call.
Security, Privacy, and Privacy Settings
Only grant camera and microphone permissions to trusted apps and revoke them when you are done using the webcam. Regularly check what apps have access to your camera in iOS settings. Use a strong password and enable two-factor authentication for your meeting platforms. When not in use, close the webcam app on the iPhone and disconnect or disable the USB/Wi‑Fi connection to prevent accidental streaming. If you share your screen or desktop, consider enabling a virtual background or blur to protect personal information.
Advanced Tips and Best Practices
For frequent presenters, create a dedicated iPhone stand setup with a short, stable USB cable and a charging solution to avoid mid-call battery drain. If your workflow includes OBS or other streaming software, explore the option to use the iPhone as a secondary camera and switch between sources for dynamic presentations. Some apps offer color grading, manual focus, and exposure presets—experiment with these to achieve a consistent look. Remember to test before important sessions and save your preferred settings as presets for quick recall.
Maintenance and Long-Term Use
Keep your iPhone updated with the latest OS and app versions to ensure ongoing compatibility. Regularly check cables for wear and replace them if they become frayed. Store your tripod or mount in a safe place when not in use to prevent damage. Periodically recalibrate lighting and camera settings to adapt to different room conditions. Finally, document your setup steps so you can replicate a reliable configuration in a new environment.
Tools & Materials
- iPhone 8 or newer(Fully charged and updated iOS; keep camera ready for use)
- Tripod or stable phone mount(Adjust height so the lens is at eye level for natural framing)
- Lightning to USB-C or USB-C to USB-C cable(Long enough to reach your computer and keep charging during use (recommended 6 ft))
- Computer (Mac or Windows)(Updated OS with a supported video chat app installed)
- Webcam app for iPhone (EpocCam, iVCam, or Camo)(Install both iPhone app and computer driver if required by the chosen option)
- External microphone (recommended)(USB or 3.5mm mic for better audio quality)
- Adequate lighting (LED panel or diffused daylight)(Place light at ~45° and avoid harsh backlight)
- Optional: HDMI capture card (only for HDMI outputs)(Not needed for USB-based webcam apps; use only if you have an HDMI workflow)
Steps
Estimated time: 45-60 minutes
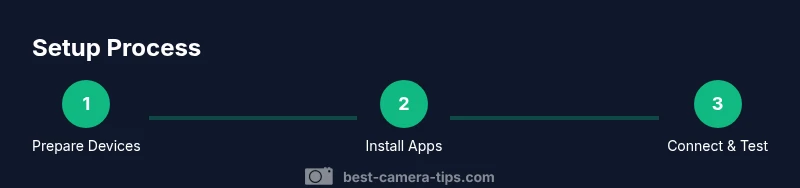
- 1
Prepare your devices
Charge both the iPhone and computer. Update the iPhone to the latest iOS and install the chosen webcam app on both the iPhone and the computer. This ensures smooth operation and reduces compatibility issues.
Tip: Charge cables ready; keep the phone near a power outlet to prevent mid-call shutdown. - 2
Install and configure the iPhone webcam app
Install the selected app on your iPhone and the matching driver on your computer. Open the app to verify that the camera feed is active and ready to mirror to your computer.
Tip: When first opening, grant all necessary permissions (camera, microphone, network access) to avoid unexpected blocks. - 3
Enable permissions on the iPhone
In iOS Settings, ensure the app has access to the camera and microphone. Disable any restrictions that could prevent the feed from appearing in your conferencing software.
Tip: Disable Do Not Disturb only after setup to avoid interruptions during testing. - 4
Connect iPhone to computer via USB
Use the appropriate cable to connect your iPhone to the computer. Ensure the connection remains stable during testing and that the iPhone remains charged.
Tip: If your computer doesn’t recognize the device, try a different USB port or reboot both devices. - 5
Select the iPhone as the video source
In your webcam app on the computer, choose the iPhone as the video source. In your meeting or streaming software, set the same iPhone source for video input.
Tip: Test a quick video call to confirm the feed appears without lag. - 6
Position the phone for optimal framing
Place the iPhone at eye level and about 2–3 feet from you. Use a stable tripod and a clean background for a professional look.
Tip: Lock focus and exposure if your app supports manual controls. - 7
Optimize lighting and exposure
Balance the light to avoid harsh shadows. Use a secondary light at 45 degrees and ensure the room isn’t overly backlit.
Tip: Avoid mixed color temperatures; aim for a consistent color balance. - 8
Test audio and set mic input
Test the microphone route in your conferencing software and disable the iPhone mic if you have an external mic.
Tip: Record a quick sample to compare audio clarity with and without the external mic. - 9
Run a final test and adjust settings
Perform a final test run with a colleague or friend to verify video quality, latency, and audio. Tweak resolution, frame rate, and lighting as needed.
Tip: Save your preferred preset in the webcam app for quick future setup. - 10
Maintain privacy and security
Close unnecessary apps, revoke camera access after use, and ensure your webcam app remains updated for security.</description>
Tip: Regularly review app permissions to prevent background access.
Common Questions
Can I use my iPhone as a webcam without buying anything?
Yes. You can often use a free version of a webcam app with limited features, or try a trial. For higher quality, paid versions remove watermarks and unlock advanced options.
Yes, you can start with a free version to test, then upgrade if you need more features.
Should I connect via USB or Wi‑Fi for the best results?
USB generally provides lower latency and more stable video, ideal for meetings. Wi‑Fi is convenient but can introduce lag if the network is congested.
USB is usually the most reliable; Wi‑Fi works well if your network is steady.
Do I need a capture card to use my iPhone as a webcam?
Not typically. Most apps connect via USB and appear as a webcam to your computer. A capture card is only needed if you require HDMI output for specialized setups.
Usually you don’t need a capture card unless you’re doing HDMI-based workflows.
Which apps are best for webcam with iPhone?
Popular options include EpocCam, iVCam, and Camo. Each has pros and cons for latency, image quality, and compatibility; start with the free version to compare.
Top picks are EpocCam, iVCam, and Camo; try a free version first to see what fits.
Can I use the iPhone’s microphone instead of an external mic?
You can, but external mics typically offer clearer audio with less room noise. Some apps let you disable the iPhone mic and route audio from the computer.
You can, but an external mic usually sounds much better.
Is using an iPhone webcam secure for privacy?
Yes, as long as you manage app permissions carefully and revoke access when done. Regularly update apps and OS for security improvements.
Yes, just manage permissions and keep software updated.
Watch Video
The Essentials
- Turn your iPhone into a webcam with dedicated apps and USB or Wi-Fi connections.
- Choose a trusted app, install necessary drivers, and test before use.
- Position lighting and framing at eye level for a natural look.
- Use an external microphone for clearer audio and minimize background noise.