How to Use Phone Camera as Webcam in 2026
Turn your smartphone into a high-quality webcam for video calls and streaming. This educational 2026 guide covers wired and wireless setups, app options, troubleshooting, and best practices for sharp video.

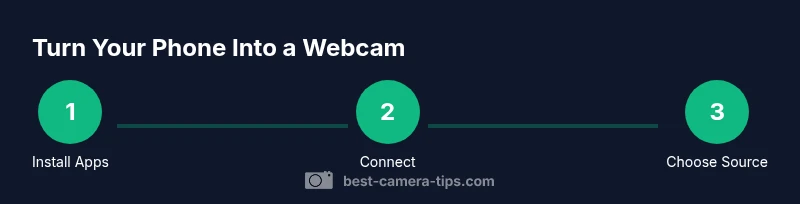
To use your phone camera as a webcam, install a compatible bridging app on both your phone and computer, then connect via USB or Wi‑Fi. Important requirements: a smartphone, a computer, a stable connection, and a USB cable or reliable network. Quick steps: 1) install the apps, 2) connect devices, 3) choose the phone as the webcam in your video app, and 4) run a test and adjust lighting.
Why turning a phone into a webcam can boost your video quality
According to Best Camera Tips, using your phone camera as a webcam often yields crisper detail, better low-light performance, and more flexible framing than entry-level built‑in webcams. Modern phones pack brighter sensors and advanced processing that shine during video calls and live streams. However, the setup isn’t automatic; you’ll need a bridging app, a stable connection, and a few quality‑enhancing habits. This guide outlines practical, broadly compatible steps to get reliable results in 2026, whether you’re conferencing from home or streaming from a laptop. You’ll also learn what to avoid to prevent dropped frames, lag, or unstable feeds.
Key takeaway: a careful setup yields dramatically improved image quality without buying new hardware.
Compatibility and recommended apps
There isn’t a one‑size‑fits‑all solution for every phone or computer. Most bridging apps support both Android and iOS, but you’ll want to verify compatibility with your operating system and chosen video software (Zoom, Meet, Teams, OBS, etc.). For best results, pick a bridge that offers both USB and wireless modes so you can switch depending on your network conditions. On the phone side, ensure you have the latest OS updates and battery optimization settings disabled for the camera app. On the computer side, keep your conferencing app up to date and close unnecessary background programs that could compete for CPU or bandwidth.
Wired vs wireless: pros and cons
Wired USB connections tend to offer lower latency and more stable video. They’re less prone to interference and don’t depend on wireless network quality, which is especially helpful if you’re in a busy home network. Wireless connections offer greater mobility and fewer cables, but can introduce latency, frame drops, or periodic reconnects. If you’re streaming or presenting slides, a wired setup is usually more reliable. If you’re moving around or have a crowded desk, wireless can be convenient, provided your network is strong and stable.
What you’ll need to get started
A successful conversion requires a few essentials: a smartphone (iOS or Android), a computer (Windows or macOS), a USB cable or reliable Wi‑Fi, a phone stand or tripod to steady the shot, and a compatible phone‑to‑webcam app paired with a desktop companion app. Optional upgrades include better lighting, an external microphone for clearer audio, and a small ring light or diffuser to improve exposure. Before you begin, make sure your devices are charged, your apps are updated, and you have a quiet, well‑lit space for best results.
Lighting, framing, and audio tips
Lighting is the most impactful factor after camera quality. Position the phone so the light source faces you, avoiding harsh backlight. Use a soft, diffuse light and aim for even illumination across your face. Frame yourself with head and shoulders visible, leaving space above for a natural look. Audio matters too—if your phone’s mic isn’t ideal, pair with a compact external microphone connected to your computer or use a desktop mic to reduce echo. Finally, consider a stable mount to prevent shakes and keep the camera angle flattering.
Troubleshooting quick fixes
If you don’t see the phone as a camera option in your video app, recheck the bridge connection and ensure both devices are on the same network (for wireless) or that the USB cable is firmly seated and recognized by the computer. Restart the bridge apps and, if necessary, reboot both devices. Low frame rate? Try lowering the phone’s resolution or enabling “high performance” power settings so the camera doesn’t throttle during long calls. If you experience audio lag, disable Bluetooth and use a wired microphone connected to the computer.
Tools & Materials
- Smartphone (iOS or Android)(Keep OS updated; ensure camera permissions are granted)
- Computer (Windows or macOS)(Have a supported conferencing app installed)
- USB-C to USB-C or USB-A cable(Used for wired connections; choose based on ports)
- Phone stand or tripod(Stabilizes framing and eliminates shake)
- Phone-to-webcam app (phone)(Select a bridge with USB or Wi‑Fi support)
- Desktop companion app(Ensure compatibility with your phone app)
- Optional lighting(Improves exposure in dim rooms)
- External microphone(Clearer audio for calls and streams)
Steps
Estimated time: 20-40 minutes
- 1
Prepare your devices
Charge your phone, update the OS, and close unnecessary apps. Check that your computer is ready to install and run the bridging software. Setting up in a quiet, well‑lit space helps you see and hear yourself clearly during the demo.
Tip: Charge the phone to at least 70% before starting to avoid mid‑setup drops. - 2
Install the bridge apps
Install the chosen phone app on your smartphone and the corresponding desktop app on your computer. Follow on‑screen prompts to grant permissions (camera, microphone, network access). Restart both apps after installation.
Tip: If you have a firewall, allow the bridge apps through to prevent connection blocks. - 3
Choose your connection method
Decide between USB for reliability or Wi‑Fi for mobility. If using USB, connect the phone with the cable and enable file transfer mode if prompted. For Wi‑Fi, ensure both devices are on the same network and the bridge app shows the phone as available.
Tip: USB typically yields lower latency and fewer glitches. - 4
Configure the computer camera source
Open your conferencing/recording software and select the bridge device as your video source. Verify audio routing if the app also handles mic input. Disable other camera sources to prevent conflicts.
Tip: Test different resolutions to balance image quality with smooth performance. - 5
Set your phone as the webcam in the app
In the video meeting app, change the camera input to the bridge device. Frame yourself, test lighting, and adjust exposure or focus if needed. Keep your phone on airplane mode if you don’t want notifications to interrupt your call.
Tip: Use a stable mount to avoid jerky video during movement. - 6
Test, tweak, and go
Run a quick test call to verify video and audio. Adjust brightness, contrast, and framing as needed. Keep a spare charger nearby if you’ll be on long sessions.
Tip: Always perform a test before an important meeting or live stream.
Common Questions
Can I use any phone as a webcam?
Most modern smartphones can be used as a webcam with a suitable bridge app and a computer app. Android and iOS platforms are commonly supported, though some features may vary between devices. Always check component compatibility before purchasing or installing.
Yes, most contemporary phones work with the right bridging app, but check compatibility for your devices before you begin.
Do I need OBS or other software to use my phone as a webcam?
Many video platforms accept the bridged webcam directly, but some setups require a software like OBS to route the camera into the stream. If you plan to stream or record locally, OBS can help manage sources and scenes.
If your platform doesn’t recognize the bridge device, OBS can help route the feed.
Will using my phone as a webcam drain the battery quickly?
Yes, extended camera use can drain the battery. It’s best to keep the phone plugged in during long calls or uses and monitor heat during operation.
Long sessions can drain the battery, so keep the phone plugged in when possible.
Is wired USB better than wireless for stability?
Generally, USB offers the most stable connection with lower latency. Wireless can be convenient, but depends on network quality and interference. If you’re presenting or streaming, USB is usually the safer choice.
USB is usually more stable; use Wi‑Fi only if you need mobility and your network is strong.
Which devices can host the webcam feed?
Most bridges support Windows and macOS, with mobile platforms linked via the companion app. Ensure both ends (phone and computer) are updated and compatible with the chosen bridge tool.
Most setups work on Windows or macOS; just ensure device compatibility.
Watch Video
The Essentials
- Choose between wired and wireless connections based on stability needs.
- Position lighting to illuminate your face evenly for best image quality.
- Test before important calls to prevent last‑minute issues.
- Keep devices charged and minimize background processes during sessions.