How to Use Continuity Camera: A Complete Mac Guide
Learn to turn your iPhone into a high-quality webcam for Mac with Continuity Camera. Step-by-step setup, app selection, lighting, audio, and troubleshooting for beginners.

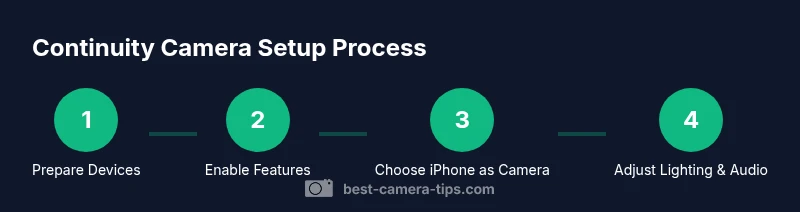
Use Continuity Camera to turn your iPhone into a webcam for your Mac. Enable the feature on both devices, choose iPhone as the camera in your video app, and position the phone for flattering framing. According to Best Camera Tips, verify both devices share the same Apple ID and are near each other for a smooth setup.
What Continuity Camera is and why it matters
Continuity Camera is a built-in feature from Apple that lets you use your iPhone as a wireless webcam for your Mac or iPad. It leverages proximity, an active Apple ID session, and nearby devices over Wi-Fi or Bluetooth to stream video and audio directly into your apps. For aspiring photographers and home-security enthusiasts, Continuity Camera offers sharper imagery without external hardware, elevating video calls, live streams, and security checks. According to Best Camera Tips, the feature is especially valuable when you need high-quality visuals on demand with minimal setup. In practice, you’ll benefit from a stable phone mount, good lighting, and a clear understanding of how to switch sources in your preferred app.
Prerequisites and compatibility
Before you begin, confirm your devices meet the minimum requirements: a Mac with macOS Ventura or later, an iPhone with iOS 16 or later, and both devices signed into the same Apple ID. Ensure Bluetooth and Wi‑Fi are enabled on both devices and that they are within reasonable proximity (a few meters). A solid iPhone mount and good ambient lighting dramatically improve image quality. Best Camera Tips recommends waiting until both devices recognize each other in the camera picker of your video apps to avoid mid‑call interruptions.
Supported devices and initial setup
Continuity Camera works with most recent Macs running macOS Ventura or later and iPhones running iOS 16 or later. The feature does not require third‑party hardware; you simply select the iPhone as your video source in your conferencing or streaming app. On first use, open a supported app (Zoom, Teams, FaceTime, OBS Studio, etc.), and in the camera menu choose the iPhone as the camera. If the iPhone does not appear, confirm Bluetooth and Wi‑Fi are on, both devices are on the same Apple ID, and relaunch the app.
Positioning, lighting, and framing fundamentals
Mount the iPhone at eye level and angled slightly downward for the most flattering perspective. Use soft, diffuse lighting in front of you to minimize harsh shadows, and avoid backlighting that washes out your face. A basic three‑point lighting setup (key light, fill light, and a background light) can dramatically improve depth and clarity. If you have a newer iPhone, you can enable features like HDR capture and adjust exposure by tapping the screen; keep exposure consistent to prevent flicker during longer calls.
Audio considerations and mic options
The iPhone's built‑in microphone is typically sufficient for casual calls, but you may get better results with a dedicated mic placed near your face. If you use the iPhone as the source, make sure the mic is not obstructed by a stand or mount. In some apps you can switch the audio input to a desktop mic or headset; test both options before important calls to ensure consistent audio quality. You may also want to mute the Mac’s mic when you rely on the iPhone mic to avoid double audio pickup.
Using Continuity Camera with popular apps
Most major video apps support Continuity Camera. In each app, open the camera settings and select the iPhone as the camera source. For Zoom and Teams, you’ll typically find the camera option under the video settings; in FaceTime or QuickTime, select the iPhone from the camera picker. If you’re streaming with OBS, add the iPhone as a video capture source and adjust resolution and frame rate to match your monitor. Always run a quick test before a live session to confirm video and audio routes.
Troubleshooting common issues and fixes
If the iPhone doesn’t appear as a camera option, verify both devices are on the same Apple ID, Bluetooth and Wi‑Fi are enabled, and they are within range. Restart the apps and, if needed, reboot both devices. In some cases, signing out of iCloud and back in can reestablish trust between devices. If you still can’t connect, test with a different app to determine if the problem is app‑specific. Finally, ensure you’re not in a low‑power state on either device, which can disable some Continuity features.
Advanced tips and best practices for consistent results
Create a dedicated setup for continuity camera workflows: keep your iPhone plugged into power during longer sessions, use a stable mount, and maintain a consistent desk height to minimize adjustments. If your environment changes (new lighting or background), recheck exposure and white balance in your iPhone’s camera controls. Consider using a simple backdrop and neutral lighting to reduce color shifting, and regularly update iOS and macOS to keep features working smoothly.
Privacy, security, and data considerations
Continuity Camera streams video and audio locally between devices on the same network, rather than streaming over the internet. To maximize privacy, disable Continuity Camera when not in use and review app permissions to ensure only trusted apps have access to the camera. If you share your screen or use sensitive content, prepare by stopping the camera feed and ensuring no unnecessary services remain active. The Best Camera Tips team emphasizes testing privacy settings after any OS update to prevent unexpected camera access.
Tools & Materials
- iPhone with iOS 16 or later(Ensure device is signed in with your Apple ID)
- Mac with macOS Ventura or later(Open to use Continuity Camera in supported apps)
- Stable phone mount or tripod(For face-level framing and stability)
- USB-C or Lightning cable for charging(Keep iPhone charged during long sessions)
- Wi‑Fi & Bluetooth enabled on both devices(Proximity helps discovery)
- Video conferencing app (Zoom, Teams, OBS, etc.)(Check in-app camera options and permissions)
Steps
Estimated time: 15-25 minutes
- 1
Verify compatibility and prerequisites
Confirm your Mac runs macOS Ventura or later and your iPhone runs iOS 16 or later. Ensure both devices are signed into the same Apple ID and have Bluetooth and Wi‑Fi enabled. Keep them within a few meters of each other to ensure a smooth discovery.
Tip: Double-check that the app you’ll use supports Continuity Camera before starting. - 2
Enable Continuity Camera on iPhone
Make sure Bluetooth and Wi‑Fi are on and that you are signed in with the same Apple ID as your Mac. There is no separate toggle needed in most setups; the feature activates when you select the iPhone as camera in a compatible app.
Tip: Test the connection with a quick call in a supported app to confirm visibility. - 3
Enable Continuity Camera on Mac
On your Mac, ensure Handoff is enabled in System Settings and that your network allows device discovery. Open a video app and look for the camera picker; the iPhone should appear as a source.
Tip: If the iPhone doesn’t show, restart the app and reselect the camera source. - 4
Choose iPhone as camera in your app
Within the app’s video settings, select the iPhone as your camera. Do a quick test call or recording to verify the feed is active and stable.
Tip: Set the app to the highest reasonable resolution your hardware supports to balance quality and performance. - 5
Position the iPhone and set lighting
Place the iPhone at eye level with a slight downward tilt. Use soft, even lighting in front of you to avoid harsh shadows and bright reflections.
Tip: Avoid backlighting from windows or lights behind you; consider a simple LED panel for consistent lighting. - 6
Configure audio
Decide whether to use the iPhone mic or Mac’s microphone. If you need clearer voice, place a dedicated mic within arm’s reach and mute the other device to prevent echo.
Tip: Test audio levels before important meetings and adjust input gain as needed. - 7
Test and optimize
Launch a short test call to check video framing, exposure, and audio. Adjust brightness, contrast, and white balance on the iPhone if necessary.
Tip: Record a quick local video to review color accuracy and sharpness before going live. - 8
Privacy and security checks
Review app permissions, close the camera when not in use, and prevent unintended sharing by disabling Continuity Camera after your session ends.
Tip: Revisit privacy settings after OS updates to keep control over camera access.
Common Questions
What is Continuity Camera?
Continuity Camera lets you use your iPhone as a webcam for your Mac or iPad. It works with compatible devices and apps; you can select the iPhone as a video source.
Continuity Camera uses your iPhone as a webcam for Mac; just choose it in your app.
Which devices support Continuity Camera?
Macs with macOS Ventura or later and iPhones with iOS 16 or later; both signed into the same Apple ID and nearby. Availability may vary by model.
Most recent Macs and iPhones support Continuity Camera.
Do I need internet to use Continuity Camera?
No. Continuity Camera uses local Wi‑Fi and Bluetooth to connect two devices. A stable network can improve discovery but is not required for the feed itself.
No internet is required for the live feed, just proximity and Bluetooth/Wi‑Fi.
Can I use Continuity Camera with apps other than FaceTime?
Yes. Zoom, Teams, OBS, Skype, and many other apps let you select the iPhone as the camera source. Check each app's camera settings.
Yes—most major video apps support Continuity Camera.
What do I do if the iPhone doesn’t show up as a camera option?
Ensure Bluetooth and Wi‑Fi are on, sign into the same Apple ID, and restart the app. If needed, reboot both devices and try again.
Turn Bluetooth and Wi‑Fi back on and relaunch the app.
Is Continuity Camera secure and private?
The feed remains local between devices. Disable Continuity Camera when not in use and review app permissions after updates to protect privacy.
Yes, but always review permissions and disable when not in use.
Watch Video
The Essentials
- Prepare devices and apps for a smooth setup.
- Choose the iPhone as the camera in your app’s settings.
- Mount and light properly for professional results.
- Test and troubleshoot before important calls.
- Protect privacy and security with proper permissions.