How to webcam with phone: turn your smartphone into a webcam
Learn how to webcam with your phone using wired or wireless capture, simple apps, and tips for crisp video on Windows or Mac. Follow steps to avoid pitfalls.

You can webcam with your phone by turning it into a USB or wireless capture device and linking it to your computer with a compatible app. This quick guide covers essential hardware, setup steps, and software settings to deliver reliable, high-quality video for streaming, calls, and conferences today easily anywhere.
Understanding the phone webcam landscape
Phone webcams exist because modern smartphones pack high-quality sensors and compact form factors. When you run a camera app on the phone and route the video feed to your computer, you can bypass dedicated webcams. The easiest approach is to use a dedicated capture method (wired) or a wireless bridge; each approach has its own trade-offs: wired tends to deliver lower latency and more stable frames, while wireless offers flexibility when you cannot run cables. A successful setup depends on three elements: the phone's camera quality, the capture method, and the software on your computer. Start by choosing a phone with a good camera and reliable battery; then decide whether you prefer a USB capture route or a Wi-Fi-based link. In any case, plan your workspace to minimize motion and reflections; a stable mount, decent lighting, and a quiet environment are essential for professional-looking video.
Wired vs wireless: pros and cons
Wired connections usually involve a USB capture device that plugs into your computer and a USB cable that connects to the phone (or a USB-C/Lightning cable feeding a capture dongle). This path generally provides lower latency, more consistent frame rates, and fewer dropouts, which makes it ideal for live streams or calls. Wireless methods rely on apps that pipe the camera feed over your local network. They are simpler to set up and eliminate extra cables, but they can introduce variability depending on network quality, interference, and device performance. If you frequently move during recordings or work in spaces with tight cable routing, wireless might be more practical. For best results, test both options in a controlled environment before you go live.
Hardware and software prerequisites
Hardware basics: a smartphone with a decent camera, a stable mount, a suitable cable or wireless setup, a computer with Windows or macOS, and video software such as a conferencing app or streaming program. Software: choose a phone webcam app that supports your connection type; on the computer, select the phone as your video source in OBS, Zoom, Teams, or your preferred platform. If you go wired, also prepare a USB capture device or a USB-C to USB-A adapter. Lighting: aim for soft, even illumination from in-front; avoid backlighting. Sound: either use a separate mic or the phone's mic if you can manage echo; consider using headphones to prevent feedback; plan battery life by connecting to power or turning on battery saver.
Framing, lighting, and audio for crisp video
Set your phone at eye level and use a stable mount. Use a soft key light in front of you to minimize shadows, and keep the camera lens clean. For audio, rely on a dedicated mic when possible and mute the phone’s mic to prevent feedback. If you must use the phone mic, position the phone close enough to capture clear sound without distortion. A quiet room with minimal ambient noise will dramatically improve perceived quality. Finally, factor in the camera’s exposure and white balance—manual tweaks in the app help you avoid washed-out highlights or color cast.
Troubleshooting common issues and fixes
If the computer doesn’t recognize the phone as a source, re-check cables, adapters, and permissions. Low frame rate or stuttering usually points to bandwidth or encoding bottlenecks—lower the resolution or frame rate and ensure no other programs are hogging resources. Audio problems often arise from echo or feedback; use a separate mic and mute the phone mic. If latency is high, switch to a wired setup or adjust the streaming software’s encoder settings. Regular software updates for both phone and PC improve compatibility and stability.
Authority sources
- FCC: https://www.fcc.gov
- NIST: https://www.nist.gov
- Stanford University: https://www.stanford.edu
Tools & Materials
- Phone with camera(Any modern smartphone with a functional front or rear camera)
- USB capture adapter or dock(A wired path requires a capture dongle or dock that connects to your computer)
- USB-C/Lightning cable(Cable to connect phone or capture device to computer or power source)
- Computer (Windows or macOS)(Desktop or laptop capable of running video apps)
- Video conferencing or streaming software(Zoom, Teams, OBS, or similar software for output)
- Tripod or phone mount(Keep the phone steady at eye level)
- Lighting (lamp or diffuser)(Improves image quality; not strictly required)
- Wireless streaming app (optional)(If you choose a wireless workflow)
Steps
Estimated time: 30-60 minutes
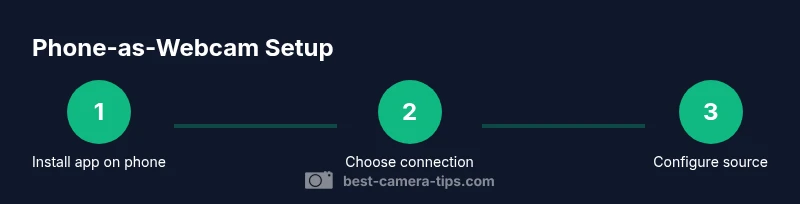
- 1
Install app on phone
Download and install a reputable webcam app on your phone. Grant camera and microphone permissions, and check that the app supports your chosen connection method (wired or wireless).
Tip: Choose an app with good reviews and regular updates; avoid beta-only builds. - 2
Choose connection method
Decide between wired USB capture (lower latency, more stability) or wireless streaming (no cables, quicker to set up). Consider your space, mobility, and how often you’ll move during streams.
Tip: Wired is preferred for live content; reserve wireless for temporary setups. - 3
Prepare hardware
Mount the phone on a sturdy, adjustable stand at eye level. Gather your cables, adapters, and a compatible capture device if using a wired path.
Tip: Ensure the phone is charged or plugged in to prevent shutdowns during use. - 4
Connect phone to computer
Connect via USB or establish the wireless link as instructed by your phone app. Verify that your PC recognizes the capture source in your chosen software.
Tip: Use a short, high-quality cable to minimize signal loss if wired. - 5
Configure video source in software
Open OBS or your conferencing app and add a video capture source. Select the phone from the device list and configure resolution, frame rate, and bitrate.
Tip: Start with 1080p at 30fps; increase only if your hardware supports it without dropping frames. - 6
Balance audio
Decide whether to use the phone mic or an external mic. If using the phone mic, test for echo and adjust input levels accordingly.
Tip: If possible, use a separate mic to improve voice clarity. - 7
Optimize lighting
Place a soft light source in front of you and avoid backlighting. Use diffusers to soften harsh highlights and reduce shadows.
Tip: Position lighting 45 degrees off-center for natural-looking depth. - 8
Test and adjust latency
Record a short clip to check lip-sync and stability. Tweak resolution, bitrate, and encoder settings if you notice lag.
Tip: Lowering resolution or frame rate can dramatically improve smooth playback on weaker machines. - 9
Save presets and monitor
Create a dedicated profile in your software for future use, and keep notes on settings that work well in your environment.
Tip: Label presets clearly (e.g., “Home Studio 1080p 30fps”).
Common Questions
Can I use any phone as a webcam?
Most modern phones can be used as webcams with the right app and a USB or wireless connection. Compatibility depends on the app and the computer OS. Always check the latest app support notes before starting.
Most smartphones work with a webcam app and a USB or wireless link; verify compatibility with your computer OS first.
Do I need a USB capture device for wired setup?
Not always. Some two-device setups can route the phone signal directly to your computer, but a capture device often provides more reliable performance and wider OS support.
A capture device is usually recommended for a stable wired setup.
Is wireless webcam quality reliable?
Wireless can be convenient, but quality depends on network stability and interference. Use a strong 5 GHz Wi-Fi network and test before going live.
Wireless works well in strong networks, but wired is typically more reliable.
Will this work on Windows and macOS?
Yes. Most webcam apps and capture methods are cross-platform; you may need to install drivers or bridge software on your computer.
Yes, both Windows and Mac can use a phone webcam setup with the right software.
What about latency and lip-sync?
Latency varies with connection type. Wired setups generally offer lower latency and better lip-sync; you may need to tweak encoder settings to optimize.
Wired usually has the best lip-sync; adjust settings if you notice lag.
Can I use the phone’s mic as input?
Some apps route both video and audio from the phone, but many prefer using a desktop mic to improve voice clarity and reduce echo. Check your app’s audio routing options.
You can, but using a separate mic is often clearer.
Watch Video
The Essentials
- Use wired for lowest latency
- Mount the phone at eye level for natural framing
- Test audio separately to avoid echo
- Choose stable lighting for consistent image quality