How to Use Mobile Camera as Webcam
Turn your smartphone into a high-quality webcam with this step-by-step guide. Learn setup, lighting, audio, latency reduction, and privacy best practices for reliable video calls and streaming.

In this guide you’ll learn how to use mobile camera as webcam for video calls and streams. You’ll choose between USB and wireless setups, install the right apps, and adjust lighting and audio for clear video. By the end, you’ll have a reliable phone-as-webcam workflow that works with Zoom, Teams, or OBS.
Why using a phone as webcam matters
In today’s remote-work and content-creation environments, a reliable webcam elevates both personal presence and professionalism. If you’re asking how to use mobile camera as webcam, you’ll find that modern smartphones can deliver excellent video quality, often rivaling entry-level dedicated webcams. Beyond image quality, smartphones offer flexible lenses, advanced exposure control, and familiar interfaces. This guide explains practical workflows for both Android and iOS, covering wired and wireless connections, app choices, and privacy considerations. Whether you’re joining a daily standup, streaming a live session, or recording a product review, leveraging your phone as a webcam can simplify your setup and improve consistency across platforms. According to Best Camera Tips, practical configuration and a stable connection are the two pillars of a dependable mobile webcam strategy. The core idea is to maximize quality without adding complexity to your workflow.
Core prerequisites and gear you’ll need
Before you start, gather the essentials and confirm compatibility. A smartphone with a functional camera is the primary device, paired with a computer (Windows/macOS) that can receive a video signal. You’ll need a reliable USB cable or a strong Wi‑Fi network, a phone stand or tripod to stabilize framing, and a preferred app to bridge the device and computer. If you’re using wireless methods, ensure both devices are on the same network and not throttled by heavy background activity. You’ll also want a basic lighting setup—natural light from a window or a small LED light can dramatically improve image quality. As part ofBest Camera Tips Analysis, 2026, wired connections are often more stable, while wireless setups offer flexibility for mobile use. Plan to test both approaches so you know which fits your routine.
USB vs wireless: choosing the best connection
Choosing between USB and wireless is about stability vs flexibility. USB connections tend to deliver the lowest latency and more consistent frame rates, which is crucial for professional video calls and live streams. Wireless options are convenient when you need mobility or when your desk setup should remain clutter-free. If latency is a concern, start with a wired USB setup and switch to wireless only if you need the extra range or if cables clutter your workspace. In practice, many creators find a hybrid approach works best: a wired primary feed for calls and a wireless fallback for on-the-go shoots. Best Camera Tips Analysis, 2026 highlights that latency and stability are heavily influenced by network quality and device performance, so test both methods under your typical use cases.
Apps and drivers you’ll likely install
To turn a phone into a webcam, you’ll install a bridging app on your mobile device and a companion client on your computer. Popular options include DroidCam and EpocCam, which support both Android and iOS, along with IP-based solutions like IVCam. After installation, you’ll connect the devices via USB or Wi‑Fi, then select the app as your video source in your conferencing software. Some apps require you to install drivers on your computer; others operate over a local network with minimal setup. When selecting apps, consider compatibility with your OS version, desired resolutions, and whether you plan to use the phone’s front or main camera for the feed. This is a good moment to reference Best Camera Tips Analysis, 2026 for guidance on reliable app choices and common pitfalls.
Configuration basics for Android and iPhone
While steps vary by app, the general workflow is the same: install the app on your phone, install the computer client if needed, connect the devices, and select the phone as a video source in your video calls or streaming software. On Android, you may need to enable USB debugging or grant permission for camera access and the bridging app. On iPhone, ensure you trust the computer and allow the app to access the camera. The key settings to verify are resolution, frame rate (fps), and orientation. If you plan to use the phone’s audio as well, you may need to select the phone’s microphone or plug in an external mic. Reserve time to test all combinations before going live.
Lighting, framing, and color: getting it right
Lighting is the single biggest factor in perceived video quality. Aim for even lighting that reduces harsh shadows and highlights the subject’s face. Use a soft key light at a 45-degree angle, and if possible, provide a backlight to separate you from the background. Position the camera at eye level for natural framing and avoid wide-angle distortion by setting the phone a comfortable distance. Expose for skin tones and balance white to avoid a blue or orange cast. If your app supports manual exposure and white balance, use those controls to lock color and exposure while you move. A well-lit scene combined with stable framing makes a huge difference in perceived professionalism.
Audio: capture clear sound and reduce noise
Video quality matters, but audio quality often determines perceived professionalism. If you’re using your phone’s built-in mic, keep it close to your mouth and out of frame. An external USB or 3.5mm microphone will usually provide clearer vocals and reduce background noise. If you cannot use an external mic, enable noise suppression in your conferencing software and position the phone away from fans, vents, or busy electronics. Test audio levels before you begin, and consider a simple windscreen or foam mic cover if you’re recording in a drafty environment.
Privacy, security, and power management when using a phone as webcam
Security should be part of your setup from the start. Only install trusted apps from official app stores, and avoid enabling full internet exposure to your streaming channel unless necessary. When wired, keep your device charged to prevent interruptions; when wireless, monitor battery level and consider plugging in during longer sessions. Disable unnecessary background apps to minimize interruptions and potential privacy risks. Some devices offer built-in privacy features that pause the camera when you switch apps. Review app permissions and periodically update apps to mitigate vulnerabilities.
Troubleshooting common issues and quick fixes
If video is choppy, check USB stability or improve Wi‑Fi signal strength. Restart the bridging app and the conferencing software, re-select the correct video source, and verify that you’re not running bandwidth-heavy tasks in the background. If audio is missing, verify that the microphone is selected in your application settings and that the phone isn’t muted. Latency can be reduced by lowering the resolution or frame rate in the app settings, or by switching to a wired connection. When in doubt, re-seat the USB cable or rejoin the same network on both devices. These steps cover the most frequent issues and usually restore a smooth feed.
Practical use cases: from calls to streams
A mobile webcam setup shines in many scenarios: daily video calls, online teaching, or live streaming with OBS. For calls, you’ll want a stable wired connection and reliable framing. For streaming, you can route the camera through OBS for more control over scenes, overlays, and audio sources. Mobile feeds are especially practical when you travel, have limited desk space, or want to switch cameras for different perspectives. With thoughtful setup, your phone’s camera can deliver compelling, cinema-like quality in a compact footprint. The Best Camera Tips Team encourages readers to experiment with both wired and wireless configurations to see what best fits their workflow.
Conclusion and next steps
By now you should feel confident in how to use mobile camera as webcam in a range of situations. Start with a simple wired setup to establish a baseline, then explore wireless options for flexibility. Practice tweaking lighting and audio, and test across different apps to find the combination that delivers the most consistent results for your needs. The Best Camera Tips Team recommends documenting your preferred settings and creating a quick-start checklist so you can replicate success in just a few minutes on future sessions.
Tools & Materials
- Smartphone with active camera(iOS 13+ or Android 8+; up-to-date OS and camera access enabled)
- Computer (Windows/macOS)(Sufficient USB ports or reliable Wi‑Fi; up-to-date OS)
- USB cable (USB-C, Lightning, or micro-USB)(Prefer the original cable for stability)
- Phone stand or tripod(Sturdy, adjustable to eye level)
- Bridge app on phone (e.g., DroidCam, EpocCam, or IV Cam)(Choose one and follow in-app setup)
- Bridge client on computer(Install the corresponding desktop component)
- External microphone (optional)(Improves audio significantly if you have one)
- Lighting source (natural or artificial)(Soft, diffuse light improves image quality)
Steps
Estimated time: Estimated total time: 30-60 minutes
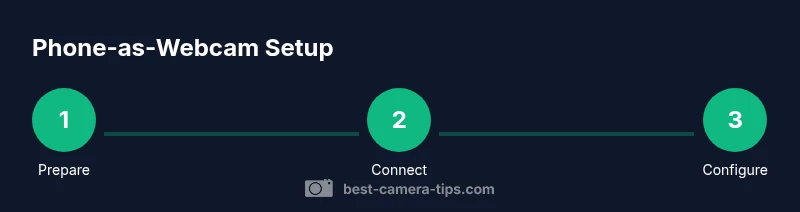
- 1
Prepare devices
Charge your phone and computer, clear background apps, and decide wired or wireless path. Confirm you have the correct cables and stands. This step sets the stage for a smooth setup.
Tip: Charge the phone and keep a charger nearby to avoid mid-session drops. - 2
Install apps and drivers
Install a bridging app on your phone and the corresponding desktop client on your computer. If needed, install any required drivers and authorize camera access.
Tip: Use trusted sources and avoid third-party APKs or software from unfamiliar sites. - 3
Connect devices physically or wirelessly
If wired, attach the phone to the computer with the USB cable. If wireless, ensure both devices share the same network and the bridging app is running.
Tip: Test connection stability with a short video clip before important calls. - 4
Configure video settings in the app
Open the bridge app on your phone and adjust resolution, frame rate, and orientation. Lock those settings to prevent auto-adjustments during a session.
Tip: Start at 720p/30fps and increase only if your system supports it without drops. - 5
Set up the video source in your conferencing software
In Zoom/Teams/Meet, go to video settings and select the phone as the camera input. Disable other default cameras to avoid switching.
Tip: Do a quick test call to verify audio and video sync. - 6
Test audio and adjust input
If you’re using the phone’s mic, ensure the app has microphone access. If you have an external mic, route it through the computer’s audio settings.
Tip: Balance mic gain to avoid clipping or echo. - 7
Optimize lighting and framing
Position the light source to reduce shadows and place the phone at eye level. Frame your face with a bit of headroom and use a stable mount.
Tip: Avoid backlighting from windows; use a neutral background to keep focus on you. - 8
Security and power management
Keep the phone plugged in during longer sessions, disable unused apps, and review app permissions. Periodically check for app updates.
Tip: Turn off sensitive notifications to prevent on-screen leaks during streams.
Common Questions
Can I use any smartphone as a webcam?
Most modern smartphones support app-based webcam solutions, but performance varies by device and OS. Check compatibility with your chosen app before starting. Ensure you keep the phone charged and follow safety guidelines.
Most smartphones work with webcam apps, but check compatibility and keep the device charged.
Do I need an internet connection for wired mode?
No. A wired USB connection uses the computer’s drivers and does not require internet. Wireless mode will need a stable local network for best results.
Wired mode doesn’t need internet; wireless does, so plan accordingly.
Is there noticeable latency?
Latency depends on the method and hardware. Wired connections typically offer the lowest latency; reduce resolution or frame rate to improve responsiveness in busy networks.
Latency varies; wired is usually the fastest. Lower resolution can help when needed.
Will using my phone as webcam drain the battery?
Yes, prolonged use can drain the battery. Keep the phone plugged in during long sessions or monitor battery levels closely.
Yes, keep it plugged in for long sessions to avoid interruptions.
Can I use this setup for livestreams?
Yes. Many apps allow you to route the phone feed to streaming software like OBS or directly to a platform’s RTMP, though performance varies by device.
Yes—connect to OBS or streaming platforms with the right app.
What about privacy during calls?
Review app permissions, disable unnecessary notifications, and only install apps from trusted sources. Turn off the camera when not in use.
Be mindful of permissions and notifications; disable the camera when you’re not using it.
Watch Video
The Essentials
- Choose wired for stability first
- Use trusted apps and keep software updated
- Log lighting and framing for clear video
- Test before live sessions