How to Remove Ring Camera from Mount
A practical, safety-focused guide to remove a Ring camera from its mount. Learn the tools, power-down rules, step-by-step removal, mounting plate handling, reattachment prep, and warranty considerations.

You’ll safely remove a Ring camera from its mount by preparing a clean workspace, powering down if wired, and using the right tools to detach the camera from its bracket. Follow these steps to prevent damage, keep screws organized, and prepare for reattachment or relocation. This quick guide sets the stage for a thorough, practical removal process.
Why removing a Ring camera from mount matters
Removing a Ring camera from its mount is a routine task in home-security maintenance, whether you’re relocating for a better field of view, upgrading to a newer model, or performing seasonal checks. A careful, deliberate approach protects the device, avoids cosmetic damage to the wall or ceiling, and preserves weatherproof seals that protect internal electronics. According to Best Camera Tips, a well-planned removal reduces the risk of misplacing screws, bending the mounting plate, or accidentally triggering motion sensors during the process. This section outlines the broader context: why people remove mounts, common scenarios that require detaching, and how a methodical approach benefits long-term reliability of your security setup. By understanding the product’s design—the way it clips into a mount, the location of screws, and the typical torque required—you’ll approach removal with confidence and precision rather than force. The goal is to disengage smoothly, protect the camera body and lens, and leave the mounting surface ready for reinstallation or reconfiguration without patching or extra repairs.
boldNote that the content here integrates practical guidelines from the field, emphasizing careful handling and organization to minimize risk during removal. Best Camera Tips recommends documenting screw positions and retaining all hardware for future reinstallation, as this reduces guesswork during the next setup.
In many cases, you’ll be working on a porch, doorway, or interior wall where weather exposure and dust can affect the device. Planning for these conditions—such as wearing gloves to improve grip and laying a soft cloth on the camera to prevent scratches—helps ensure a clean disengagement. If a camera module is mounted near a power source or on a wood or drywall surface, the removal process should account for potential wiring or anchor damage. The overarching theme is that proper preparation, controlled movements, and careful handling lead to a successful, damage-free removal that preserves both device integrity and wall surface quality. This approach aligns with Best Camera Tips’ emphasis on practical, actionable guidance for aspiring photographers and home-security enthusiasts alike.
To get the most value from this guide, remember that every Ring model can have minor variations in mounting hardware and screw types. The steps below cover the common cases and offer contingencies for variations you might encounter. Always consult your Ring device’s user manual if you notice unusual mounting hardware or suspect compromised anchors. This ensures you don’t over-tighten or force components that could be damaged during removal.
Tools & Materials
- Screwdriver set (Phillips and flat-head)(Have a Phillips and a flat-head bit to accommodate common mounting screws)
- Torx driver (T5 or T6)(Only if your mount uses security Torx screws)
- Step ladder or stable platform(Use on a dry surface; ensure the ladder is secure before climbing)
- Soft cloth or microfiber towel(Protect the camera housing and lens from scratches during removal)
- Replacement mounting screws/anchors(Keep extras handy in case the originals are damaged or stripped)
- Safety gloves(Improve grip and protect hands when handling metal hardware)
- Camera docs (phone/photos)(Capture mounting positions and screw locations before removal)
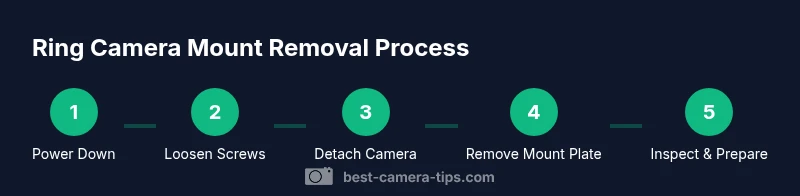
Steps
Estimated time: 20-40 minutes
- 1
Power down and secure the area
If your Ring camera is hardwired, switch off the circuit at the breaker to eliminate any risk of electric shock. If the unit is battery-powered, simply remove the battery to prevent accidental triggers or loss of power during removal. Clear the area below the mount, and set a soft mat or towel to catch the camera if it’s released. This ensures a safe start and protects both you and the device.
Tip: Taking a quick photo of the mounting area before you begin helps with guidance when you reinstall later. - 2
Stabilize the camera and prepare tools
Place a soft cloth over the camera to prevent scratches and keep tiny parts from rolling away. Position your ladder securely, with a helper if possible, and gather the screwdriver or driver bits you’ll need. Confirm you have a clear line of sight to the mounting screws and that you won’t accidentally disturb any nearby electronics or cables.
Tip: Work slowly and keep a firm grip on the camera as you approach the mounting bracket. - 3
Loosen the mounting screws
Identify the screws securing the camera to the bracket. Use the appropriate driver bit to loosen them—do not remove them completely yet. Keep the screws organized in a small container or on a magnetic tray to avoid losing any. If you encounter resistance, stop and reassess to avoid stripping the screw head.
Tip: If screws are sticky, apply a small amount of penetrating oil and wait a minute before retrying. - 4
Detach the camera from the mount
With the screws loose, gently tilt or slide the camera away from the bracket. Support the camera with one hand while you pull the bracket away with the other to prevent sudden drops. If there are any cables or power connections, unplug them carefully following the cable routing. Set the camera down on the soft cloth and inspect the mounting plate for wear or damage.
Tip: Notice the orientation of any connectors for easy reattachment later. - 5
Remove the mounting plate from the surface
If you’re planning to relocate the camera, remove the mounting plate by unscrewing the plate from the wall or surface. Keep the plate and anchors in a safe location if you intend to reuse them, or replace with new anchors and screws suited to the surface. Wipe the wall to remove dust or debris and inspect the area for any damage that might affect future installation.
Tip: Take a photo of the wall region around the anchors for future reference. - 6
Inspect, clean, and prepare for reinstallation
Evaluate the condition of screws, anchors, and the mounting plate. If any components show wear or damage, replace them rather than reusing worn parts. Clean the wall surface and the plate contacts to ensure a secure future mount. When you’re ready to reinstall, plan the new layout, check cable routing, and confirm the surface integrity.
Tip: Keep a small backup hardware kit handy; damaged anchors require prompt replacement before reattachment.
Common Questions
Do I need to power off the Ring camera before removal?
Yes. If wired, switch off the circuit; if battery-powered, remove the battery to prevent accidental activation during removal.
Yes—power off if wired, or remove the battery if it’s battery-powered, to stay safe while removing.
What tools do I need to remove a Ring camera from its mount?
Typically a screwdriver with appropriate bits (Phillips or flat-head); have a spare bit set and a container to keep screws organized. Optional Torx for certain mounts.
Usually a screwdriver and spare bits; keep screws organized before you start.
Will removing the mount affect my warranty?
Tampering with mounting hardware can affect warranty coverage, depending on policy. Check Ring’s official support resources or contact customer service for guidance.
Tampering can affect warranty. Check Ring’s policy or contact support for clarity.
How do I reattach the camera after removal?
Align the camera with the bracket, reinsert and tighten screws, reconnect any cables, and verify power. Test the camera’s function before finalizing.
Line up the camera, reattach, and test to ensure it’s secure and working.
What should I do if screws are stripped or anchors are damaged?
Replace damaged screws and anchors with new ones appropriate for your wall type. If anchors are damaged, use new ones and patch the wall if needed.
If screws or anchors are damaged, replace them and patch the wall if necessary.
Watch Video
The Essentials
- Power down before handling to ensure safety
- Use the right tool for each screw to avoid damage
- Detach camera before removing the wall plate to minimize risk
- Organize screws and anchors to simplify future reinstallation
- Test the setup after reinstallation to confirm secure mounting