Is Ring Camera Easy to Install? A Practical Guide
Discover how easy it is to install a Ring camera with practical, beginner-friendly steps. Learn about mounting, power options, Wi-Fi setup, and privacy best practices with Best Camera Tips.

Is Ring camera easy to install? In most cases, yes—the setup is straightforward with modular hardware and a guided app. This quick guide covers indoor versus outdoor placement, powering options, and Wi‑Fi considerations so you can get a reliable, secure feed without professional help. Real-world tips come from Best Camera Tips to help you avoid common mistakes.
Why Ring Camera Installations Are Generally Straightforward for Beginners
Is ring camera easy to install? In practice, most users find the process approachable, thanks to modular hardware, labeled mounting brackets, and a guided app that walks you through pairing and setup. According to Best Camera Tips, the design of Ring devices emphasizes plug-and-play power options, simple mounting on walls or eaves, and intuitive configuration through the Ring app. Even if you have limited tools or DIY experience, you can typically have a working camera in under an hour with careful prep. The initial decision is whether you want indoor or outdoor placement, which influences power choices and mounting hardware. For outdoor use, you’ll want weather-rated housings and secure mounting to withstand wind and vibration; for indoor monitoring, you may prioritize a clean line of sight and a stable Wi‑Fi signal.
Pre-Install Considerations: Compatibility, Models, and Network
Before you install, confirm the camera you chose is compatible with your preferred Ring model, power option, and network. Ring offers a range of devices from battery-powered sticks to wired doorbell camera units. In general, easy installs share these traits: a modular mounting bracket, clearly labeled mounting holes, and a quick-start guide inside the device's packaging. The Ring app provides step-by-step prompts for connecting to your Wi‑Fi, updating firmware, and customizing motion detection settings. If you’re starting from scratch, replicate the path many home users take: ensure you have a 2.4 GHz or dual-band router, a stable power source where required, and a clear, secure mounting area with a line of sight to your network. Best Camera Tips also stresses testing your network in the installation zone to prevent dead zones later. If you’re replacing an existing camera, photograph the old wiring and mount to help align the new hardware with the same field of view.
Indoor vs Outdoor Setup: Choosing the Right Location
Indoor placements often focus on high-traffic corridors or entryways where motion alerts are most useful, while outdoor setups emphasize doorways, porches, or yard entrances with clear lines of sight. The main difference is exposure: outdoor cameras must withstand weather, temperature fluctuations, and wind, so choose weather-rated housings and secure mounting. Indoor installations can benefit from power outlets and shorter cable runs, reducing clutter. Regardless of location, aim for a mid-height placement (about 4 to 6 feet) for optimal facial recognition and coverage, while avoiding direct sunlight that can trigger false alerts or degrade image quality.
Wi-Fi, Power, and Network Readiness
A strong, reliable Wi-Fi connection is essential for smooth video and timely notifications. Prefer dual-band routers that support both 2.4 GHz and 5 GHz networks, and consider placing the router within 30 feet of the camera with minimal walls in between. For battery-powered models, you don’t need a wired power supply, but you should plan for battery health and charging cycles. Wired models will require a transformer or dedicated power supply that matches the camera’s voltage requirements. In all cases, verify network permissions, firewall settings, and UPnP availability to help the Ring device discover and connect automatically.
Powering Your Ring Camera: Battery or Wired Options
Battery-powered Ring cameras offer flexibility and easier DIY installs, especially on surfaces without nearby outlets. If you install a wired model, you’ll need a compatible power source, which might involve a transformer and careful routing of cables to stay out of sight and meet safety standards. In both cases, avoid using extensions or makeshift power arrangements that could cause voltage drops, overheating, or damage. Regularly monitor battery levels for battery-powered units and schedule firmware updates after installation to ensure optimal performance and security.
Mounting Tips and Placement Rules
A solid mounting strategy improves coverage and reduces maintenance. Use the included bracket and hardware, mark pilot holes with a level, and mount on a sturdy surface away from directly vibrating surfaces like shaky walls or metal gutters. Aim for a viewing angle that includes entry points, no major blind spots, and a clear path for movement in front of the camera. If you need to adjust, loosen the screws slightly to reframe the camera, then retighten securely. Use weatherproof sealant or weather-rated housings for outdoor installations to protect electrical connections. Remember: less is more with cable visibility—conceal cables along trim or within wall channels when possible.
Setup Through the Ring App: Pairing, Zones, and Alerts
The Ring app is the central control hub. Start by creating or signing into your Ring account, then add your camera and follow the on-screen prompts to connect to Wi‑Fi. Configure motion detection zones to reduce false alerts, adjust sensitivity, and set notification preferences for your smartphones. Take time to name each device clearly and assign appropriate location tags so you can quickly access feeds and recordings. If you use shared devices, consider setting up separate user accounts with appropriate permissions for privacy.
Troubleshooting Common Issues and Quick Fixes
If the camera won’t connect, verify Wi‑Fi connectivity, confirm password accuracy, and ensure the device is within range of the router. Battery alerts may indicate depleted power; replace or recharge as needed. For poor video quality, verify lighting conditions, check lens cleanliness, and review resolution settings in the app. If firmware is out of date, perform an update through the Ring app. In general, routine checks help prevent missed alerts and stale feeds, keeping your system responsive and secure.
Security, Privacy, and Firmware Best Practices
Security starts with strong authentication and regular firmware updates. Enable two-factor authentication on your Ring account, review access permissions for household members, and rotate credentials if devices are reassigned. Regular firmware updates frequently address vulnerabilities and improve performance. Always review privacy settings, such as quick-release shrouds for cameras and configurable retention periods, to match local laws and comfort levels. Best Camera Tips notes that maintaining a proactive update routine is essential for long-term protection.
Real-World Scenarios: Front Door, Garage, and Hallways
Front door cameras are excellent for package alerts and visitor verification, while garage cameras monitor vehicles and valuables. Hallway cameras help with interior monitoring and motion-triggered routines. For each scenario, adjust motion zones, set alert schedules, and test from different times of day to understand how lighting affects sensitivity. Keeping a log of settings and retrievals helps you dial in the right balance between helpful alerts and notification fatigue.
Maintenance and Upkeep After Install
After installing, periodically inspect the camera housing for cracks or moisture, clean the lens with a microfiber cloth, and verify that cables and mounts remain secure after extreme weather. Update firmware as released, and review motion zones monthly or after changes to your home layout. Regular checks ensure you retain a reliable, secure feed and extend the camera’s lifespan.
Tools & Materials
- Ring camera device (model of your choice)(Battery-powered or wired version depending on model; confirm compatibility with your mounting surface)
- Smartphone or tablet with Ring app installed(iOS or Android; ensure you have an account set up prior to install)
- Mounting bracket, screws, and anchors(Use included hardware and appropriate wall anchors for your surface)
- Drill/driver and appropriate drill bits(For hard surfaces; ensure bit size matches screws)
- Level and pencil(To align camera precisely and mark wall holes)
- Cable management supplies(Cable clips or raceways for neat wiring on wired models)
- Ladder or stable step stool(Safety first when mounting at height)
- Weatherproof housing or sealant (outdoor only)(Optional for extra protection in harsh climates)
- Power supply transformer (wired models only)(Match the camera’s voltage and amperage requirements)
- Spare batteries or charger (battery models)(Keep on hand for uninterrupted monitoring)
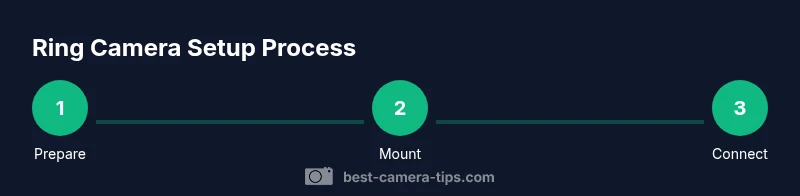
Steps
Estimated time: 45-60 minutes
- 1
Prepare mounting area
Assess the best location for coverage and power access. Mark the outline with a pencil and verify sightlines to entry points. If mounting outdoors, check for weather exposure and ensure the surface is solid.
Tip: Use a level to ensure your bracket sits perfectly horizontal before drilling. - 2
Power the camera
If battery-based, ensure a full charge; if wired, route cables to a nearby power source with minimal exposure. Avoid running cables across doorways or high-traffic paths.
Tip: Plan cable routes early to minimize visible wiring and potential tripping hazards. - 3
Attach mounting bracket
Drive the mounting screws into the marked holes using a drill, ensuring a secure hold. If you’re mounting on brick or concrete, use appropriate anchors.
Tip: Check bracket alignment with the level before tightening fully. - 4
Mount the camera
Attach the camera to the bracket and adjust its angle to capture the desired area. Tighten screws securely and test the range of motion.
Tip: Leave a small gap for angle adjustments after initial placement. - 5
Connect to the Ring app
Open the Ring app and add a new device. Follow prompts to join your Wi‑Fi network and complete initial firmware update if prompted.
Tip: Keep your phone nearby during the network setup for quick verification codes. - 6
Configure zones and alerts
Define motion zones to minimize false alerts and set notification preferences for your devices. Test alerts by walking through the zones.
Tip: Start with conservative zones and expand as you verify performance. - 7
Test live view and recording
Access live video, confirm recording events trigger, and review saved clips. Ensure the time stamps align with events.
Tip: Check different lighting conditions to ensure visibility in day and night modes. - 8
Finalize placement and wrap up
Tidy any exposed cables, secure all components, and perform a final position check. Document device location and name in the app for easy future access.
Tip: Take a quick photo of the setup for your records.
Common Questions
Do Ring cameras require a subscription?
A Ring account provides live view and basic alerts without a subscription, but cloud video history and some advanced features typically require an active plan.
You can view live video without a plan, but cloud storage usually needs a subscription.
Can Ring cameras be installed outdoors?
Yes, most Ring cameras are designed for outdoor use with weather-rated housings and proper mounting. Follow the manufacturer’s guidance for outdoor electrical safety.
Yes—outdoor installations are supported with weatherproof options.
Is the Ring app user-friendly for beginners?
Yes. The Ring app walks you through setup, pairing, and configuring alerts with intuitive menus and prompts.
The app is designed for beginners with clear setup steps.
How long does installation take?
Time varies by model and mounting surface. Plan for a focused session and video checks to ensure everything works smoothly.
It varies, but a focused session usually gets you set up.
Will Ring work with smart home assistants?
Ring devices integrate with common assistants like Alexa for hands-free viewing and voice commands where supported.
Ring works with some smart assistants for hands-free control.
Can I manage multiple Ring cameras from one app?
Yes. You can add multiple Ring devices to a single account and organize them by location for centralized access.
You can manage several cameras from one app with location grouping.
Watch Video
The Essentials
- Plan placement for optimal field of view and minimal obstruction.
- Choose power options (battery vs wired) before mounting to avoid rework.
- Use the Ring app to tailor motion zones and notifications.
- Regularly update firmware and review security settings.