How to Remove Ring Camera from Your Account
Learn how to remove a Ring camera from your account with a practical, step-by-step approach. Protect your security, manage sharing, and verify access across devices.

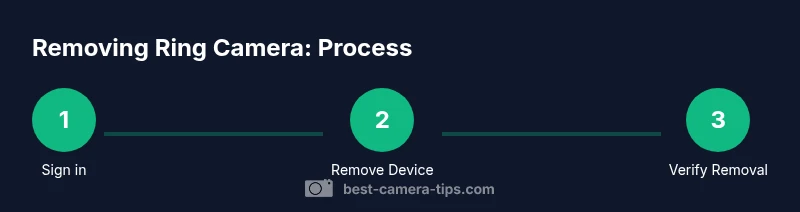
By the end of this guide you will know exactly how to remove a Ring camera from your account. You’ll need a Ring account, access to the Ring app, and permission to modify devices. The steps apply to iOS and Android, and cover removing shared access so others can’t view the feed. This quick path sets you up for a secure, clean account.
Understanding what removing a Ring camera from your account entails
Removing a Ring camera from your account means dissociating the device from the owner’s Ring profile, revoking live access, and limiting any shared permissions. This action does not erase the device itself unless you choose to factory reset. For aspiring photographers and home security enthusiasts, understanding this distinction helps you plan future use or reuse. It also prevents accidental deletion of other devices tied to the same account. According to Best Camera Tips, always verify you own or have explicit permission to remove a device before proceeding and make sure you’ve saved any footage you may need later. The core goal is to maintain control over who can view feeds while keeping your security posture intact.
Prerequisites and safety considerations
Before you begin, confirm ownership of the camera and ensure you have access to the Ring account that currently manages it. If you’re removing a device from a shared account, discuss the change with other users to prevent confusion. Prepare your login credentials, and enable two-factor authentication if it isn’t already on. If the camera is integrated with other services (Alexa, Google Home, or IFTTT), decide in advance whether you also want to revoke those links. Safety-wise, never share your account password, and avoid performing the removal over unsecured networks. This keeps your Ring data secure and reduces the risk of unauthorized access during the process.
Gather your information and access
Make sure you have: (1) the Ring account email and password or a trusted password manager entry, (2) access to the Ring app on a phone or tablet, (3) the camera’s device name for quick identification, and (4) confirmation you can modify device sharing settings. Having the camera’s serial number or model can help if you encounter a device that doesn’t appear in the standard list. If you rely on two-factor authentication, ensure you can complete the second factor during sign-in. Finally, decide if you want to export any footage before removal, as access to that footage may change after the device is detached.
What happens to recordings and subscriptions after removal
When you remove a camera from your Ring account, your ability to view live feeds from that camera ends for the removed user or device. If your account still has an active Ring subscription tied to the camera, your cloud recordings may remain accessible to the account owner until the retention period ends. If you plan to reuse or relocate the camera, export any important clips before detaching the device. Best Camera Tips emphasizes reviewing your subscription settings to understand how long footage remains available after removal and to ensure new ownership is reflected accurately across devices and apps.
Removing via the Ring app: a high-level overview
The removal process is typically done within the Ring app by selecting the target camera, opening its device settings, and choosing Remove or Remove Device. If the camera is shared with others, you’ll also want to revoke access from those users. Some setups involve removing the device from all associated spaces (like Alexa routines or Google Home integrations) to ensure there are no active links left. In most cases, you’ll be prompted to confirm your choice, and you may be asked to re-enter your password for security. This block sets the stage for the exact steps that follow.
Removing a camera from a shared account or household
If the camera is part of a household with multiple Ring accounts, removal decisions should reflect the desired ownership. You may need to transfer ownership or reassign the device to a new primary account. Within the Ring app, review the sharing panel and remove the camera from the shared users list. Documenting the new owner’s account details can prevent future access issues. This careful approach minimizes friction if someone else needs access later and helps you maintain clarity about who can view the feed.
Shared access: removing a user and revoking permissions
Revoking permissions for a specific user is often necessary when someone leaves the household or no longer needs access. In the Ring app’s Sharing section, remove the user from the camera’s sharing list. If the user has a linked Ring account, remind them to disconnect or unlink the device on their side as well. This ensures there are no dangling permissions that could re-activate access later. Keeping a clean sharing policy is a key security practice for aspiring photographers and home security enthusiasts.
Troubleshooting common issues during removal
If you can’t locate the camera in the app, ensure you’re signed into the correct Ring account and check for software updates that might affect device lists. In some cases, a camera may be tied to an older account or a legacy sharing setup. If you can’t remove due to a password or two-factor barrier, use Ring’s account recovery flow or contact support. Always verify the device name and model when multiple cameras exist. Remember that a factory reset is a separate option you can consider if you’re repurposing or selling the hardware, but it should be done only after you’ve completed removal properly.
Security best practices after removal
After removal, review your account security: update your password to a strong, unique one; reconfigure two-factor authentication; and audit connected services. If you shared access with other people, set expectations for future access and consider creating a separate account for guests or temporary access. Maintain a log of changes to device ownership for accountability. This approach aligns with best practices in camera security and helps preserve your privacy and security posture.
Post-removal checks to ensure success
Finally, verify the device no longer appears in the camera list for that account. Sign out and sign back in to confirm the removal took effect on all devices. Check any linked services (Alexa, Google Home, IFTTT) to ensure there are no lingering routines that reference the removed camera. If you intend to reuse the camera, set it up anew in the new account and perform a fresh test of live view and motion alerts. This final check minimizes surprises and confirms the process is complete.
Next steps and planning for reuse or disposal
If you’re planning to reuse the camera, decide whether to perform a factory reset and re-add the device to a new account. If you’re disposing of the camera, perform a factory reset to wipe settings and links before handing it off. Keeping a simple checklist helps ensure you’ve covered all bases: ownership, removal from all sharing lists, removal from linked services, and secure reset if needed. This thoughtful, methodical approach is the hallmark of a security-conscious photographer and home-security enthusiast.
Tools & Materials
- Ring account credentials(Email + password or password manager entry with access to the primary Ring account)
- Smartphone or tablet with Ring app installed(Ensure the app is up to date for accurate device lists)
- Stable internet connection(Prefer a trusted network; avoid public Wi‑Fi during login or removal steps)
- Access to secondary verification method (2FA)(If enabled, have the code ready during sign-in)
- Footage export plan(If you need to preserve clips, export them before removal)
Steps
Estimated time: 15-25 minutes
- 1
Verify ownership and credentials
Confirm you own the camera or have explicit permission to remove it. Gather your Ring account email and password, and have access to the Ring app on a trusted device. If 2FA is enabled, be prepared to complete the sign-in step.
Tip: Tamper-free removal starts with solid authentication—don’t skip this step. - 2
Sign in to the Ring app
Open the Ring app on your device and sign in with the correct credentials. If you’re already signed in, refresh the session to ensure you’re operating on the latest device list.
Tip: Use a private network to minimize interception during sign-in. - 3
Navigate to the device you want to remove
Go to the main menu, select Devices or My Devices, and locate the camera you intend to remove. If you have multiple cameras, confirm you’re choosing the correct one by cross-checking the name and model.
Tip: If you can’t find the device, use the search bar to filter by name. - 4
Open device settings
Tap the camera to open its settings page. Look for an option labeled Remove, Remove Device, or similar wording. This is the critical action that dissociates the camera from the account.
Tip: Some screens place Remove under a three-dot menu; check both the device header and the overflow menu. - 5
Confirm removal
You’ll be prompted to confirm that you want to remove the device. Confirm to proceed and wait for the app to update the device list. This may take a moment if the cloud is syncing changes.
Tip: If you’re removing a shared device, repeat the removal from each user’s Sharing panel as needed. - 6
Revoke sharing permissions
If the camera was shared with other users, navigate to the Sharing section and remove those users or revoke their access to the camera. This ensures no one else can view the feed.
Tip: Document the users you revoke for future reference. - 7
Review linked services
Check any linked services (Alexa, Google Home, IFTTT) that might reference the camera. Remove or update those links to prevent orphaned automation from triggering the camera.
Tip: Perform a quick audit of routines that involve the camera after removal. - 8
Decide on factory reset (optional)
If you plan to reuse the hardware, you may opt for a factory reset to wipe personal data and unlink the account completely. This is optional and should be done after removal is confirmed.
Tip: Reset only if you intend to repurpose or sell the device. - 9
Test your account and confirm removal
Sign out and back in or refresh the app to confirm the camera no longer appears in your device list. Verify that you cannot access the live feed from the removed device.
Tip: Perform a final check on multiple devices to ensure consistency.
Common Questions
What happens to saved footage when I remove a Ring camera from my account?
Removing a camera stops future access to live feeds from that device for the removed user. If you still have an active subscription on the account, existing cloud footage may remain available to the account owner for a period determined by your plan. Export clips you want to keep before removal.
Removing a camera stops future live access for the removed user. If your plan remains, cloud footage may stay available to the account owner for a limited time. Export any clips you want to save first.
Do I need to factory reset the camera after removing it from my account?
Factory resetting is optional and typically only needed if you plan to reuse or sell the camera. If you’re not reusing it, removing from the account and unlinking from services is usually sufficient.
Factory reset is optional and mainly for reuse or resale. If you’re not reusing it, removal and unlinking are usually enough.
Can I remove a Ring camera from someone else’s account?
You can only remove a camera from an account you control or own. If you don’t own the device, contact the account owner to handle the removal or request access changes.
Only the account owner or an authorized user can remove the camera. If you don’t own it, ask the owner to make the changes.
Will removing a camera affect other devices in the same account?
No. Removing one camera only affects that device’s access. Other cameras, settings, and automations linked to the same account remain unaffected unless you also remove them.
No, other devices stay intact unless you remove them too.
How do I remove a Ring camera from the Ring app on iOS vs Android?
The steps are the same in both apps: sign in, select the camera, open settings, and choose Remove Device. If the layout differs, look for a three-dot menu or the Remove option within the device’s settings.
Sign in, pick the camera, go to settings, and tap Remove Device. If needed, check the overflow menu.
What if I can’t sign in to my Ring account to remove a camera?
Use Ring’s account recovery flow to reset your password or regain access. If you’re unable to recover the account, contact Ring Support for assistance.
If you can’t sign in, use the recovery flow to reset access or contact support for help.
Watch Video
The Essentials
- Verify ownership before removing a Ring camera.
- Revoking sharing access is essential for complete removal.
- Export footage if needed and review linked services afterward.
- Test the account to confirm the device no longer appears.