How to Install a Camera at the Door: A Practical Guide
Learn how to choose, install, configure, and maintain a camera at the door for safer entry monitoring. Practical steps, privacy tips, and troubleshooting.

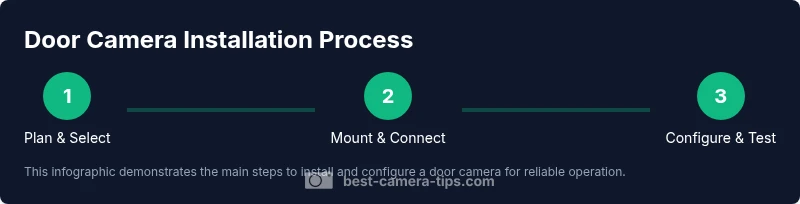
You will learn how to install and use a camera at door to monitor entry, deter intruders, and improve safety. Before you begin, gather a door camera, a power source, and a stable mounting spot. Steps: choose the camera type, mount at the doorway, connect to Wi‑Fi, configure motion detection, set privacy zones, test alerts, and review footage.
Why a camera at the door matters
A camera at the door is a cornerstone of entry security. According to Best Camera Tips, having a device at the threshold not only deters suspicious behavior but also provides real-time visibility into visitors, deliveries, and potential threats. In addition to recording footage for later review, it can generate instant alerts to your phone, enabling quicker decisions when you’re away. When used properly, this setup improves situational awareness and can help you document incidents for warnings or insurance claims. The Best Camera Tips team emphasizes that a door camera complements strong lighting, sturdy locks, and clear sight lines, creating a layered defense rather than a single line of defense. With the right setup, you can verify who is at your door without opening it and respond promptly to package deliveries or potentially unsafe situations.
Key features to prioritize in a door camera
Selecting a camera for your door involves balancing several features that directly impact reliability and usability. Look for a wide field of view that minimizes blind spots, strong night vision, and clear daytime resolution so faces and details are identifiable. Two-way audio adds a practical way to communicate with visitors without opening the door. AI-based detection helps distinguish people from cars or pets, reducing unnecessary alerts. Privacy features like configurable privacy zones protect nearby neighbors and bystanders. Storage options (local, cloud, or hybrid) determine how long you can retain footage and how accessible it is from different devices. Power choices matter too: battery-powered cameras are easy to install, while wired models can offer longer life and more stable connectivity. Weather rating (IP65/IP66 or higher) ensures the device withstands rain, dust, and temperature swings. As a reminder, Best Camera Tips analysis shows that cameras with robust detection, reliable wireless performance, and clear app control tend to deliver the most consistently useful results. In practice, your decision should align with your entry patterns, home layout, and privacy preferences.
Installation considerations: placement, mounting options, and power
Door cameras should be placed where they can clearly frame the entry and any path a visitor takes toward the door. Mounting options vary from doorbell cameras integrated into the doorbell system to standalone cameras mounted on the frame or adjacent wall. For best results, avoid direct sun glare and keep the lens free of obstructions like dirt, rain splashes, or dead leaves. If you’re wiring a camera, plan for a clean cable run with proper grommets and weatherproof connectors. Battery-powered units are simpler to install but will require periodic recharging, while wired devices may offer more stable performance and continuous power. Consider the door’s material and whether masonry anchors or door-frame brackets are needed. A thoughtful placement ensures you get both the person at the door and the approach path, making it easier to verify events later.
Setup and daily operation: pairing, app, notifications, and privacy controls
Once the camera is mounted, download the manufacturer’s app and pair the device following on-screen prompts. Connect to a secure Wi‑Fi network and perform a firmware update if prompted. Configure motion zones so alerts trigger primarily near the door and along the entry path. Enable audible alerts and ensure push notifications arrive on your devices. Use privacy controls to mask nearby neighbors or street-facing areas if required by local laws. Regularly review camera feeds to confirm the field of view remains optimal, and test the audio to verify two-way communication works as expected. Keeping a routine review helps you catch any drift in alignment or aging components before they fail.
Maintenance, privacy, and best practices
Maintain lens clarity by cleaning with a soft microfiber cloth and inspecting seals for wear. Schedule periodic firmware updates to patch security vulnerabilities and improve performance. Encrypt data in transit and at rest when possible, and enable strong authentication for your cloud or local storage. Keep access permissions tight—only trusted household members should have full access. Consider a privacy-first approach by disabling recording during sensitive times or configuring per-person access, especially if you share footage with family members. Finally, document your door camera setup so you can retrace steps if you relocate or reconfigure your entryway.
Troubleshooting common issues and avoiding false alarms
If you notice blurry video, check lens cleanliness and lighting conditions. If alerts aren’t arriving reliably, verify network connectivity and reset the device or router as needed. False alarms are common when motion is triggered by passing cars, swaying branches, or shadows. Refine motion sensitivity, enable person-detection, and narrow the detection zone to the doorway rather than the entire scene. For persistent issues, consult the device’s support resources or reset to default settings and reconfigure from scratch. A disciplined approach to setup and testing can dramatically reduce nuisance alerts and improve overall security.
Tools & Materials
- Door camera (wired or wireless)(Doorbell camera or standalone unit; choose based on mounting surface and power options)
- Power source or charged battery(Ensure adequate power: mains or fully charged battery with spares)
- Mounting hardware(Screws, anchors, brackets suited to your door frame material)
- Screwdriver set(Include Phillips head and flat-head; sizes vary by device)
- Level and tape measure(Ensure straight alignment and accurate placement)
- Smartphone or computer for setup(Required to install apps and configure settings)
- Wi-Fi router with 2.4GHz/5GHz(Check compatibility and signal strength at the door)
- Weatherproof sealant or gasket(Optional for outdoor installs to improve durability)
- Cable management supplies(For wired installs to keep cables tidy and protected)
- Memory card or cloud storage plan(Local storage or cloud plan if supported by device)
Steps
Estimated time: 60-90 minutes
- 1
Plan and select
Assess entry layout and choose a door camera type that fits your power options and mounting surface. Decide whether you want a doorbell camera or a standalone unit and confirm network compatibility.
Tip: Take measurements of the mounting area and note any glare sources that could affect image quality. - 2
Mount the camera
Attach the mounting bracket to the door frame or wall using the provided hardware. Use a level to ensure the camera sits straight and adjust the tilt to capture the entry path.
Tip: Seal gaps around the mount to prevent weather intrusion. - 3
Power and connect
If wired, connect to the power supply and route cables neatly. If battery-powered, install a fresh, high-quality battery and prepare a spare.
Tip: Avoid routing cables through door paths that may vibrate or be damaged by frequent use. - 4
Link to Wi‑Fi and update firmware
Follow the app prompts to join your secure network and perform any available firmware updates for security and stability.
Tip: Use a strong, unique password for the device account. - 5
Configure motion zones and alerts
Set up detection zones that focus on the doorway and approach path. Enable push alerts and test them to ensure timely delivery.
Tip: Enable person-detection to reduce false alerts from non-human movement. - 6
Privacy controls and testing
Configure privacy zones to mask surrounding areas as needed and run a live test with a family member's device to confirm notification behavior.
Tip: Document who has access and when to review footage responsibly. - 7
Review storage and retention
Choose local, cloud, or hybrid storage. Verify access controls and review retention settings to balance convenience with privacy.
Tip: Establish a routine check to archive important clips.
Common Questions
What is a door camera and why should I use one?
A door camera monitors visitors, deliveries, and potential threats at your entry. It provides live video, recordings, and alerts to your devices, helping you verify visitors and respond quickly from anywhere.
A door camera helps you see visitors and record footage, even when you're away.
Can a door camera function without internet?
Most door cameras rely on Wi‑Fi for live streaming and alerts, but some offer local storage and offline operation. For full features, internet access is recommended.
Most door cameras need internet, but some can store locally.
Where should I mount a door camera for best results?
Mount on the door frame or wall near eye level to capture faces and the doorway while avoiding glare. Tilt slightly to cover the doorknob area and the approach path.
Place it where you can clearly see visitors and the doorway.
How can I reduce false alerts from a door camera?
Use motion zones to limit detection to the doorway, adjust sensitivity, and enable person-detection to filter non-human motion.
Limit zones and tweak sensitivity to cut down false alarms.
Are door cameras compatible with smart home systems?
Many door cameras integrate with popular smart home ecosystems and voice assistants. Check app compatibility and any routines you want to build.
Most door cameras integrate with common smart homes.
How should I store and protect door camera footage?
Choose local storage, cloud storage, or a hybrid plan. Encrypt data in transit and at rest, and control access to stored footage.
Use encryption and strong access controls for stored footage.
Watch Video
The Essentials
- Choose a door camera with clear field of view and reliable night vision.
- Mount at streaming-friendly height and angle for facial visibility.
- Configure motion zones and privacy settings to minimize false alerts.
- Regularly update firmware and perform lens maintenance for best results.