Why Is My Camera Not Working on My Laptop? Troubleshooting Guide
A practical, step-by-step troubleshooting guide to restore your laptop webcam fast—covering drivers, privacy settings, updates, and hardware checks for Windows and macOS.

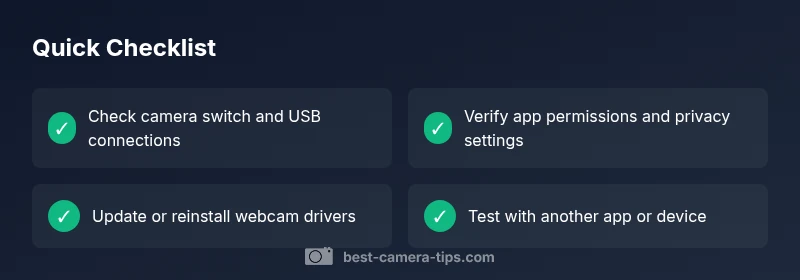
Most laptop webcam issues begin in software: you may have blocked access, outdated drivers, or misconfigured privacy settings. Start by ensuring the camera is enabled in Privacy permissions and that your apps are allowed to access it. If that doesn’t help, update or reinstall the webcam driver, and test with another app. If the camera hardware is faulty, contact a professional.
Understanding the symptoms and immediate checks
If you’re wondering why is my camera not working on my laptop, start by identifying the symptom: the camera is not showing video, the device is not detected, or the preview is black. Begin with the basics: ensure the camera is physically present and enabled, and confirm that your operating system recognizes the device at all. Check the notification area for camera indicators, verify that Airplane Mode is off, and see if the camera is disabled in Device Manager (Windows) or System Information (Mac). Test across multiple apps—video conferencing, the built-in camera app, and browser-based capture—to gauge scope. If all apps fail, move to targeted checks. Document any error codes, timestamps, and recent changes, as this will guide subsequent steps. This approach mirrors Best Camera Tips’ method: methodical, evidence-based, and focused on lasting fixes.
In many cases, the root cause is simple: permissions blocked by an OS update, a recent app update that reset access, or a misread device status. A calm, systematic diagnostic saves time and reduces frustration. Remember: the goal is to reproduce the issue consistently and then isolate the variable. If the symptom only appears after a specific action, like joining a video call, that action becomes a prime suspect and a test target.
Throughout this section you’ll encounter common scenarios—silent cameras, distorted or grainy video, or audio-only feeds. Each scenario has a practical resolution path. By documenting symptoms and testing across apps, you collect the evidence needed to distinguish between software configuration and hardware faults. This section intentionally emphasizes clear, repeatable steps to avoid guessing games and aligns with Best Camera Tips’ evidence-based troubleshooting approach.
Hardware vs software: what's causing the issue?
Understanding whether the problem is hardware-based or software-driven is essential for an effective fix. Hardware issues include a loose cable connection (common in laptops with removable panels), a damaged camera module, or a failed integrated webcam. These scenarios often manifest as “camera not detected” or a completely blank screen with no control inside any app. Software problems are far more frequent and include outdated or corrupted drivers, system updates that disable camera access, and privacy settings that block apps from using the camera. Malware or security software can also interfere, and in some cases, BIOS/UEFI settings can disable the camera at startup. The best practice is to first rule out software problems, since many hardware faults require professional repair. A well-documented diagnostic trail helps when you do need hands-on repair later.
To assess root causes, start with these quick checks: ensure the camera is listed in Device Manager (Windows) or System Information (Mac) and that there are no warning icons. Check OS-level privacy settings to confirm camera access is allowed. Then observe behavior across multiple apps: if several apps fail, it’s more likely a driver, permission, or BIOS setting. If one app works while others don’t, the problem may be app-specific or a conflicting setting within that program. Finally, perform a simple external test with an alternate USB webcam if available to determine whether the built-in camera or the entire system is at fault. This diagnostic separation—hardware vs software—saves time and points you toward the correct fix path.
Check software permissions and privacy settings
Privacy and permission settings often trip people up. On Windows, go to Settings > Privacy & security > Camera and confirm that “Camera access” is On and that individual apps (like Zoom, Teams, Chrome) have permission to use the camera. If your device uses multiple cameras, select the correct one in the app’s video settings. On macOS, open System Preferences > Security & Privacy > Privacy > Camera, and ensure the checkbox next to the affected apps is enabled. Some browsers require you to grant permission the first time you access a camera; a persistent denial can show a blank feed. After adjusting permissions, restart the app and, if needed, reboot the laptop. If the issue persists, move to driver updates. The underlying principle is simple: without permission, the camera is effectively invisible to your software. This is a common stumbling block and a frequent cause of the initial failure signal.
If you’re troubleshooting a shared device, confirm that another user’s profiles don’t have restricted camera access. Enterprise-managed devices may enforce stricter policies through group policies or MDM profiles; consulting your IT department can save hours of trial-and-error tuning. By consistently validating permissions first, you eliminate one of the most common and easily fixable culprits. Remember, even a minor OS change can revoke camera permissions without obvious alerts, so recheck permissions after updates.
Update drivers and firmware: step-by-step
Drivers are the lifeblood of your camera’s compatibility with Windows and macOS. An out-of-date or corrupted driver can stop the webcam from functioning entirely, even when the hardware is fine. Begin by visiting the device manager (Windows) or the System Information/About section (Mac) to identify the exact webcam model. On Windows, expand “Imaging devices” or “Cameras,” right-click your webcam, and choose “Update driver.” If Windows can’t find a newer driver, visit the manufacturer’s site for a manual download. On Mac, ensure your system is up-to-date with the latest macOS version, then reinstall the related software if needed. Firmware updates for laptops are less common but can be critical for specific hardware revisions; consult your laptop’s support page for any available BIOS or firmware updates.
After updating, reboot the system and re-test across several apps. If the new driver causes stability issues, you can roll back to the previous version via Device Manager (Windows). If updates do not resolve the problem, consider a clean reinstall of the camera driver or using a system restore point prior to the issue. Maintaining current drivers reduces the chance of compatibility conflicts during OS updates and apps that request camera access. Always download drivers from official sources to avoid malware, and create a restore point before major driver changes. This patient, stepwise approach minimizes risk and increases success rates.
In parallel, check for firmware updates that might impact integrated cameras on certain ultrabooks. Firmware updates can improve power management, recognition, and stability. If the device has an internal webcam with a dedicated firmware, follow manufacturer instructions precisely to avoid bricking the hardware. After each driver or firmware change, re-test with multiple apps to confirm the fix.
Troubleshooting per platform: Windows and macOS differences
Windows and macOS handle cameras differently, so platform-specific steps are essential. On Windows, use the Device Manager to locate the camera, update drivers, and check BIOS/UEFI for any disabled camera options. Windows also tends to have more granular privacy controls tied to the OS and the apps; you may need to grant permission in Settings for each app. On macOS, permissions are more centralized, and the camera is typically tied to System Preferences and App permissions. Apple also tends to enforce stricter sandboxing; if a third-party app can’t access the camera, reinstalling or updating the app and granting permission in Privacy settings often resolves it. If you’ve recently installed a Windows feature update or macOS update, re-test the camera after the update since some updates reset permissions. A cross-platform approach helps identify whether the issue is OS-specific or universal to the device. Keep in mind that some laptops implement a physical camera switch or a keyboard shortcut to disable the camera; ensure those aren’t active.
If you rely on external USB webcams, test the device on another computer to verify whether the camera itself is functional. If it works on another system but not on your laptop, the problem is likely an internal setting or driver specific to your device. Conversely, if the external camera fails on another machine, the camera hardware is likely defective and may require replacement. Document these tests to demonstrate the scope of the issue when seeking support.
When to seek professional help and prevention tips
When should you seek professional help? If you’ve exhausted permissions, driver updates, and hardware checks without a resolution, it’s time to escalate. A professional technician can diagnose BIOS-level camera disable flags, inspect internal cables, and check for motherboard-level faults that aren’t user-serviceable. If you’re uncomfortable opening your laptop or ensuring battery safety, avoid DIY hardware repairs. For prevention, adopt a routine: keep your OS and drivers up to date, use reputable security software to monitor for webcam-related interference, and create a regular backup plan. Keeping a spare external USB webcam is a practical backup option for critical video tasks. Regularly review privacy settings after major updates and consider creating a system restore point before significant changes. These habits minimize future disruptions and preserve your ability to communicate clearly, whether for work or personal use.
Diagnostic flow overview
- Symptom: Camera not detected or no video feed across all apps.
- Diagnosis path: check permissions → update drivers → verify BIOS settings → test with a second app → test with an external camera.
- Solutions: enable camera in OS, install correct drivers, re-enable BIOS camera toggle, perform a system restore if an OS update caused the issue, and consider professional repair if hardware failure is suspected.
This flow helps you stay organized and ensures you don’t skip essential checks. Start with the least invasive remedies and move toward more involved steps only when necessary. The goal is to narrow down to software configuration before concluding hardware faults. Following a deliberate diagnostic flow reduces frustration and speeds up restoration of camera functionality.
Common pitfalls to avoid
- Skipping permission checks after updates or OS changes.
- Installing unverified drivers from third-party sources.
- Assuming a problem is hardware-only without testing software and BIOS settings.
- Overlooking simple steps like rebooting after changes.
- Ignoring privacy toggles tied to individual apps. By avoiding these missteps, you’ll solve most webcam problems quickly and with less risk of creating new issues.
Quick-check recap and next steps
This troubleshooting guide offers a practical, evidence-based approach to restoring laptop webcam functionality. Start with permissions, then drivers, then BIOS and hardware checks, using cross-platform tests to pinpoint the root cause. When in doubt, lean on a professional for hardware diagnostics. By applying the steps outlined here and avoiding common pitfalls, you’ll be well-equipped to handle future webcam issues and maintain reliable video communication.
Steps
Estimated time: 45-75 minutes
- 1
Power cycle and reboot
Shut down the laptop, disconnect all peripherals, and perform a cold reboot. This resets temporary hardware states that can block the webcam. After reboot, launch a few apps to test the camera.
Tip: Avoid forcing shutdowns; use a proper reboot to preserve system integrity. - 2
Check camera status in OS
Open Device Manager (Windows) or System Information (Mac) and confirm the camera is listed without warning icons. If listed with a warning, update drivers or run a hardware diagnostic.
Tip: Note any error codes shown; they guide the next steps. - 3
Update or reinstall drivers
In Device Manager, right-click the webcam and select Update driver. If no update is available, choose Uninstall and then reboot to reinstall automatically. Re-test across apps after installation.
Tip: Always use official drivers from the manufacturer when possible. - 4
Validate app permissions
Navigate to OS privacy settings and ensure camera access is granted to the affected apps. Reopen the apps and reselect the camera in video settings.
Tip: Some browsers require a page-level permission prompt; grant it when requested. - 5
Test with another app or device
Use multiple apps (Camera app, video conferencing, browser-based capture) and if available, connect an external webcam to compare results.
Tip: If external cam works, the issue is likely internal to the laptop camera or its settings. - 6
Consult professional help if needed
If none of the above resolves the issue, seek professional repair to inspect hardware cables or the camera module.
Tip: Do not attempt internal repairs beyond your comfort level; factory service may be required.
Diagnosis: Camera not detected or no video feed across any application
Possible Causes
- highOutdated or missing webcam drivers
- highCamera access blocked by privacy settings
- mediumBiOS/firmware or hardware switch disabling camera
- lowHardware fault in camera module or cable
Fixes
- easyUpdate or reinstall the webcam driver from the manufacturer or Device Manager, then reboot
- easyCheck and re-enable camera permissions in OS privacy settings for all affected apps
- mediumInspect BIOS/UEFI to ensure the camera is enabled; enable if disabled and save changes, then reboot
- easyTest with a known-good external webcam or consult a technician if hardware fault is suspected
Common Questions
Why is my laptop camera not showing any video?
No video feed usually means a permissions, driver, or BIOS setting issue rather than a complete hardware failure. Start by checking app permissions, then update drivers, and verify that the camera is enabled in the BIOS. If the problem persists across apps, test with another device to determine if the hardware is faulty.
No video feed usually means permissions or driver issues. Check permissions, update drivers, and verify the camera is enabled in BIOS. If it persists across apps, test with another device to confirm hardware status.
How do I enable camera access in Windows 11?
Open Settings, go to Privacy & security, then Camera. Turn on camera access and allow apps to use the camera. Ensure each app you plan to use has permission. If issues continue, update or reinstall the webcam driver.
Open Privacy & security, then Camera, turn on access, and allow apps to use the camera. Check each app's permissions and update drivers if needed.
Why doesn’t the camera work after a Windows update?
Windows updates can reset privacy settings or disrupt drivers. Recheck camera permissions, run Windows Update to reinstall drivers if available, and consider rolling back to a previous driver version if instability appears after the update.
Windows updates can reset camera permissions or drivers. Recheck permissions, update drivers, or roll back a driver if needed.
Do I need to update my camera driver?
Driver updates improve compatibility and fix bugs. Visit the manufacturer’s site or use Device Manager to search for updated drivers. If the update causes instability, revert to the previous version or perform a clean reinstall.
Driver updates boost compatibility. Check the manufacturer site or Device Manager, and revert if issues arise.
My Mac camera isn’t working, what should I do?
On macOS, ensure the app has camera access in System Preferences > Security & Privacy > Privacy > Camera. Update macOS, restart apps, and test. If it still fails, remove and reinstall the problematic app or reset the SMC/PRAM as a last resort.
Make sure apps have camera access in Privacy settings, update macOS, and test again. If needed, reinstall the app or reset system components.
When should I seek professional help?
If you’ve exhausted permissions, driver, and BIOS checks without results or you suspect hardware damage, consult a certified technician. Hardware faults often require hands-on inspection or replacement of the camera module or internal cables.
If basic fixes fail or hardware damage is suspected, seek professional help.
Watch Video
The Essentials
- Start with permissions and updates before hardware checks
- Test across multiple apps to isolate issues
- Use official drivers and avoid untrusted sources
- BIOS and hardware switches can disable cameras
- Have a backup plan with an external webcam