Laptop Camera Guide: How to Use Your Built-In Webcam
Master your laptop camera with this comprehensive guide. Learn to enable, test, and optimize your webcam across Windows, macOS, and ChromeOS, plus tips on lighting, privacy, and troubleshooting.

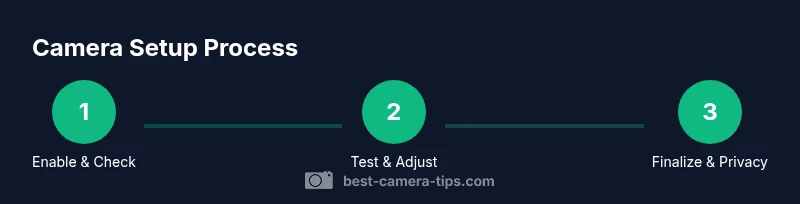
This guide shows you how to use your laptop camera effectively, covering how to enable the built-in webcam across Windows, macOS, and ChromeOS, how to test video quality, improve lighting and framing, and implement reliable privacy and security practices. You’ll find practical steps, recommended tools, and safety tips to ensure clear video for meetings, streaming, and content creation.
Understanding the laptop camera: components and capabilities
Your laptop camera is a compact image sensor paired with a lens, a microprocessor, and driver software. Built-in webcams have evolved from basic sensors to higher-quality modules that support autofocus, exposure control, and digital processing to improve color balance and detail. The quality you get depends on the sensor, lens quality, frame rate, and lighting. Ensure the camera is recognized by the operating system and that the latest drivers are installed. A solid foundation starts with knowing how the camera integrates with your OS and apps, which helps you diagnose issues quickly and choose settings that fit meetings, streaming, or casual video calls.
Key takeaway: built-in cameras are capable performers when properly enabled and configured, and understanding their limitations helps you set realistic expectations.
Quick-start: enabling cameras on Windows, macOS, and ChromeOS
Across major operating systems, the first step is to verify that your camera is enabled and not blocked by privacy settings. On Windows, check under Privacy > Camera to ensure apps have permission to access the device. On macOS, visit System Settings > Privacy & Security > Camera and grant access to the apps you use. On ChromeOS, open Settings > Privacy and security > Site settings > Camera and allow access for trusted sites and apps. After enabling, launch a camera app or a video conferencing tool to confirm the camera is active. If multiple cameras exist (such as an external webcam), choose the preferred device in the app’s settings. Pro tip: restart the device after changing privacy toggles to ensure changes take effect.
Testing and benchmarking your webcam quality
Testing your webcam helps you quantify readiness for meetings or streaming. Start with a simple test in your default camera app and note brightness, color accuracy, and sharpness. Open a video call or recording app to assess real-time performance, then compare results across at least two apps to ensure compatibility. If you notice color shifts or grain in low light, you may need to adjust exposure, white balance, or lighting. Recording a short sample video lets you review facial detail, movement smoothness, and facial tracking performance. Keep a baseline test in mind so you can measure improvements after adjustments.
Lighting, framing, and audio: how to get professional-looking video
Lighting is the single biggest factor in webcam quality. Use a soft, diffuse light source in front of you, ideally at chest height, so your face is evenly lit without harsh shadows. Position the camera at or slightly above eye level for flattering framing, and keep the background uncluttered to minimize distractions. If audio matters, pair a decent microphone with the camera for clearer speech. When possible, use natural light from a window balanced with a secondary light source to avoid flat, washed-out tones. A stable mount or tripod (even for a laptop) helps keep the frame steady during long calls.
Privacy, security, and safety best practices
Privacy should be a priority with any webcam setup. Use a physical privacy shutter when the camera isn’t in use, review app permissions regularly, and avoid granting blanket access to unknown apps. Update drivers and OS patches to mitigate security vulnerabilities. Consider enabling hardware indicators (LED) that show when the camera is active, and periodically audit which programs have camera access. Finally, be mindful of background content and avoid streaming sensitive information when in public or shared spaces. These practices help protect your privacy without sacrificing convenience.
Tools & Materials
- Laptop with built-in webcam(Ensure the lens is clean and unobstructed)
- Operating system (Windows/macOS/ChromeOS)(Keep up-to-date with latest updates)
- Camera app or video conferencing software(Test across at least two apps)
- Stable internet connection(Important for online meetings and streaming)
- External webcam (optional)(Useful for higher quality or USB camera compatibility)
- Lighting source(Natural light or a diffuse LED light panel)
- Privacy cover (shutter)(Protect privacy when not using the camera)
- External microphone (optional)(Improves audio clarity for recordings or calls)
Steps
Estimated time: 30-60 minutes
- 1
Inspect camera hardware and enable it in settings
Verify that the built-in camera is present in Device Manager (Windows) or System Information (macOS). Check privacy toggles to ensure the camera is allowed for apps you use. If the camera is disabled, enable it and restart the device to apply changes.
Tip: If the camera isn’t listed, try a basic OS update or reinstall the camera driver. - 2
Open a camera app to test
Launch a basic camera app or video conferencing tool to confirm the camera is capturing. Look for live preview, adjust exposure if available, and note any lag or blurry imagery. If you see an error, proceed to permission checks.
Tip: Use at least two apps to verify cross-compatibility. - 3
Grant camera permissions to apps
In Windows, macOS, and ChromeOS, ensure each app has explicit permission to access the camera. Review privacy dashboards and revoke access for unused apps. This prevents silent camera access and improves security.
Tip: Only grant permissions to trusted applications. - 4
Tune basic image settings
Within the camera app or OS settings, adjust brightness, contrast, and white balance. If available, set the resolution to the highest supported by your device. Test again after changes to see improved clarity.
Tip: Avoid pushing brightness too high; it can wash out details. - 5
Improve lighting and framing
Position yourself so the light faces your face; avoid overhead lighting that creates shadows. Frame yourself with a clean background and keep the camera at or slightly above eye level for flattering perspective.
Tip: A small, diffuse light source at 45 degrees from the camera works well. - 6
Consider external hardware if needed
If the built-in camera quality remains subpar, connect an external USB webcam and adjust its settings within the chosen app. External mics can also dramatically improve audio capture for recordings and calls.
Tip: Check USB ports for power and stability; use a powered hub if necessary. - 7
Implement privacy and security controls
Install a privacy shutter when not using the camera and review software permissions regularly. Keep drivers updated and enable LED indicators to confirm when the camera is active.
Tip: Schedule a monthly privacy audit to keep settings current.
Common Questions
What should I do if the laptop camera isn’t working after a Windows update?
First, check privacy settings to ensure camera access is allowed for apps. If needed, roll back recent driver updates or reinstall the camera driver. Run built-in troubleshooter if your OS provides one, and test with multiple apps to confirm the issue persists.
If the camera stops working after an update, check privacy permissions, reinstall drivers, and use a built-in troubleshooter to identify the problem.
How can I test my webcam on macOS?
Open a camera-enabled app like FaceTime or Photo Booth to view the live feed. If the image looks off, adjust exposure in the app or System Preferences, and verify that the app has camera permission in Security & Privacy.
Use FaceTime or Photo Booth to test the camera on macOS and adjust permissions if needed.
Is external hardware worth it for better video quality?
If the built-in camera doesn’t meet your needs, an external USB webcam can offer higher resolution, better lens quality, and improved low-light performance. Pair it with a good microphone for clearer voice and a professional setup.
An external webcam can significantly improve quality if your built-in camera isn’t enough.
What’s the simplest way to improve lighting without buying gear?
Use natural light facing you, diffuse harsh light with a white curtain or a softbox, and place a secondary light at a 45-degree angle. Avoid strong backlighting that washes out your face.
Face the light source and diffuse it to reduce harsh shadows.
How do I protect my privacy while using my laptop camera?
Keep a physical privacy shutter when not using the camera, review app permissions regularly, and enable LED indicators if available. Regularly update drivers and OS security patches.
Use a privacy shutter and review permissions to protect your camera from unauthorized access.
Watch Video
The Essentials
- Identify and enable the built-in camera across OS.
- Test with multiple apps to confirm reliability.
- Improve lighting and framing for clearer video.
- Protect privacy with shutters and permission audits.
- Keep drivers and software updated for security and compatibility.