How to Turn Camera When Recording iPhone
Learn how to turn the camera during iPhone video recording, including flipping between front/rear, changing orientation, and maintaining audio. A comprehensive, step-by-step guide with tips from Best Camera Tips.

Learn how to turn the camera while recording on iPhone. This quick guide covers flipping between front and rear cameras, adjusting orientation, and resizing framing without stopping your shot. You’ll learn when mid-record camera switches are supported, how to maintain audio quality, and how to keep your footage steady during transitions.
Why turning the camera mid-record matters
According to Best Camera Tips, controlling when and how you switch your camera during a recording can dramatically affect storytelling, framing, and how viewers perceive movement. If you’re asking how to turn camera when recording iphone, understanding the built-in controls gives you flexibility to capture multiple angles without stopping the take. In practice, a quick flip or a deliberate rotation can reveal a new subject, cover a different side of a scene, or help you follow action more naturally. This is especially useful for interview segments, unscripted moments, and dynamic vlog sequences. When used intentionally, mid-record camera turns keep viewers engaged and reduce the need for later edits. The approach also helps you adapt to changing light, background activity, and changing subjects, all while maintaining a coherent narrative. Practice in a controlled environment before a live shoot to build muscle memory and rely less on trial-and-error during critical moments.
How iPhone orientation works during video capture
The iPhone uses the device's physical orientation to determine whether a video is recorded in portrait or landscape mode. When you rotate the phone, the Camera app typically adjusts the preview and the resulting file to match. If you want to switch orientation mid-record, first check the Orientation Lock setting in Control Center and disable it if necessary. With Lock Rotation off, you can rotate from portrait to landscape and back, and the recording should adapt; however, abrupt turns can cause a momentary visual shift. Some devices or iOS versions handle orientation changes as separate clips, which can affect continuity. Plan transitions at natural moments — for example, a pause between actions or a move from one subject to another — to keep framing consistent. In practice, spending a few minutes practicing rotation on a short clip will pay off for longer shoots.
Switching between front and rear cameras while recording
Many iPhone models support flipping between the front and rear cameras during video by tapping the Flip button (the camera-with-arrows icon). This enables two perspectives in a single take, ideal for facial-first storytelling, tutorials, or experiential footage. If your device or iOS version does not show the Flip button, or if flipping creates a noticeable jump in framing, stop the current clip and restart to preserve consistency. Always test this feature before an important shoot, since availability and behavior can vary by model. Pro tip: keep your subject centered during the swap and verify exposure after the switch, as lighting can change when you switch cameras.
How to change framing and lens on supported models
On devices with multiple lenses, you may be able to switch between wide, ultra-wide, and telephoto during a video by tapping the lens selector (often labeled 0.5x, 1x, 2x) or by performing a controlled zoom gesture. The exact controls depend on your iPhone model and iOS version. If mid-record lens switching isn’t available, use the zoom control or switch lenses between separate takes to capture different perspectives. When lens changes occur, reframe to keep the subject in focus and maintain consistent exposure. For best results, practice with a stationary subject first to learn how each lens affects framing and depth.
Step-by-step actions you can perform during recording
This section presents a practical sequence you can follow in a typical iPhone run-and-gun shoot. It emphasizes a smooth flow to minimize disruption and to keep audio aligned. While the availability of mid-record flips or lens changes depends on your device, you can prepare so each action feels deliberate. Start with a short practice clip to verify that orientation and camera flips behave as expected, then apply the steps to your real project. The aim is to build a reliable, repeatable routine you can rely on when moments count.
Common pitfalls and how to avoid them
- Inconsistent framing when the camera flips: keep your subject centered and use a quick, gentle motion.
- Sudden exposure shifts after a flip: lock in lighting with manual exposure when possible, or ensure stable ambient light.
- Audio gaps during transitions: if your iPhone’s internal mic picks up a click or pop, consider using an external microphone or a quick external clap to align audio in post.
- Orientation lock left on: always check Control Center before starting a mid-record change.
- Overusing zoom: digital zoom degrades quality; prefer shorter, closer shots or multiple takes with different lenses.
Best practices for audio and stabilization when you flip cameras
Mid-record camera switches can introduce micro-shakes and audio discontinuities. To minimize these effects, use a stable mount, tripod, or gimbal whenever possible. Maintain a steady stance, keep elbows tucked, and practice slow panning during a camera swap to avoid abrupt motion. For audio, consider using an external mic or a secondary audio track to ensure consistent quality across segments. If you anticipate a switch, brief pause the recording or implement a clap to help syncing in post. Lighting should remain balanced across shots to avoid jarring exposure changes when you flip.
Next steps: practice, review, and post-production tips
The most reliable way to master turning the camera while recording on iPhone is deliberate practice and review. Create a short test sequence that includes a few flips, orientation changes, and lens adjustments. Review the footage for continuity, sound quality, and framing, and note where transitions feel natural or abrupt. Use basic editing tools to trim, color-match, and stabilize transitions, then export a final cut that maintains consistent exposure and sound. Remember to plan shots with your end goal in mind, and keep the camera movement purposeful rather than decorative. According to Best Camera Tips, consistent practice yields recognizable improvements in both technique and storytelling.
Tools & Materials
- iPhone with latest iOS version(Ensure your device is updated to the current iOS for best compatibility with mid-record camera controls)
- Stable grip or tripod(Keep the device steady to minimize shakes during camera flips)
- External microphone (optional)(Helps preserve audio when you switch angles)
- Lighting source (optional)(Good lighting helps minimize exposure shifts when you flip cameras)
Steps
Estimated time: 15-25 minutes
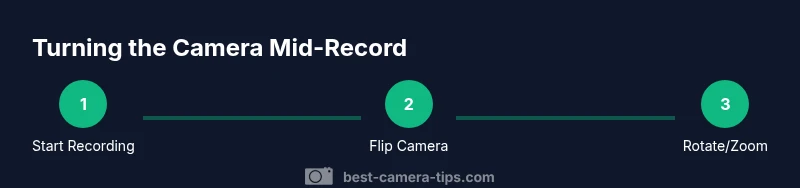
- 1
Prepare device settings
Open the Camera app, select Video mode, and verify orientation lock is off. If you plan to flip later, position the device so your subject is centered.
Tip: Turn off Orientation Lock in Control Center before you begin. - 2
Start recording
Tap the Record button and check audio levels visually if available. Keep your grip steady throughout.
Tip: Hold the phone with two hands for stability. - 3
Flip camera to switch perspectives
Tap the Flip button to switch between front and rear cameras. Do this quickly and smoothly to minimize frame jitter.
Tip: Pause briefly if you must, to reframe after the switch. - 4
Change orientation if needed
Rotate the device to switch between portrait and landscape once the flip is complete, provided orientation lock is off.
Tip: Rotate slowly to avoid abrupt motion that viewers notice. - 5
Adjust framing and zoom
Use pinch-to-zoom or the on-screen zoom slider to reframe after the switch. Maintain a natural field of view and avoid over-zooming.
Tip: Aim to stay within 2x zoom for best quality. - 6
Finish and review
Stop recording, review the clip, and note any transitions that need smoothing in post. Re-record if necessary for a cleaner sequence.
Tip: Label clips by angle and orientation for easier editing.
Common Questions
Can I flip the camera while recording on all iPhone models?
Not all models or iOS versions support mid-record flips; check your device. If unavailable, you may need to stop the current clip and start a new one.
Mid-record camera flipping depends on your model and iOS version; some devices support it, others don’t.
How do I disable orientation lock on iPhone?
Open Control Center (swipe down from the top-right on newer iPhones), then tap the rotation lock icon to turn it off. This allows you to rotate the device during recording.
Open Control Center and tap the rotation lock icon to disable orientation lock.
Will flipping affect audio quality?
There can be a brief audio discontinuity when flipping. Using an external mic or capturing a separate audio track can help maintain consistency.
Flipping can cause a small audio gap; use an external mic if possible.
Is mid-record lens switching available on all models?
Lens switching mid-record is model- and version-dependent. If unavailable, switch lenses between takes or use zoom for framing changes.
Lens switching during recording depends on your device; check your model’s capabilities.
What’s the best practice for mid-record transitions?
Plan transitions in advance, keep movements smooth, and limit rapid changes to avoid disorienting the viewer.
Plan your transitions ahead of time and keep movements smooth.
How should I review and edit mid-record footage?
Review the clips for continuity, audio quality, and framing. Use simple edits to align angles, color-match, and stabilize transitions.
Check for continuity and audio, then edit for smooth transitions.
Watch Video
The Essentials
- Know when mid-record camera flips are supported on your model
- Disable orientation lock to enable smooth transitions
- Use front and rear perspectives to enrich your shot
- Keep motion and zooming intentional to maintain stability
- Review clips and plan edits for a polished final product