Can You Switch Camera While Recording on iPhone? A Practical Guide
Learn how to switch cameras mid-recording on iPhone, when it's possible, and best practices for smooth transitions. Includes QuickTake behavior, troubleshooting, and tips for aspiring photographers and home security enthusiasts.

Yes. You can switch between the front and rear cameras while recording on iPhone using the Camera app and QuickTake: tap the flip camera button to cycle between lenses, and you can toggle back and forth mid-shot. Be aware that exposure and stabilization may shift briefly, and some older devices or third-party apps may not support mid-recording switching.
Why switching cameras mid-recording matters
Switching cameras mid-recording can add dynamic perspective to your footage, letting you capture wide establishing shots with the rear camera and then switch to a face-shot with the front camera for interview or narration moments. This technique is popular among vloggers, educators, and home security enthusiasts who want a seamless, multi-point view without restarting the recording. According to Best Camera Tips, planning a few switch moments ahead of time helps maintain continuity and reduces post-production edits. When done thoughtfully, the transition feels intentional rather than jarring, elevating storytelling and viewer engagement. Keep in mind that every switch demands steady handling and quick decisions about lighting, exposure, and framing to preserve video quality across lenses.
Quick overview: what changes when you switch
On recent iPhone models, switching between lenses during recording leverages the same sensor and processing pipeline, but each camera has its own characteristics—field of view, depth, and stabilization profile. Switching can cause minor exposure adjustments and a brief autofocus recalibration. In stable conditions, these shifts are almost imperceptible; in low light or high-contrast scenes, you may notice a momentary color or brightness change. If you’re aiming for professional-looking results, rehearsing the switch and keeping your subject framed consistently helps keep the edit smooth and the narrative clear.
How exposure and white balance behave during flips
Automatic exposure and white balance react to changes in lens characteristics. When you flip, the camera might reframe and reexpose to optimize histogram balance in the new perspective. This is usually quick, but in scenes with strong lighting changes (sunlight to shade, LED to natural light), you may see a brief flicker or color shift. To minimize this, try to lock exposure and white balance beforehand when possible, then flip, rather than letting the camera chase exposure in real time.
Practical scenarios where flipping is valuable
- Vlogging: start with a wide shot from the rear camera, then flip to a close-up with the front camera for a talking-head moment.
- Tutorials: show your hands and demonstration from the rear lens, then switch to the front lens to address the audience.
- Interviews or guidance: capture a subject with the rear camera and switch to the front camera for a personal reaction or narration.
- Home surveillance walkthroughs: narrate a scene with the front camera while keeping a wider context in the rear shot.
Using flips strategically helps you tell a story without pausing the recording, which is especially helpful for on-the-go creators and security monitoring.
Device and app compatibility considerations
Most modern iPhone models support mid-recording camera flips in the native Camera app and QuickTake. However, some third-party camera apps may not allow flipping while recording, and older iPhone generations or iOS versions may have limited support. If you rely on an app for production workflows, test the flip feature before a critical shoot. If you experience issues, updating iOS and the app, restarting the device, or temporarily recording with the default Camera app can help.
How to approach the flip without breaking the flow
- Plan your sequence: decide in advance which moments require a camera switch.
- Maintain a consistent framing: keep your subject roughly centered to simplify post-production.
- Use a tripod or stabilizer: a stable base reduces micro-movements during a flip.
- Practice the motion: quick, clean taps with a controlled grip produce cleaner results than slow, uncertain flips.
- Review immediately: skim the clip after recording to confirm the switch looks intentional and not jarring.
Audio considerations when flipping cameras
Audio generally comes from the device’s built-in microphones and is not separately tied to a specific lens. If you’re moving between cameras, wind noise and ambient sounds may interact with the mic placement briefly. A compact external microphone or a lavalier can help maintain consistent sound quality across camera flips, especially in noisy environments. If you must switch in a noisy room, consider pausing briefly or using a post-production audio fix to ensure a seamless audio track.
Common pitfalls and how to avoid them
- Over-zooming or abrupt framing changes: practice stable transitions and avoid sudden target shifts.
- Exposure jumps: time your switch in consistent lighting conditions or lock exposure beforehand.
- Inconsistent audio levels: balance mic input or plan a quick edit to smooth levels later.
- Rushed flips in dynamic scenes: rehearse the sequence and use a stabilizer to reduce shake.
With awareness of these factors, mid-recording camera flips become a powerful tool rather than a risky experiment.
Post-production notes: polishing the transition
If your footage reveals a small jump between camera angles, a quick cut or crossfade during editing can mask the transition. You can use color matching, consistent white balance, and gentle motion blur to harmonize the two clips. This approach helps preserve pacing and preserves the narrative flow, making viewers less aware of the switch.
Accessibility and usability tips for a better experience
- Enable Grid and Level features to keep shots straight during a flip.
- Use VoiceOver or magnification features if you’re adjusting settings while recording.
- Keep your device in a comfortable grip to reduce fatigue during longer shoots.
- Document your plan for quick reference so you can execute flips confidently on camera.
Final thoughts: practice, plan, and review
Switching cameras mid-recording is a practical skill that, when used thoughtfully, expands your storytelling toolkit. Practice with a simple shot list, test across lighting conditions, and review results to refine your technique. The Best Camera Tips approach emphasizes deliberate experimentation paired with consistent methods, so you can grow your confidence and creativity with each session.
Tools & Materials
- iPhone with latest iOS(Ensure QuickTake and flip camera control are supported on your model.)
- Stable mounting (tripod/handheld grip)(Reduces shake during flips and maintains consistent framing.)
- Native Camera app(Used for mid-recording camera flips in standard capture mode and QuickTake.)
- Optional external microphone(Improve audio consistency across flips (especially on-the-go).)
- Power source(Keep a charged battery or portable power bank for longer shoots.)
Steps
Estimated time: 15-25 minutes
- 1
Prepare your shot plan
Decide in advance which moments will switch cameras and what each angle will capture. Set up framing for both lenses so the transitions feel intentional. Why: Planning reduces ad-hoc switches that disrupt flow.
Tip: Write a quick shot list and rehearse the sequence before recording. - 2
Start recording with your primary camera
Begin with the lens you want for the opening shot (rear or front). Keep your grip steady and maintain consistent lighting. Why: A stable start helps later transitions look seamless.
Tip: Use a tripod or stabilized grip for any motion during the flip. - 3
Tap the flip camera control to switch lenses
While recording, tap the flip camera button to switch to the other lens. Do not tilt the device abruptly; make a clean, deliberate flip. Why: A smooth, intentional flip minimizes jarring motion.
Tip: If your model supports QuickTake, you can flip without pausing the recording. - 4
Reframe quickly after the switch
After flipping, adjust your stance and framing to keep the subject centered. A minor readjustment can prevent a jump cut look. Why: Consistent framing maintains narrative continuity.
Tip: Practice quick thumb and hand positioning to avoid camera shake. - 5
Assess exposure and white balance
Check if the new lens needs minor exposure tweaks. If possible, lock exposure before flipping to reduce flicker or color shifts. Why: Consistent color makes the final edit smoother.
Tip: Use the lock exposure/WB option if your iPhone supports it. - 6
Continue recording or switch back as needed
Proceed with your planned sequence; you can flip back to the original angle if the shot requires it. Maintain a steady tempo so the viewer doesn’t notice the transition. Why: Controlled rhythm keeps audience engagement.
Tip: Avoid flipping during rapid action unless necessary for the story. - 7
Review and trim in post
After filming, review the clips and trim any awkward frames around the switches. Use gentle crossfades or cuts to hide minor mismatches if needed. Why: Post-production polish enhances perceived quality.
Tip: Label the clips by which lens was used for easier editing.
Common Questions
Can you switch cameras while recording on an iPhone?
Yes, you can switch between the front and rear cameras while recording on iPhone using the Camera app (and QuickTake on supported models). Some third-party apps may not support mid-recording flips, and older devices may have limited functionality.
Yes, you can flip the camera during recording on iPhone with the native Camera app on supported models. Some apps or older devices might not support it.
Does switching cameras affect audio quality or synchronization?
Audio is generally continuous, as the device mic remains active regardless of which lens is active. A brief moment of ambient sound change may occur if the flip coincides with motion, so consider a quick post-shot audio check.
Audio stays connected to the device mic; flips might cause a tiny ambient sound variation, which you can fix in editing.
Are there any iPhone models or iOS versions that don’t support mid-recording flips?
Most recent iPhone models support mid-recording flips in the native Camera app, but some older devices or non-native apps may not. Always test on your device before critical shoots.
Most new iPhones support mid-recording flips, but check your model and iOS version first.
What if exposure jumps when I flip lenses?
Exposure changes are common when switching lenses. Locking exposure before flipping and keeping lighting consistent helps minimize jumps during the transition.
Exposure can jump when you flip lenses; locking exposure helps keep things steady.
Can I flip cameras while recording with third-party apps?
Some third-party filming apps do not support mid-recording flips. If you rely on a specific app, test its behavior during a rehearsal.
Some apps don’t allow flipping while recording; test before production.
What’s the best workflow for switching during a tutorial?
Plan a few switch moments, rehearse the sequence, and edit transitions in post for a polished result. Use a stabilizer and consistent lighting to keep the narrative cohesive.
Plan, rehearse, and edit transitions to keep your tutorial smooth.
Watch Video
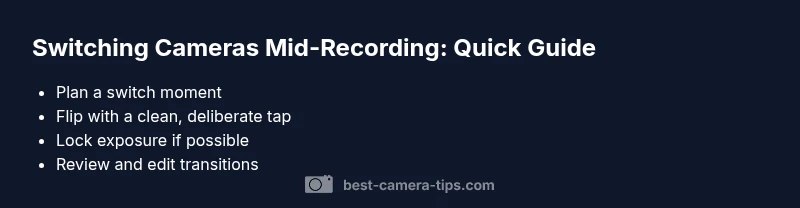
The Essentials
- Plan switching moments before you start recording.
- Maintain stable framing to avoid jarring transitions.
- Expect minor exposure changes when flipping between cameras.
- Test the workflow on your device to confirm compatibility.
- Edit transitions for a smooth final video.