How to Change Camera When Recording Video on iPhone
Learn how to switch between front and rear cameras (and switch lenses) while recording video on iPhone. This step-by-step guide covers controls, tips, and troubleshooting to help you capture dynamic footage with confidence.

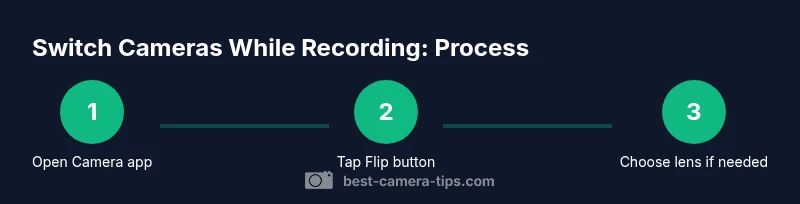
To switch cameras mid-recording on iPhone, tap the camera flip button to toggle between front and rear cameras, and, if available, tap the lens selector to switch between wide, ultra-wide, or telephoto. Start with the camera you want, ensure proper lighting, then flip once to capture alternate perspectives without stopping the video. Practice in a controlled setting first.
Why changing cameras mid-recording can boost storytelling
In dynamic video storytelling, you rarely want to stay locked to one viewpoint from start to finish. Switching between camera angles during a single take can add energy, reveal different details, and help you explain a concept more clearly. The question of how to change camera when recording video iphone is common among aspiring filmmakers and home security enthusiasts who want to capture more context without pausing the recording. On the iPhone, you can alternate between the front-facing camera for talking head moments and the main rear camera to show the scene, without stopping the video. This flexibility is especially valuable for tutorials, product demos, or ambient surveillance footage that benefits from multiple perspectives. The key is to plan the transition, ensure your framing is ready, and practice the motion so the cut feels intentional rather than abrupt. By mastering this technique, you can tell more complete stories with fewer takes, and you can preserve continuity in your workflow. Best Camera Tips's guidance emphasizes deliberate transitions, stable framing, and awareness of lighting when flipping cameras during a recording session.
iPhone camera architecture and lens options
The iPhone camera system offers multiple lenses that you can blend into a single recording. Front camera work is ideal for host segments, while rear cameras provide broader context and detail. Recent iPhones expose 1x, 0.5x (ultra-wide), and 2x (telephoto) options on the rear module, along with the ultra-wide and standard wide lenses. When you switch cameras during recording, you’ll be toggling between these lenses if your model supports in-video lens changes. Understanding which lens mode best suits your scene helps you capture a compelling sequence without over-stretching memory or battery. If you plan a narrative with several perspectives, sketch a quick shot list that assigns a moment to each lens. This approach aligns with Best Camera Tips’s practice of pre-visualizing transitions to maximize impact while keeping settings consistent.
Where to locate the switch controls in the Camera app
To switch cameras while recording on iPhone, you generally use the camera flip button visible on the screen during video capture. This control toggles between the front and rear cameras. If your model supports multiple rear lenses, you’ll also see a lens control (often showing 1x, 0.5x, or 2x) to switch between wide, ultra-wide, and telephoto. Make sure you’re in Video mode; attempting to switch while paused or in Photo mode won’t translate into a recording. Practicing the exact location of these controls in a quiet space helps reduce hesitation during live shoots. Keeping a clean screen and avoiding screen occlusion while filming ensures your flips remain clean and intentional.
Core workflow for switching while recording (core workflow)
The practical takeaway is to begin with a setup you’re comfortable with, press record, and then execute a deliberate flip when you have the composition ready. If you’re using multiple rear lenses, switch lenses during a brief hold in a stable frame to avoid abrupt motion. After flipping, reframe quickly and smoothly to preserve continuity. Remember that lighting and exposure can shift with each lens or camera, so be prepared to adjust exposure by tapping and holding on the subject to lock AE/AF between switches.
Lighting and exposure considerations when switching cameras
Exposure can change when you flip cameras due to different sensor sizes or lens characteristics. To maintain consistency, lock exposure before flipping by tapping and holding on the subject until AE/AF locks. If you’re moving from a bright scene to a darker one, consider increasing your lighting or white balance slightly before the flip so the transition doesn’t feel jarring. In addition, use consistent ambient lighting where possible, and avoid large, fast changes in light during the flip moment. This helps you keep color temperature steady and reduces post-production adjustments.
Audio considerations during camera changes
Audio can be disrupted when you flip cameras, especially if you rely on the built-in mic of the phone. If possible, keep a stationary mic or external mic in the same spot for both camera angles, or use a secondary mic near the subject. If you cannot, be mindful of the mic’s distance to the subject when you flip, and consider a short pause before the transition to capture a clean audio cut. In quick scenarios, you can splice voiceovers in post to preserve narration quality while maintaining real-time visuals.
Tips for handheld vs gimbal setups
If you’re moving while you flip between cameras, a gimbal or stabilizer helps maintain smooth motion. Practice slow, deliberate pans and small rotation during the flip window to minimize wobble. A shallow, well-lit shot with a stable hold will read as a seamless transition rather than a camera shake. For handheld work, keep your elbows tucked and your feet planted, and consider a brief pause between angles to reset framing and lighting before resuming motion.
Common mistakes to avoid and how to fix them
A frequent error is flipping too quickly without preparing the next frame, which creates jump cuts that can be distracting. Another pitfall is changing lighting drastically mid-transition, producing obvious exposure shifts. To improve, plan your shots with a simple cue for when to flip, lock exposure before the flip, and keep your subject centered in both configurations. If you notice a color shift, re-balance white balance after the flip and do a quick exposure tweak if needed.
Practice plan to master this technique
Create a small practice routine: choose a 60-second scene and perform three different camera configurations—front-only, rear-wide, and rear-tele—within that minute. Focus on timing, framing, and audio consistency as you flip. Record in a controlled environment with stable lighting and a quiet background. Review the footage for continuity and adjust your flip cadence until transitions feel natural. Regular practice with intent speeds up on-set confidence.
Practical examples and use cases
Vloggers can dramatically improve pacing by flipping from a talking head to a contextual scene. Tutorial creators benefit from alternating angles to show details up close, then pull back to reveal the bigger picture. In home security footage, you can quickly pivot from a door view to a room angle to verify activity, providing richer context without restarting the recording. The key is to practice and implement consistent flip cues that your audience can follow.
Tools & Materials
- iPhone with the latest iOS(Ensure camera controls are up to date for reliable flipping.)
- Stable mount or tripod(Helpful for steady transitions, especially in longer takes.)
- External microphone (optional)(Improves audio consistency across angles.)
- Adequate lighting(Use soft, even light to minimize exposure shifts during flips.)
- Storage and battery headroom(Long recordings require enough space and power.)
Steps
Estimated time: 12-20 minutes
- 1
Prepare your shot
Open the Camera app in Video mode and frame your starting angle. Check lighting, background, and subject distance. Confirm you’re ready to switch when the action begins.
Tip: Aim for a clean, balanced frame before you start recording. - 2
Set initial camera
Select the camera you want to begin with—front for talking moments, rear for context. Lock exposure if possible by tapping and holding on the subject until AE/AF locks.
Tip: Locking exposure helps prevent sudden light changes during the flip. - 3
Start recording
Tap the red Record button to begin. Keep your subject still for the first few seconds to establish framing.
Tip: Having a short stable lead-in reduces the impact of the switch. - 4
Flip to the other camera
Tap the camera flip button to switch to the other camera. If you’re using multiple rear lenses, tap the lens control to switch lenses if needed.
Tip: Make the flip a deliberate action rather than a quick, frantic gesture. - 5
Reframe after flip
Quickly adjust your framing and keep subject placement consistent. Check lighting and keep audio levels stable.
Tip: Pause for a breath or micro-adjustment if necessary to maintain smoothness. - 6
End and review
Stop recording and review the clip. Note any exposure or framing shifts and plan adjustments for next passes.
Tip: Note the exact flip moments for smoother edits later.
Common Questions
Can I switch cameras while recording on all iPhone models?
Most recent iPhone models allow you to flip between front and rear cameras during video recording. Some older devices may have limited support for switching lenses mid-record. Always test on your specific model before relying on this in a professional shoot.
Yes, on newer iPhones you can flip between front and rear during recording, but test on your device to be sure it supports lens changes.
Will switching cameras affect video quality or frame rate?
Switching cameras should not drastically impact video quality or frame rate if lighting is stable. You may observe minor lighting or exposure changes depending on the lens being used, which you can correct with exposure lock and white balance tweaks.
There’s usually no major quality drop, but be ready for small lighting changes when you flip lenses.
How do you switch between ultra-wide and telephoto while recording?
Use the lens selector shown on screen if your iPhone model supports it. Tap 0.5x for ultra-wide, 1x for wide, and 2x for telephoto. Not all models expose all lenses during video; plan accordingly.
Tap the lens control to switch between ultra-wide, wide, and telephoto where available.
Is there a shortcut or gesture to switch cameras?
There isn't a universal external shortcut; the switch is primarily a screen button in the Camera app. Some third-party apps may offer different controls, but the built-in app relies on the flip button.
No universal shortcut in the default app; use the on-screen flip button.
Can I lock exposure while flipping between cameras?
Yes. Tap and hold on the subject until AE/AF locks. This helps maintain consistent brightness across camera switches.
Lock exposure before flipping to keep brightness steady.
What should I do if the camera flip doesn’t register during recording?
First check that you’re in Video mode and that the app isn’t frozen. If needed, pause the recording, close and reopen the Camera app, and test the control before resuming.
If it doesn’t register, pause, restart the app, and test again.
Watch Video
The Essentials
- Plan flips to maintain continuity and storytelling flow.
- Lock exposure before switching angles to avoid lighting shifts.
- Practice with basic setups to build confidence quickly.
- Use a stable mount for smoother transitions.
- Review footage and refine your flip timing.