How to Fix Camera on iPhone: A Practical Troubleshooting Guide
Learn practical, safe steps to fix camera issues on your iPhone—from lens cleaning to software resets. A comprehensive, user-friendly guide for quick, reliable results.

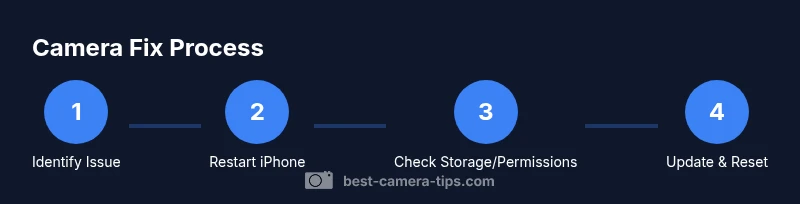
If your iPhone camera misbehaves, you can usually fix it with a structured sequence: confirm symptoms, restart the device, check storage and permissions, apply software updates, force-quit and reopen the Camera app, and clean the lens. For persistent issues, reset settings or seek professional help. This guide walks you through each step.
Why the iPhone camera might fail
A malfunctioning iPhone camera can stem from software glitches or hardware wear. Common symptoms include blurry images, camera app crashes, lens obstruction, or the screen going black when you try to take a photo. The goal when you search for how to fix camera on iphone is to identify whether the issue is software-related, a lens problem, or something in between. In most cases, software conflicts, storage limits, or permissions mismatches are easily resolved with guided steps. If the symptoms persist after basic fixes, you may be facing a hardware fault that requires professional inspection. This section helps you distinguish between quick DIY fixes and scenarios where professional service becomes necessary.
Quick checks before deep troubleshooting
Before diving into deeper fixes, perform a lightweight diagnostic pass. Check that you have enough free storage space, as a full drive can cause camera malfunctions. Verify app permissions for the Camera app, ensuring it can access the camera, microphone, and photos. Confirm you’re running a recent iOS version, as outdated software can cause compatibility issues. Finally, try taking a photo in a different app (e.g., a third-party camera app) to determine if the problem is isolated to the stock Camera app or affects the camera sensor itself.
Software fixes you can try safely
Software fixes address the majority of camera issues. Start with a simple restart, then force-close the Camera app and reopen it. If the problem persists, update iOS to the latest version and ensure Camera app updates are installed. For persistent issues, resetting all settings (without erasing data) can resolve misconfigurations that block the camera from functioning properly. Each step is designed to be non-destructive and reversible, so you can back out if something doesn’t help. Keep in mind that some fixes may require waiting for the system to complete updates or resets, which could take several minutes.
Lens care and physical checks
Even a software fix won’t help if the lens is dirty, scratched, or obstructed. Clean the lens gently with a microfiber cloth, and use a soft brush or compressed air to remove debris around the camera area. Inspect the rear camera housing for cracks or moisture. If you notice condensation or water exposure, avoid forcing the camera to work and seek professional care. Physical damage often manifests as blurry images with color artifacts or a visible gap around the lens.
Hardware considerations and when to seek help
If basic troubleshooting fails, determine whether the issue affects all camera modes (Photo, Portrait, Video) or only one mode. Some issues require hardware evaluation, such as loose camera modules or sensor damage, which can occur after drops or impacts. In such cases, avoid DIY disassembly unless you have specialized training, as it can void warranties and cause more damage. Contact Apple Support or authorized service providers for a professional assessment and repair.
Realistic expectations and results after fixes
When software fixes succeed, you should notice clearer photos, accurate autofocus, and stable video capture across modes. If the issue persists after all safe software steps, plan for a hardware diagnostic. In some cases, camera replacements or module repairs are covered under warranty or AppleCare+. Understanding what’s actionable at home versus what requires service helps you budget time and cost effectively.
Prevention: keep your iPhone camera healthy
Implement routine maintenance to prevent future issues. Keep iOS updated, manage storage, and review app permissions periodically. Use a protective case that shields the camera from impact, and avoid exposing the lens to moisture. Regularly clean the lens with a microfiber cloth and inspect the camera area after drops or exposure to moisture. Proactive care reduces the chance of recurring camera problems.
Tools & Materials
- Microfiber cleaning cloth(Lint-free and soft to avoid scratching the lens)
- Lens cleaning solution(Use a dedicated lens cleaner or plain water; avoid alcohol on lenses)
- Soft brush or air blower(Gently blow away dust around the camera housing)
- Phone stand or stable surface(Helps you test camera angles while following steps)
- Backup device case for moisture(If moisture exposure is suspected, keep the phone safe and dry)
Steps
Estimated time: 45-75 minutes
- 1
Identify the issue and reproduce
Clearly note what goes wrong: blurry photos, black screen, lag, or crashes. Reproduce the behavior by taking a photo in different modes and with/without apps. Document timing and any patterns to help diagnose.
Tip: Keep a short log of symptoms and times to compare after each fix. - 2
Restart the iPhone
A simple restart can clear temporary glitches affecting the camera. Power off completely, wait 15–30 seconds, then power back on and test the Camera app.
Tip: If a regular restart doesn’t help, perform a force restart following your iPhone model’s instructions. - 3
Check storage and permissions
Verify you have enough storage for photos/videos and that Camera has permission to access photos, microphone, and camera. Go to Settings > General > iPhone Storage and Settings > Privacy > Camera.
Tip: Low storage can cause camera capture failures; freeing space often resolves this quickly. - 4
Update iOS and Camera app
Install any available iOS updates and camera app updates. Software patches often fix known camera bugs and improve stability.
Tip: Turn on automatic updates to reduce future manual checks. - 5
Force-quit and relaunch Camera
Swipe up to access multitasking, swipe the Camera app away to force-quit, then reopen. This clears stubborn in-app caches that may block camera operation.
Tip: If the app still crashes, clear app cache if available or reinstall updates. - 6
Reset all settings (non-destructive for data)
Reset all settings to restore default camera configurations without erasing your data. Go to Settings > General > Transfer or Reset iPhone > Reset > Reset All Settings.
Tip: Back up important preferences before doing this step; some personalized settings will revert. - 7
Clean the lens and housing
Gently wipe the lens with a microfiber cloth. Inspect the lens housing for dust, scratches, or moisture. Repeat testing after cleaning.
Tip: Avoid pressing on the glass or using rough materials that could scratch the lens. - 8
Test with another app or mode
Try the camera via different modes (Photo, Portrait, Video) and in a third-party camera app to determine if the issue is isolated to a single app.
Tip: If other apps work fine, the problem may be app-specific rather than hardware.
Common Questions
Why is my iPhone camera blurry even after cleaning the lens?
Blurry photos can result from autofocus issues, incorrect focus, or moisture inside the lens housing. Start with a software reset, check focus in different lighting, and ensure no protective case obstructs the camera. If blurriness persists, test with another app to rule out app-specific problems.
Blurry photos can come from autofocus issues or moisture. Start with a software reset and test in different apps. If it continues, consider a hardware check.
The Camera app crashes or won’t open. What can I do?
Force-quit the Camera app, restart the iPhone, and check for iOS updates. If the problem persists, reset all settings. If still failing, it could be a deeper software or hardware issue requiring support.
If the Camera app crashes, force-quit, restart, and update. If it persists, reset settings or seek support.
Will resetting all settings erase my data?
Resetting all settings restores system defaults for settings like display and network without erasing your photos, apps, or media. It’s a safe step when troubleshooting camera behavior.
Resetting settings won’t delete your data or photos, but you’ll need to reconfigure some preferences.
When should I seek professional help for my iPhone camera?
If software fixes don’t resolve the issue and you notice hardware signs like cracks, stuck focus, or moisture, contact Apple Support or an authorized service provider. Hardware repairs often need specialized equipment.
If software fixes fail or you see hardware signs, seek professional help from Apple Support.
Can third-party apps cause camera problems?
Yes. Some apps may interfere with camera access or processing. Test with multiple apps to determine if the issue is app-related or device-wide.
Some apps can interfere with the camera, so try testing with different apps to isolate the issue.
Is there a quick fix for camera issues after moisture exposure?
Power off, dry the device thoroughly, and seek professional inspection if you suspect moisture has entered the camera assembly. Avoid charging or using the device until inspected.
If moisture is suspected, power off and seek professional inspection to avoid further damage.
Will updating software automatically restore camera quality?
Software updates can fix known camera bugs but don’t guarantee hardware issues. Always install the latest iOS update and test the camera after the update.
Updating iOS can fix bugs that affect the camera, but it won’t fix hardware problems.
How long should I expect a hardware repair to take?
Repair duration varies by provider and warranty status, but you should typically plan for a few business days for inspection and potential replacement parts.
Hardware repairs may take a few days, depending on availability and warranty.
Watch Video
The Essentials
- Identify whether the issue is software or hardware.
- Follow a safe, progressive sequence of fixes.
- Don’t ignore lens cleaning; physical debris can cause focal problems.
- Reserve hardware repairs for professionals when software steps fail.