How to Use Camera on Chromebook: A Complete Guide
A comprehensive, beginner-friendly guide to using your Chromebook camera—from enabling permissions and testing in Meet/Zoom to troubleshooting and privacy tips. Learn how to set up built-in or external webcams for clear video.

By the end of this guide, you will be able to use camera on Chromebook confidently across built-in and external devices. You’ll enable camera permissions, test the feed in popular apps like Google Meet and Zoom, and choose the right webcam for your setup. You’ll also learn practical troubleshooting and privacy practices to keep you secure during video tasks.
Why Using the Camera on Chromebook Matters
In today’s digital landscape, your Chromebook camera is a central tool for communication, collaboration, and learning. Whether you’re joining a live class, conducting a remote interview, or creating quick tutorial videos, a reliable camera setup makes a strong impression. For aspiring photographers and home-security enthusiasts, understanding how to use camera on chromebook opens possibilities for remote monitoring demos, live streaming, and quick check-ins with clients or colleagues. The built-in camera on most Chromebooks is designed for simple, hands-off use, but optimizing its performance—along with the right accessories—can dramatically improve image clarity and user experience. According to Best Camera Tips, mastering camera usage on Chromebooks helps you stay productive while reducing friction during video tasks.
This section sets the foundation by outlining what you can expect from Chromebook cameras, common limitations, and how to approach upgrades without complicated hardware. You’ll learn how to leverage both built-in hardware and optional external webcams, so your setup matches your task—whether you’re recording tutorials, conducting virtual workshops, or streaming casually.
Quick compatibility and requirements
Most Chromebooks include a built-in webcam that works with major apps right out of the box. External USB webcams are typically supported with no driver installation required, but you’ll want to verify a few basics first. Ensure your Chromebook is up to date and that you have a stable internet connection for video calls and app updates. If you’re planning to use a higher-end external camera, confirm that the USB port (2.0 vs 3.0) and power supply are adequate to avoid drops in frame rate or video quality. In short, you can start with the built-in camera and upgrade later as your needs grow.
Granting Camera Permissions in Chrome OS
Camera access is controlled at the app level in Chrome OS and at the site level in Chrome browser settings. When you first try a video app (Meet, Zoom, Skype, etc.), you’ll usually see a prompt asking for permission to use the camera and microphone. If you miss the prompt, you can still grant access manually: open the app’s settings, locate the camera permissions, and select the preferred camera. For privacy, set permissions to “Ask before using” for unknown sites, and always review permissions after updates or after clearing browser data. This ensures you maintain control over when and which apps can access your camera. Best Camera Tips emphasizes checking permissions before important calls to avoid last‑minute surprises.
Using the Camera with Popular Apps
Your Chromebook camera works across a wide range of apps, but each platform may present camera options slightly differently. In Google Meet, select the camera from the in-call menu (you’ll usually see a small camera icon or a gear/settings icon). In Zoom or Skype, you can choose your camera from the video settings panel; if you have multiple cameras, choose the one you prefer. When testing, start with a quick video preview in the app or use a browser-based camera test page to confirm resolution and frame rate. If you experience autofocus or color issues, try adjusting lighting and white balance in your environment while using the app.
External Webcams and Accessories
If you need better image quality or want more control over framing, an external USB webcam can be a worthwhile upgrade. Plug it into a USB-C or USB-A port, then select it as the active camera in each app’s video settings. A USB-C hub can help if your Chromebook has limited ports. For stability, consider a small tripod or adjustable stand and a privacy cover when not in use. Note that some older Chromebooks may require a quick reboot after plugging in a new webcam to ensure it’s detected properly. External devices often deliver higher resolution and better color accuracy, especially in poorly lit rooms.
Privacy, Security, and Best Practices
Camera privacy matters, particularly on shared devices. Always close or disable the camera when not needed, and review permissions regularly to avoid lingering access for unused apps. Use a privacy cover or the built-in shutter if available, enable secure sign‑in and app permissions, and avoid granting camera access to unfamiliar sites. When recording or streaming, check the recording indicators in your app to ensure you’re aware of when the camera is active. Following these practices helps you maintain control over your device and protect sensitive information while using camera on chromebook.
Common Issues and Simple Fixes
If your camera isn’t functioning as expected, start with the basics: restart the Chromebook, verify your camera is enabled in the app, and confirm you have selected the correct camera in the app’s settings. Update Chrome OS and the involved apps to make sure you have the latest drivers and bug fixes. If using an external webcam, test it on another device to isolate hardware issues. Clearing browser cache or regranting permissions can resolve stubborn permission prompts. For persistent problems, try a different USB port or cable and consider resetting app preferences to default.
Tips for Optimal Video Quality
- Improve lighting by placing a light source in front of you; avoid harsh backlighting.
- Position the camera at or slightly above eye level for a flattering angle.
- Use a neutral background to minimize distractions and enhance contrast.
- Calibrate white balance and exposure in-app if available, especially when lighting changes.
- Test audio separately; clear audio improves overall perceived video quality and engagement.
toolsMaterialsTypeHint_1_2_3_neutral":null},
toolsMaterials
stepByStep
tipsList
keyTakeaways
videoEmbed
faqSection
mainTopicQuery
Tools & Materials
- Chromebook with working built-in camera(Ensure the camera is clean and not physically blocked by a sticker or case.)
- External USB webcam (optional)(Choose a USB webcam with at least 720p resolution for better quality.)
- USB-C hub or USB-A adapter (optional)(Needed if your Chromebook has limited ports and you want to connect multiple devices.)
- Stable internet connection(Video calls require stable upload/download speeds to avoid lag.)
- Video conferencing apps installed (Google Meet, Zoom, Skype)(Have at least one primary app ready for testing.)
- Privacy accessories (camera cover, clean cloth)(Cover when not in use and wipe the lens for clarity.)
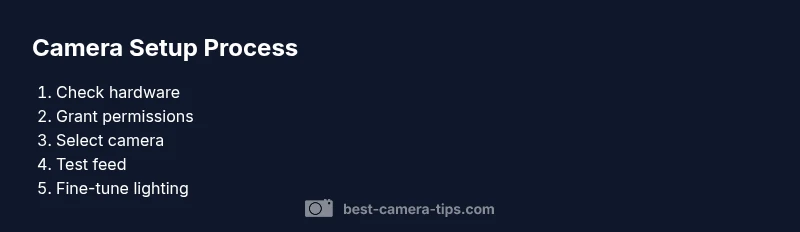
Steps
Estimated time: 15-25 minutes
- 1
Prepare your hardware
Connect any external webcam if you plan to use one and power everything on. Verify the device is recognized by the system and does not exhibit physical issues like loose cables.
Tip: If using an external cam, test it on a different USB port to rule out port-specific problems. - 2
Open your video app and locate camera settings
Launch the app you will use (Meet, Zoom, etc.) and navigate to the video or camera settings. You should see a list of available cameras including Built-in and External options.
Tip: If you don’t see the camera, ensure permissions are granted and the app is allowed to access the camera. - 3
Select the correct camera
Choose the preferred camera from the list (e.g., Built-in Video Camera or External USB Webcam). The app will start a live preview once selected.
Tip: If you switch cameras mid-call, pause or stop the video for a smooth transition. - 4
Test the feed with a quick call or test page
Do a quick test by starting a private call or using a browser-based camera test page to verify video quality, lighting, and focus.
Tip: Check for blinking frames or color shifting; adjust lighting if needed. - 5
Optimize lighting and framing
Position the camera at or slightly above eye level and ensure your face is well-lit with minimal shadows.
Tip: Avoid strong backlighting; use a soft front light for even illumination. - 6
Review privacy and permissions
Double-check that the app has permission to access the camera and microphone. Revoke access if you notice suspicious activity.
Tip: Only grant permissions to trusted apps and review them after updates.
Common Questions
How do I enable my Chromebook camera?
Most Chromebooks enable the camera by default; you may need to grant permission the first time you use a video app. Open the app and approve access when prompted, then check the in-app camera selector.
Open a video app and approve camera access when prompted; check the app’s camera selector if needed.
Why is my camera not working on Chromebook?
Common causes include blocked permissions, a loose external webcam, or the app selecting the wrong camera. Verify permissions in Chrome OS, reconnect any external device, and switch cameras in the app’s settings.
Check permissions, reconnect any external device, and choose the correct camera in the app.
Can I use an external webcam with Chromebook?
Yes. USB webcams are typically supported. Plug in the device, wait a moment, then select it in the app’s video settings and test the feed.
Plug it in and select it in the app’s settings for testing.
How do I test my camera on a Chromebook?
Use a video call app or a browser-based test page to preview the feed. If the feed doesn’t appear, check permissions and switch cameras.
Open Meet or a test page to preview your camera feed.
What about privacy and security when using the camera?
Only grant permissions to trusted apps and review site permissions regularly. Use a privacy cover when not in use and avoid sharing sensitive content.
Only allow trusted apps and cover the camera when not in use.
Do I need drivers for Chromebook cameras?
Chrome OS generally handles drivers automatically. External webcams usually work without manual drivers, but ensure your OS is up to date.
Chrome OS usually manages drivers automatically.
Watch Video
The Essentials
- Enable camera permissions before use
- Choose the correct camera in each app
- Test with a quick call or test page
- External webcams offer better quality when needed
- Protect privacy with covers and regular permission reviews