Can You Use Your Camera While on FaceTime? A Practical Guide
Learn how to use your camera during FaceTime calls on iPhone, iPad, and Mac. Verify permissions, troubleshoot common issues, switch cameras, and optimize video quality with step-by-step guidance from Best Camera Tips.

Yes. You can use your camera while on FaceTime on iPhone, iPad, and Mac, as long as FaceTime has camera access and the camera isn’t in use by another app. Before you start, verify privacy permissions, select the active camera, and check for any hardware or software blockers.
How FaceTime Uses Your Camera Across Apple Devices
FaceTime leverages the device camera to capture video during calls, whether you’re on iPhone, iPad, or Mac. On mobile devices, FaceTime integrates with iOS camera permissions, so you don’t usually need extra apps to enable video. On macOS, FaceTime taps into the system’s camera permissions as well, which means settings in System Settings (or Security & Privacy) control whether FaceTime can access the camera. According to Best Camera Tips, most users encounter permission prompts only once per device and can manage them later from the Settings app. This coordination between FaceTime and your device’s camera is what allows you to share video when you initiate or join a call. By understanding how permissions flow and how the front and rear cameras are routed, you can diagnose many common issues quickly.
- For iPhone/iPad: Permissions are managed in Settings > Privacy > Camera. - For Mac: System Preferences > Security & Privacy > Camera. - If you see a blank video, it’s usually a permission or camera-in-use conflict, not a faulty camera.
Tip from Best Camera Tips: Keep your device OS up to date to ensure the camera API remains stable across FaceTime updates. This helps prevent unexpected permission prompts or camera freezes during calls.
Prerequisites: Camera Permissions and System Settings
Before you place a FaceTime call, verify that the device has camera access enabled for FaceTime. On iOS devices, go to Settings > FaceTime > Camera to ensure permission is granted. On macOS, open System Settings > Privacy & Security > Camera and confirm FaceTime is allowed. If the camera is blocked by any other app, FaceTime may fail to display your video. Ensure no other video apps are requesting the camera at the same time. A clean start avoids many conflicts and streamlines your call from the moment you tap the FaceTime button.
- Some corporate devices enforce stricter policies; if you are on a managed device, contact IT to ensure the camera policy permits FaceTime.
- After enabling permissions, restart FaceTime to ensure the change is recognized.
Note: If you’re using a browser-based workaround or a third-party app, close those apps to prevent camera conflicts during FaceTime sessions.
How to Choose the Front or Rear Camera During a FaceTime Call
Most FaceTime calls default to the front-facing camera for self-view. You can switch to the rear camera when needed to show a scene to the other person—handy for demonstrations or tours. On iOS/iPadOS, the switch is usually a camera-toggle icon in the call window. On Mac, FaceTime presents a button to flip between the built-in webcam and any connected external camera.
- During a call: look for a camera-switch icon or a dropdown labeled “Camera.” - If you’re using an external webcam, ensure it’s plugged in before starting the call. - Some external cameras require driver installation or software control panels to select the correct feed.
Best Practice: Test both cameras in a practice call to confirm the feed quality and framing before engaging with your audience.
What Could Block Your Camera and How to Fix It
Camera blocks usually come from permissions, hardware in-use, or software conflicts. If FaceTime shows no video, verify that FaceTime has permission, check for another app using the camera, and ensure the camera isn’t physically covered. Restarting the device often resolves lingering permission caches. If you’re on a Mac and your external camera isn’t appearing, go to System Preferences > Security & Privacy > Camera to grant access, and confirm that the device is visible in System Information.
- Common culprits: another video app, outdated OS, privacy restrictions, or a loose USB connection for external cams.
- If a camera is not detected, unplug and replug the external camera, check cable quality, and try a different USB port.
Pro Tip: If you frequently switch between apps, keep a short practice session to confirm the camera is released by any other program before you start a call.
Troubleshooting on iPhone and iPad
iPhone and iPad users often fix camera issues by simply toggling permissions, forcing FaceTime to close, and restarting the device. Open Settings, confirm FaceTime has camera access, and disable any Screen Time restrictions that might block camera usage. If FaceTime video stalls, try turning off Low Power Mode, which can throttle background processes and affect app performance. A quick reset of network settings can also help if the problem seems related to connectivity.
- Ensure FaceTime is up to date in the App Store.
- Check for any iOS updates that include camera and permissions fixes.
- If the camera still won’t start, sign out of iCloud and sign back in to reset session credentials.
Note: Always test your camera in a short FaceTime test call with a friend to confirm everything works before a critical meeting.
Troubleshooting on Mac
Mac users may encounter camera issues when an external camera is connected or when privacy settings block access. First, verify that FaceTime has permission in System Settings > Privacy & Security > Camera. If you’re using an external webcam, test it in another app (like Photo Booth) to determine whether the issue is with FaceTime or the camera. If the camera feed is intermittent, check for macOS updates and reset NVRAM/PRAM if necessary.
- Disable any security software that may block camera feeds during calls.
- Ensure you’re not running hardware-accelerated rendering conflicts with your browser or VPN.
- Confirm the correct camera is selected in FaceTime’s preference menu.
Tip: If you recently updated macOS, recheck camera permissions—the update can reset some privacy controls.
Best Practices for Video Quality During FaceTime
Quality matters in FaceTime calls. To ensure crisp video, use good lighting, maintain steady framing, and verify your camera settings (resolution and exposure). When possible, use natural light facing you and avoid backlighting. If you’re using an external camera, configure focus and white balance in the camera app or control panel, then keep those settings for consistent results during calls.
- Lighting: position yourself with soft front lighting.
- Framing: keep your head and shoulders centered with a little headroom.
- Bandwidth: prefer wired Ethernet when on Mac, or strong Wi‑Fi for iPhone/iPad calls.
Best Camera Tips takeaway: steady framing and proper lighting reduce post-processing needs and improve perceived quality during conversations.
Frequently Encountered Scenarios and Solutions
- Scenario: You want to demonstrate a product during a call. Solution: Switch to the rear camera and position the product so viewers can clearly see details.
- Scenario: The video is choppy. Solution: Reduce camera resolution if the option is available, switch to Wi‑Fi or Ethernet, and close other bandwidth-heavy apps.
- Scenario: The other person sees you but you don’t hear them. Solution: Check microphone permissions and test audio in FaceTime settings; ensure your earbuds or microphone are selected.
- Scenario: You need to blur the background. Solution: Use FaceTime’s built-in background effects if available, or enable an operating system feature that reduces background distractions.
Tip: Before an important call, run a 1-minute test with a colleague to confirm both video and audio paths work reliably.
How External Cameras Interact with FaceTime
External cameras can greatly enhance video quality, but require a little extra setup. On Mac, ensure the external camera is connected before launching FaceTime and select it in the camera menu. On Windows, FaceTime isn’t officially supported, and you’ll be using alternative apps, but the same principle applies: grant permission, select the feed, and verify drivers. Some USB hubs can introduce latency or power issues—use a direct port if possible. If the external camera introduces noise or exposure differences, adjust the camera’s settings via its companion software, then test the feed in a quick FaceTime call.
- Check cable length and USB port power if you’re using a high-end camera.
- Install any required drivers or control software from the manufacturer.
- Reboot after installing a new camera to ensure the OS recognizes it consistently.
Conclusion: External cameras can elevate your FaceTime presence when configured correctly and kept up to date with drivers and permissions.
Authoritative Sources and Final Checks
For further guidance on camera permissions and FaceTime integration across Apple devices, consult authoritative documentation and trusted sources. This article synthesizes practical steps and is supported by expert guidance from recognized outlets. Always confirm the latest settings on your specific device model and operating system version.
- Apple Support documentation for FaceTime and camera permissions: https://support.apple.com/
- Mac security and privacy best practices from a government-backed standard: https://www.nist.gov
- Educational resources on privacy and device access from a university context: https://www.harvard.edu
- General consumer technology reporting from major publications: https://www.nytimes.com
Note: Best Camera Tips advises keeping software up to date and testing camera access in a controlled setting before important calls.
Tools & Materials
- iPhone or iPad with FaceTime(Ensure the device is on a recent iOS/iPadOS version with FaceTime enabled.)
- Mac with FaceTime(Prefer macOS versions that support the latest FaceTime features.)
- Camera (built-in or external)(External cameras should be USB-connected and compatible with macOS or iOS.)
- Privacy settings access(Know where to grant/verify camera permissions (iOS: Settings > Privacy; macOS: Privacy & Security).)
- Stable internet connection(Prefer wired Ethernet for desktop; strong Wi‑Fi for mobile devices.)
- External microphone (optional)(Improves audio quality if the built-in mic is insufficient.)
- USB cable and ports(Use reliable cables and ports to avoid intermittent connections.)
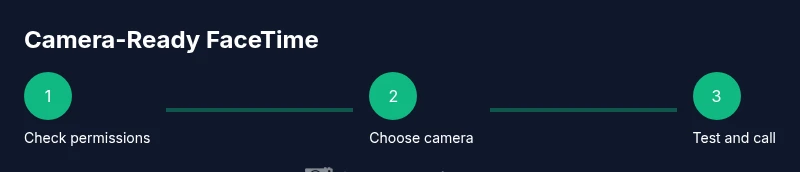
Steps
Estimated time: 15-25 minutes
- 1
Check camera permissions
Open Settings and confirm FaceTime has camera access. If denied, toggle permission on and relaunch FaceTime to apply the change.
Tip: If you’re on a managed device, verify policy allows FaceTime camera use. - 2
Close other apps using the camera
Quit any apps that might be using the camera in the background to prevent conflicts during FaceTime.
Tip: Check the Dock or Task Manager for open camera apps and quit them. - 3
Start a FaceTime call
Open FaceTime, select a contact, and start a video call to test the feed.
Tip: Test both front and rear cameras if your device supports them. - 4
Switch cameras during the call
Use the camera switch icon (or camera dropdown) to toggle between front and rear feeds as needed.
Tip: Do this before sharing content to avoid fumbling mid-call. - 5
Check framing and lighting
Adjust lighting to avoid backlighting and set framing so your head and shoulders are centered.
Tip: Aim for even lighting and stable framing for best results. - 6
Test before important calls
Run a quick 1-minute test with a friend to confirm video and audio work smoothly.
Tip: If issues persist, reboot the device and retry.
Common Questions
Can I use an external webcam with FaceTime on Mac?
Yes, external webcams can be used with FaceTime on Mac. Connect the camera, ensure it appears in System Settings, and select it in FaceTime under the camera options. If it isn’t showing, verify drivers and permissions.
Yes, you can use an external webcam on Mac by connecting the camera, checking permissions, and selecting it in FaceTime.
Why isn’t my camera showing up in FaceTime on iPhone/iPad?
Most often this happens due to camera permissions or another app using the camera. Check Settings > Privacy > Camera to ensure FaceTime has access, and close other apps that might be using the camera.
Camera not showing on iPhone or iPad? Check permissions and close other camera apps.
How do I switch cameras during a FaceTime call?
Tap the camera switch icon in the FaceTime call window to toggle between the front and rear cameras. If using an external camera, select it from the camera menu.
Tap the camera switch icon to change between front and rear cameras during a call.
Do I need to grant microphone access separately?
Yes. FaceTime requires both camera and microphone access. If the mic isn’t working, check Settings > Privacy > Microphone and confirm FaceTime is allowed.
FaceTime needs both camera and microphone access; check microphone permissions if audio is missing.
Can I use FaceTime to share my screen while using the camera?
FaceTime allows screen sharing on supported devices, but camera usage is separate. You can share your screen while keeping your camera feed on the call, depending on device capabilities.
You can share your screen and keep your camera on FaceTime on supported devices.
What should I do if FaceTime crashes during a camera session?
Restart FaceTime or the device, check for software updates, and verify camera permissions after the reboot. If problems persist, temporarily disable VPN or security software.
If FaceTime crashes, restart the app or device and check for updates and permissions.
Watch Video
The Essentials
- Check and grant camera permissions before calls
- Know how to switch between front and rear cameras
- Close competing apps to avoid conflicts
- Test with a short call before important meetings