Using a Camera Tester: A Step-by-Step Guide for Photo and Security Cameras
Learn how to test cameras with a camera tester, covering autofocus, exposure, color accuracy, and stability. This step-by-step guide from Best Camera Tips helps aspiring photographers and home security enthusiasts verify performance with confidence in 2026.

A camera tester helps you verify core image quality attributes such as autofocus accuracy, exposure consistency, color fidelity, and sensor stability across cameras. This guide provides a clear, step-by-step workflow to use a camera tester effectively, compare results across devices, and document findings for repeatable testing in photography and home security setups.
What is a camera tester and why it matters
A camera tester is a structured way to evaluate a camera's performance using standardized targets, charts, and controlled lighting. For aspiring photographers and home security enthusiasts, a camera tester helps separate operator guesswork from measurable results, ensuring that autofocus locks reliably, colors render accurately, and sensor behavior stays stable under varying conditions. According to Best Camera Tips, adopting a regular testing routine with a camera tester reduces surprises during shoots and improves surveillance output by providing repeatable benchmarks. In this guide, you will learn how to plan, execute, and interpret tests with a camera tester so you can confidently compare cameras, lenses, and settings.
Types of camera testers and when to use them
There are several concepts wrapped into the idea of a camera tester. Basic chart-based testers measure sharpness and contrast; color targets verify white balance and color rendition; and focus calibration tools help align autofocus across lenses. In security setups, a camera tester is used to validate IP cameras, dome cameras, and static surveillance cameras. When choosing a camera tester, consider compatibility with your gear, whether you need lens-specific calibration, and whether you prioritize color accuracy or sharpness. A comprehensive camera tester workflow will cover still images, video sampling, and live monitoring to ensure the system remains reliable under real-world conditions. As you read, keep in mind that camera tester workflows vary by whether you’re testing a standard camera or a security camera, but the core principle remains the same: objective data over subjective impression.
Preparing your workspace for camera tester sessions
A stable, well-lit environment is essential for accurate camera tester results. Set up a flat, level surface with a tripod or mount for the camera tester and the camera under test. Ensure there’s consistent ambient light, ideally using a neutral color temperature light source around 5000–6500K. Create a test chart layout and a clear distance marker, so measurements stay repeatable. Keep a notebook or digital log for each session, and use a camera tester to record baseline values before making adjustments. Remember, avoid reflections from glossy surfaces that can skew results when using a camera tester. Proper setup translates to reliable camera tester readings and reduces the need for repeat experiments in future sessions.
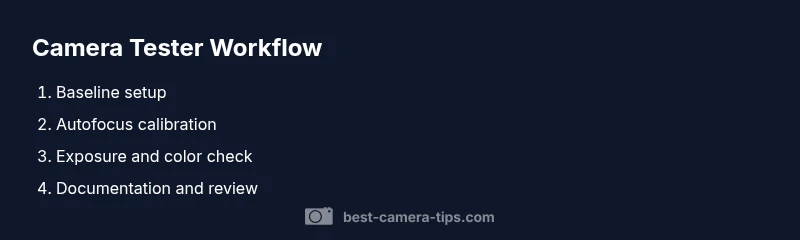
Baseline testing: establishing a control measurement
Before making any adjustments, capture a baseline set of images with the camera tester. This establishes a control reference for autofocus, exposure, and color rendering. Take shots at multiple ISO levels, white balance settings, and focal lengths to understand how the camera tester reports differences. Use consistent framing and subject matter to ensure the camera tester’s readings reflect genuine performance rather than scene variation. Document all settings and note any discrepancies that the camera tester highlights. Baseline data provides a trustworthy reference that makes subsequent camera tester adjustments meaningful.
Focus and sharpness testing: lens and autofocus calibration
Sharpness is central to any camera tester result. Use a high-contrast edge chart and a mid-range target to evaluate whether autofocus aligns with the intended focus plane. The camera tester will reveal back-to-front focus errors, field curvature, and lens softness. When results show deviations, consider recalibrating the lens or adjusting the camera’s AF Microadjustment (if available). Re-test with the camera tester after any change to confirm improvement. Document differences between test shots so you can trace which lens, body, or setting contributed to the change.
Exposure, color accuracy, and dynamic range testing
A camera tester helps quantify exposure accuracy by checking histogram alignment with the target and ensuring highlight and shadow detail are preserved. Color fidelity can be assessed with color targets and a calibrated monitor to compare output against known references. Dynamic range is evaluated by capturing scenes with both bright highlights and deep shadows and examining how the camera tester reports the tonal distribution. Use the camera tester to map how the camera responds under different lighting, and document whether the results meet your standards. This section emphasizes that camera tester data should help you optimize exposure controls, white balance, and tonal mapping for reliable results.
Stability and build quality checks for the tester and camera
Reliability matters: a camera tester should remain stable across sessions. Check mount integrity, weather sealing (for outdoor cameras), and cable connections. A loose component can introduce vibration that corrupts readings; ensure all screws are tight and that any mounts used with the camera tester hold alignment. If you’re testing many cameras, consider labeling fixtures to prevent mix-ups when using a camera tester. Stability checks ensure long-term usefulness of the camera tester and prevent misleading data from equipment wobble or misalignment.
Verifying security cameras vs. consumer cameras
Security cameras demand robust performance in challenging conditions: low light, long exposure, and scene motion. Use a camera tester suited for IP cameras to assess transmission latency, frame rate stability, and color fidelity under network load. For consumer cameras, the emphasis may be on color accuracy and autofocus speed. The camera tester should provide repeatable numbers across sessions, enabling you to compare different cameras or configurations with confidence. This approach helps align testing with practical outcomes, whether you’re optimizing a home security setup or refining your photography workflow with a camera tester.
Documenting results and planning follow-up tests
After completing tests with the camera tester, compile a structured report including baseline figures, test conditions, and interpretation notes. Convert readings into actionable adjustments—e.g., lens calibration, white balance presets, or exposure compensation—then schedule follow-up tests to verify improvements. Consistent documentation turns ad-hoc tinkering into a repeatable testing routine you can trust. The camera tester remains a central tool in your photography and security kit. By treating each session as a data point, you build a reliable history of how your gear performs with a camera tester.
Common pitfalls and how to avoid them
Avoid testing in uneven lighting or with reflective surfaces, which can distort camera tester results. Don’t skip calibration steps when changing lenses or cameras, and avoid mixing different test targets in one session. Finally, maintain a clear log of firmware versions, as updates can alter how the camera tester reports data. Following these cautions helps ensure your camera tester results stay accurate and comparable across sessions.
Tools & Materials
- camera tester kit(Includes test charts, color targets, and measurement scale)
- test charts / color targets(High-contrast chart; color checker)
- calibrated test chart stand(Stable mounting)
- tripod / stable mount for camera(3-way head recommended)
- light source with neutral color temperature (5000-6500K)(Constant lighting)
- remote shutter or intervalometer(Reduce shake)
- notebook or digital log(Record settings and results)
- calibration tools for lenses (optional)(AF microadjustment tool if available)
Steps
Estimated time: 1.5-2 hours
- 1
Gather gear
Collect the camera tester kit, the camera to test, test charts, lighting, tripod, and a logbook. Verify all items are present and functional before starting the camera tester workflow.
Tip: Double-check power supplies and batteries to avoid interruptions. - 2
Set up the test area
Position charts at a known distance, mount the camera and tester steadily, and establish consistent lighting. A stable setup ensures repeatable camera tester readings.
Tip: Use a fixed distance marker to keep measurements consistent. - 3
Power on and connect devices
Power on the camera and camera tester, connect any required cables, and confirm data logging is enabled. Establish baseline brightness and color conditions.
Tip: Allow lights to warm up for 5–10 minutes before testing. - 4
Capture baseline images
Take baseline shots with default camera settings to establish a control reference for autofocus, exposure, and color rendering using the camera tester.
Tip: Record ISO, white balance, and focal length for each baseline shot. - 5
Test autofocus and sharpness
Use a high-contrast edge chart to evaluate autofocus accuracy and lens sharpness. Note any back-to-front focus or softness observed by the camera tester.
Tip: If needed, adjust AF microadjustment and re-test with the camera tester. - 6
Evaluate exposure and color
Assess exposure correctness with histograms and verify color fidelity against color targets. Document any color cast or exposure clipping detected by the camera tester.
Tip: Calibrate white balance against the color target. - 7
Check stability and build quality
Inspect mounts, cables, and housing for looseness or wobble. A stable tester setup yields more reliable camera tester data.
Tip: Tighten all fasteners and secure cables to avoid vibrations. - 8
Document results and plan follow-up
Summarize readings in a structured report, noting test conditions and next steps. Schedule re-tests after adjustments to confirm improvements.
Tip: Attach sample images and charts to the report for quick reference. - 9
Plan and re-test after adjustments
Make targeted adjustments (e.g., lens calibration, exposure presets, or white balance), then repeat the camera tester sequence to verify gains.
Tip: Wait a short period for system settling before re-testing.
Common Questions
What is a camera tester and why do I need one?
A camera tester provides objective checks of autofocus, exposure, color accuracy, and stability using standardized targets. It helps photographers and security setups verify performance beyond subjective impressions.
A camera tester gives objective checks of autofocus, exposure, and color accuracy, helping you verify performance beyond guesswork.
Can I use a camera tester with security cameras (IP cameras)?
Yes. A camera tester can assess IP cameras for latency, color fidelity, and stability. Ensure your tester supports network cameras and appropriate data logging.
Yes, you can test IP cameras; just make sure your tester supports network cameras and logs results.
How often should I run camera tester tests?
For critical security setups, run tests monthly or quarterly. For hobby work, align tests with gear changes or major lighting setups.
Depends on use; frequent for security setups, less often for hobby testing.
What charts and targets should I use?
Use a high-contrast resolution chart and a color checker to evaluate sharpness, exposure, and color fidelity. Add a focus calibration target for autofocusing tests.
Color checkers and resolution charts are essential for autofocus and color accuracy.
Are there risks in camera tester testing?
Testing is generally safe when you respect electrical and lighting equipment. Avoid high-intensity flashes near sensitive components and ensure cables are properly managed.
The risks are minimal if you handle equipment safely and manage cables and lights properly.
Watch Video
The Essentials
- Establish baseline using a camera tester.
- Maintain consistent lighting and distance during tests.
- Log settings and results for repeatable comparisons.
- Calibrate lenses before critical shoots.
- Re-test after any adjustments.