What to Check in a Camera: A Practical Guide
Learn a comprehensive, step-by-step checklist to evaluate a camera's condition, image quality, and performance. Ideal for beginners and enthusiasts, with practical tips, safety guidance, and maintenance routines.

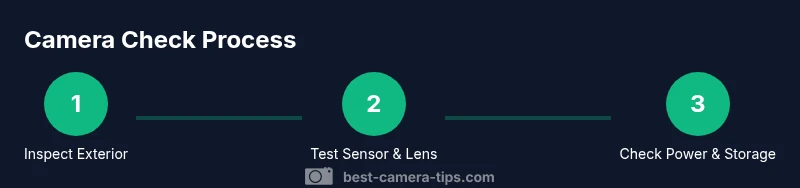
To check a camera, start with its physical condition, power up to verify basics, inspect the sensor and lens for dust or scratches, test all controls and dials, confirm memory card compatibility and formatting, and run a quick image test for exposure, white balance, and autofocus performance. Don’t miss firmware version and safety features.
What to check before you start
Checking a camera is a deliberate, repeatable process that protects your investment and ensures reliable results. This guide focuses on practical, hands-on checks you can perform in under two hours, with an emphasis on safety and data integrity. According to Best Camera Tips, adopting a consistent pre-use routine reduces surprises on shoots and helps you identify wear or potential failures early. Throughout, you’ll see how to adapt the process for different camera types—mirrorless, DSLR, and compact bodies—without special tools. If you’re buying used gear, use this checklist to verify performance and longevity before you commit. Keep a small notebook or app record of each check and any issues you discover, so you can track changes over time and plan maintenance or repairs accordingly.
Exterior condition and build quality
The exterior of a camera tells you a lot about its life cycle. Start with the body for cracks, loose screws, or peeling paint around edges. Press every control to ensure it feels solid and returns to its rest position smoothly. Check door seals, the battery compartment, and memory card slots for wear, corrosion, or moisture damage. If you’re evaluating an used body, inspect the mount area for misalignment or wobble when a lens is attached. Look for signs of impact around the grip or rails, which may indicate past drops. A well-maintained body should feel sturdy, with minimal play in buttons or dials and no unusual rattling when shaken gently. Remember to test all the control wheels, mode dial, and menu buttons to ensure they respond correctly and return to their default state after use. As you assess build quality, consider the intended environment: pro shooters need weather sealing and rugged construction, while hobbyists may prioritize portability and comfort. In all cases, a solid shell is the foundation of reliable performance.
Sensor cleanliness and image quality test
Dust or smudges on the sensor or filter stack can ruin images, especially at small apertures or high-contrast scenes. Start by inspecting the sensor area without removing the lens; use a bright light and a loupe if available, or simply check for obvious specks in a test shot. Attach your lens and take a test frame of a blank, light-filled scene to reveal dust specks or watermarks. If you see dust, a gentle blower can dislodge loose particles; avoid touching the sensor with tools. For deeper issues, use a proper sensor cleaning kit or seek professional service. When testing image quality, compare RAW and JPEG outputs at different ISO settings to gauge noise, dynamic range, and detail retention. Color and contrast should be natural without color casts; if you notice purple fringing or banding, note the conditions and consider a lens test with a clean front element.
Lens health and optics inspection
Lens health is as important as the body. Inspect the front and rear elements for scratches, fogging, or fungus, especially if the camera has spent time in humid environments. Check the focusing ring and manual focus clutch, if present, for smooth operation. Mount and unmount the lens several times to feel for any looseness at the mount that could affect alignment. Test autofocus across the frame with a variety of distances and subjects to detect back or front focusing. Check for dust or moisture behind the rear element that could affect image quality. If you own multiple lenses, test each one with the camera to ensure consistent performance, and verify that the lens data (focal length, focal plane distance) is correctly recorded by the camera. A well-sealed lens also protects against moisture and dust ingress, extending the overall life of your kit.
Autofocus, stabilization, and controls test
Autofocus performance is crucial for sharp images. Test AF modes (single, continuous, face/eye detect) across different subjects and lighting. Confirm that the focus points illuminate and track as expected, and check for any lag or hunting. If your camera has in-body or lens-based stabilization, test with and without stabilization at various shutter speeds to see the practical benefit and potential blur at slower speeds. Inspect the tactile feedback of dials, buttons, and touch controls—these should respond predictably with little resistance and return to their default states when released. If you rely on touchscreen focus, verify that touch-to-focus works smoothly across the frame and that glare doesn’t interfere with input in bright light. Document any inconsistencies and plan a lens or body service if needed.
Power, storage, and firmware health
Battery health influences reliability in the field. Check the battery for signs of wear, swelling, or leakage, and verify a spare battery is available. Confirm the camera powers on without unusual delays and that the battery door closes securely. Test memory card writing by formatting a fresh card in the camera, then capturing a few test images and transferring them to a computer to verify data integrity. Inspect supported file formats and whether the camera offers RAW capture. Firmware versions should be up to date; compare the installed version with the vendor’s latest release and note any new features or bug fixes. If a firmware update is advised, follow the manufacturer’s exact steps to avoid bricking the device. Finally, review the electrical ports for signs of wear, bent pins, or loose connectors and ensure rain or dust seals remain intact after test use.
Calibration, color accuracy, and white balance
Accurate color rendering is essential for any photographer. Use a color checker or grayscale card to calibrate white balance and verify color fidelity under different light sources. Shoot a controlled scene with known colors, then compare results to reference values. If colors appear overdue toward a hue (cool or warm), adjust white balance presets or perform post-processing LUT checks. Some cameras allow in-camera calibration for color profiles; test these options and compare with external reference shots. If you shoot under mixed lighting (sun, LED, tungsten), test WB across all modes and ensure the camera maintains stability when switching light sources. Consistency across shots under similar conditions is a strong indicator of reliable color handling. Keep a log of settings that yield the most accurate results for future sessions.
Maintenance plan and when to seek service
Developing a routine maintenance plan helps you catch issues early. Schedule regular checks every few months or after heavy use, especially in challenging environments (dusty, humid, or cold). Create a simple log: visual condition, controls responsiveness, image quality, and any faults noted during tests. For wear or damage beyond DIY capability, plan a service appointment with an authorized technician; avoid attempting deep disassembly yourself, which can void warranties. Use clean, dedicated storage and a gentle cleaning routine to extend life. If the camera is approaching the end of its typical service life, start budgeting for a replacement or upgrade. A disciplined maintenance plan reduces downtime and preserves resale value.
Authority sources
- https://www.nationalgeographic.com
- https://www.cdc.gov
- https://www.nist.gov
Note: These sources provide general guidance on imaging accuracy and device safety; refer to manufacturer manuals for camera-specific maintenance guidelines.
Tools & Materials
- Camera body(All ports and dials accessible; inspect exterior and grip)
- Charged battery(Bring a spare if possible; check for swelling or leakage)
- Memory card (and card reader)(Use a card with sufficient capacity; format in camera after backing up)
- Lens (or kit lens)(Test with clean front element; verify mount alignment)
- Lens cleaning kit (microfiber cloth, blower)(Gently remove dust from front and rear elements)
- Color checker or grayscale card(For white balance and color accuracy tests)
- USB cable or card reader(Optional for quick data transfer)
- Small flashlight(Helpful for inspecting dark sensor areas)
Steps
Estimated time: 60-90 minutes
- 1
Power up and verify basics
Power on the camera and confirm it boots normally. Check the display, menu, and keypad responsiveness. If the initial boot is slow or the screen flickers, note the issue for further testing.
Tip: If the camera won’t power on, try a different battery and inspect the battery contacts for corrosion. - 2
Inspect exterior and build
Visually inspect the body for cracks, loose screws, or signs of impact. Open and close doors and hinges to ensure smooth operation. Check the mount for any wobble when a lens is attached.
Tip: Feel for any unusual rattling; this can indicate internal damage that needs service. - 3
Test control responsiveness
Press all major buttons and rotate mode and control dials. Verify that menus respond promptly and that the touchscreen (if present) registers input accurately.
Tip: Create a quick rippling of each control under different lighting to confirm reliable tactile feedback. - 4
Check focus systems
Test autofocus with a variety of subjects and distances. Activate different AF modes and confirm that the camera locks onto subjects reliably.
Tip: Test both single and continuous AF with a static and moving target to reveal tracking performance. - 5
Capture a test shot
Take a quick RAW and JPEG shot of a scene with varied tones. Review the histogram and check for blown highlights or clipped shadows.
Tip: Use a color checker in this shot to compare WB and color accuracy later. - 6
Evaluate exposure and WB
Assess exposure consistency across different ISO levels and lighting. Compare RAW conversions with a baseline to assess dynamic range.
Tip: If WB drifts between shots, note lighting scenarios and adjust WB presets accordingly. - 7
Test memory and file paths
Format a new card in-camera and capture several files. Transfer them to a computer and verify file integrity and transfers.
Tip: Back up originals before any format operation. - 8
Review firmware and settings
Check the installed firmware version and compare with the latest from the manufacturer. Note important settings and consider restoring to a clean baseline.
Tip: Follow official update steps exactly to avoid bricking the camera. - 9
Clean and recheck sensor area
If dust is detected, use a blower; avoid touching the sensor with tools. Re-test by taking another test shot to ensure dust cleared.
Tip: Do not use liquids or aggressive tools on the sensor. - 10
Color and calibration check
Shoot a controlled scene with a color target. Compare colors against reference and adjust color profiles as needed.
Tip: Keep a record of the best color settings for future shoots. - 11
Document results and plan maintenance
Record all observations in a notebook or app. Schedule maintenance or service if issues persist or deteriorate.
Tip: Include date, conditions, and any actions taken for traceability. - 12
Establish a routine
Create a simple, repeatable routine to perform every few months or after heavy use. This helps you catch issues early and stay prepared.
Tip: Link the routine to your typical shooting scenarios for consistency.
Common Questions
What is the most important thing to check first when inspecting a camera?
Start with the exterior condition and power-on stability. A solid body and responsive controls set the foundation for reliable performance.
Begin with the body and power-on check to ensure the camera feels solid and ready to test.
How can I safely clean dust from the sensor?
Use a blower and only then a dedicated cleaning kit. Do not touch the sensor with tools; if dust persists, seek professional service.
Blow dust off with a blower first, then consult a professional if needed.
Should I test autofocus with multiple lenses?
Yes, test AF with the camera mounted on each lens you plan to use. This reveals any back- or front-focusing issues and ensures consistency.
Test AF with each lens to confirm consistent focus.
What should I do if the camera cannot format a memory card?
Try another card and ensure the card is not write-protected. If formatting still fails, inspect for compatibility or seek service.
If a card won’t format, try another card and check write protection.
Is it necessary to update firmware before use?
Check for updates in the manufacturer’s site or menu. Update only if the release notes address issues you’ve encountered or features you need.
Check for updates and install only if they bring needed improvements.
Should I calibrate color using a color checker?
Using a color checker helps standardize white balance and color rendition across lighting conditions and post-processing.
Color checkers help ensure accurate color across shoots.
Watch Video
The Essentials
- Follow a repeatable camera check routine.
- Assess exterior, sensor, and lens health together.
- Test autofocus, exposure, and color accuracy with deliberate shots.
- Keep firmware and storage in good standing; document findings.
- Schedule regular maintenance to extend gear life.