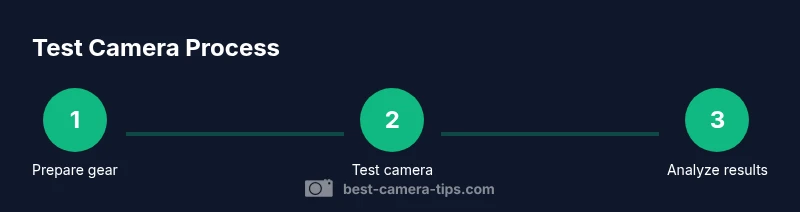
Test Camera: A Comprehensive Step-by-Step Guide
Learn how to test a camera effectively, covering basic operation, image quality, exposure, color accuracy, and stabilization. A practical, step-by-step guide for aspiring photographers and home security enthusiasts to validate gear reliability and document test results.

According to Best Camera Tips, you can accurately test a camera by checking basic operation, image quality, and safety settings. Start with cleaning the lens, update firmware, then run a controlled test shoot under neutral lighting. Analyze exposure, focus, white balance, and stabilization, and document results for comparison over time with consistency.
Why test camera matters
Testing a test camera isn't just about getting great shots; it's about reliability across real-world scenarios. For aspiring photographers and home security enthusiasts, a structured test helps identify weaknesses before they disrupt important work. Regularly testing a test camera reveals exposure errors, color shifts, autofocus inconsistencies, and unexpected stabilization issues that might otherwise go unnoticed until it matters most. A well-planned test camera procedure builds confidence that your gear performs as expected across different lighting, scenes, and subjects. By using repeatable targets and standardized settings, you create a baseline you can compare against in future sessions. This consistency matters for learning, calibration, and making informed gear choices.
Pre-test setup and safety checks
Before you start, set up a safe testing environment and prepare your gear. Charge the battery, ensure you have a fresh memory card, and check firmware version; reset to a known baseline if needed. Clean the lens with a microfiber cloth and inspect the sensor area for dust. Make sure your tripod is stable and the surroundings won't cause vibrations. If you use a security camera, verify network connectivity and recording settings. These steps help ensure your test camera results reflect true performance rather than setup errors.
Conducting a controlled test shoot
Set up a controlled test scene so results are repeatable when you test camera performance. Use a neutral gray card to calibrate exposure and white balance, and shoot in manual mode with fixed ISO, aperture, and shutter speed. Keep lighting constant to avoid scene-driven differences, and use a color target to verify color accuracy. For security cameras, record at the usual frame rate and resolution to simulate real monitoring conditions. Reference shots with the same focal length to reduce variables. This disciplined approach makes it easier to detect genuine changes in your test camera over time.
Assessing image quality and camera performance
Review your test camera results systematically. Check exposure by examining the histograms and highlight/shadow detail; look for blown highlights or crushed shadows. Inspect color fidelity by comparing against the color target and ensuring white balance remains stable across the scene. Test autofocus at different distances and lighting; verify tracking and consistent sharpness. Evaluate stabilization by panning slowly and confirming motion blur stays within acceptable limits. For video-capable cameras, review motion artifacts and audio capture quality. Repeating the same test camera workflow helps you compare apples to apples across sessions.
Documentation, storage, and trend tracking
Create a structured test log that records date, gear used, scene, settings, and results for each session. Store RAW files alongside JPEGs to preserve quality, and include metadata in file names. Maintain a simple spreadsheet or journal to compare results over time, noting improvements or declines in performance. For home security cameras, keep clips of core test scenes and annotate any night-vision performance differences. Regular documentation makes future calibration more accurate and easier to reproduce, which is especially valuable when you test camera longevity.
Troubleshooting common issues and next steps
If results vary between sessions, re-create exact conditions and retest to confirm a trend. Color casts may indicate white balance drift or lighting shift; recalibrate with a gray card and adjust color targets. Autofocus hunts can stem from low light, lens quality, or firmware bugs—check firmware, update if available, and, if needed, test with a different lens. Dust on the sensor shows up as spots in captured frames; use proper cleaning tools and avoid touching the sensor. When in doubt, compare with a known-good test camera to isolate the cause.
Quick stats on camera testing
In Best Camera Tips analysis, regular test camera checks reduce surprises and help you track gear health over time. A consistent testing routine catches drift in exposure, color, and autofocus early, enabling timely calibration or service. Use a repeatable test scene to compare results across sessions and build a long-term history of your camera's performance. These habits empower you to make better buying, maintenance, and shooting decisions.
Tools & Materials
- Camera body(The primary unit you will test)
- Lens (standard kit or prime)(Useful for consistent optics)
- Memory cards(At least one card with ample space)
- Battery and charger(Keep a charged spare)
- Tripod(Stable base for repeatable shots)
- Microfiber cleaning cloth(Gently clean lens surfaces)
- Gray card / color reference target(Calibrate white balance and exposure)
- Lens cleaning pen or blower(Optional for stubborn dust)
- Notebook or tablet(Record settings and observations)
Steps
Estimated time: 60-90 minutes
- 1
Gather and inspect gear
Collect the camera body, lens, memory card, battery, tripod, gray card, and cleaning supplies. Check each item for damage and ensure the kit is complete for the test camera session. Arrange items on a clean surface to avoid misplacing components.
Tip: Place all items within arm's reach to prevent interruptions during setup. - 2
Update firmware and reset baseline
Check the current firmware version, install updates if available, and restore default settings to establish a known baseline. This step minimizes software-related variables when you test camera performance. Confirm that custom profiles are backed up first.
Tip: Back up your own settings before resetting so you can compare changes later. - 3
Clean optics and sensor area
Power off the camera and gently clean the lens surfaces with a microfiber cloth. Avoid touching the sensor directly; use a blower if needed. Dirty optics can bias your test camera results by reducing sharpness and accuracy.
Tip: Never spray liquids directly on the lens; apply to the cloth instead. - 4
Set up a controlled test scene
Position a neutral gray card and color reference target in a stable, evenly lit area. Use manual mode with fixed ISO, aperture, and shutter speed to minimize scene variability. Capture a baseline frame for reference before proceeding with test shots.
Tip: Keep lighting constant across all shots to ensure valid comparisons. - 5
Capture test shots with repeatable settings
Take a series of frames at fixed exposure settings and focal lengths. Include a few frames in RAW (where possible) for post-processing analysis and a set of JPEGs for quick review. Label each shot with a consistent naming convention that includes date and settings.
Tip: Use RAW whenever available to maximize post-processing flexibility. - 6
Review results and analyze
Examine histograms and highlight areas to assess exposure, white balance, and color accuracy. Check autofocus performance at multiple distances and lighting conditions. Verify stabilization with deliberate camera motion and compare sharpness across frames.
Tip: Keep a side-by-side comparison against the reference shot for clarity. - 7
Document and archive
Record session details, including gear used, scene description, settings, and observations. Save and organize files with metadata and maintain a simple log to identify trends over time. Consider creating a portfolio of test camera results for future reference.
Tip: Create a dedicated folder structure and a naming scheme for easy retrieval.
Common Questions
What counts as a successful test for a camera?
A successful test confirms basic operation, exposure accuracy, color fidelity, autofocus, and stabilization under a controlled scene. It ensures your gear performs predictably across typical shooting conditions.
A successful test means your camera operates reliably in a controlled setup and the results are repeatable.
How often should I test my camera?
Test after firmware updates, after service or repairs, and periodically to catch drift in performance. Establish a routine you can sustain over months and seasons.
Test it after updates or maintenance and on a regular testing schedule.
Do I need color calibration tools to test camera?
Yes. A color reference target and a calibrated light source help align white balance and color accuracy, especially for critical shoots or when color fidelity matters.
A color target helps you calibrate color accuracy during testing.
Can testing fix autofocus issues?
Testing can reveal autofocus problems, but fixes may require firmware updates or service. Use the results to guide troubleshooting or professional assessment.
Testing can uncover autofocus problems; updates or service may be needed.
How should I store and organize test results?
Keep organized folders with date, gear, scene, settings, and results. Preserve RAW and JPEG copies and metadata for easy comparison.
Store results with clear date and gear information.
What if results vary between sessions?
Variations can come from lighting, battery, or aging. Re-create identical conditions and retest to confirm trends before drawing conclusions.
If results change, repeat tests under the same conditions to see if a trend appears.
Watch Video
The Essentials
- Plan a focused test session with a defined scene.
- Check core functions before advanced features.
- Document results with consistent metadata.
- Review results regularly to track changes over time.
- Rely on ongoing testing, per Best Camera Tips.