How to Check Camera: A Practical Troubleshooting Guide
Learn how to check camera health, image quality, and settings with a step-by-step guide. Practical tips for photographers and home-security enthusiasts to keep gear reliable.

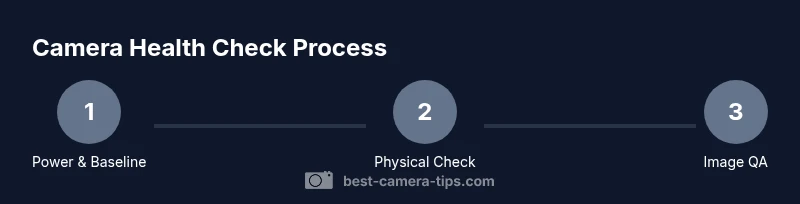
This guide shows how to check camera health, image quality, and settings in a practical, repeatable way. You’ll verify power, memory, and lenses, test autofocus, exposure, and firmware, then review test shots to confirm consistency. The method applies to most DSLR, mirrorless, and security cameras. Prepare a simple checklist and gather tools before you start.
How to check camera health: key approach and baseline
Regular checks ensure your camera remains reliable for photography and home security. When you learn how to check camera health, you cover hardware integrity, image quality, and firmware. Start with a clear baseline: note current battery performance, autofocus speed, exposure behavior, and histogram responses under your typical lighting. This baseline helps you spot drift later, whether you’re chasing sharp wildlife shots or steady surveillance footage. For photographers, a dusty sensor, a sticky autofocus motor, or uneven white balance can ruin a shoot. For security cameras, intermittent power, firmware glitches, or corrupted video can compromise safety. Build a repeatable routine that you can perform in under an hour every few weeks. The sections that follow provide concrete actions, a practical checklist, and tips to diagnose problems quickly and keep gear in peak condition.
Gathering a baseline: what to record
Before you start testing, establish a simple baseline log. Note battery health, capacity when full, memory card status, and general camera performance on startup. Capture a few test frames in a controlled scene and review them on the screen for immediate red flags. A written log helps you compare future checks and spot gradual changes. This approach reduces guesswork and makes troubleshooting faster when you’re on a shoot or securing footage.
Physical health: body, lens, and mount
The camera body and lens are the core of any check. Inspect exterior seals, the lens mount, and filters for dust or scratches. Look for loose screws or misaligned elements, and verify that the lens release mechanism works smoothly. Check the sensor cover for scratches and dust, especially after changing lenses in dusty environments. If you notice any physical damage, schedule professional servicing or consider a protective filter to reduce future wear.
Power, storage, and connectivity readiness
Power is fundamental. Ensure the battery locks in securely, holds charge, and shows full voltage on startup. For cameras with removable storage, verify the card type, available space, and write speed by recording a short clip or RAW image. Check network or Bluetooth connectivity if you rely on remote control or cloud uploads. A weak connection or flaky power source is a common cause of interrupted shoots; address it before critical sessions.
Image quality: exposure, white balance, and autofocus
Test exposure using a scene with a range of brightness. Review the histogram to ensure no clipping, and adjust ISO, shutter speed, and aperture to achieve proper exposure. Check white balance by comparing skin tones and neutral grays across lighting conditions. Test autofocus at multiple distances and focal lengths; assess whether focus locks consistently on targets and whether any back- or front-focusing occurs. If autofocus is inconsistent, you may need to recalibrate the lens or update firmware. These steps form the core of how to check camera image quality across scenarios.
Cleanliness and optics care
Dust on the sensor or inside the lens can degrade image quality. Use a blower to dislodge loose dust and a microfiber cloth for lenses. If stubborn spots persist, use a proper sensor-cleaning kit following the manufacturer’s guidance. Do not rub or spray liquid directly on the sensor. Regular cleaning keeps test results reliable and reduces the need for post-processing corrections.
Firmware, calibration, and menu hygiene
Keep firmware up to date to improve stability and compatibility with lenses and memory cards. Run any built-in calibration routines if your camera supports micro-adjustment for lenses. In the menu, note any modified defaults after testing and consider restoring factory resets if you encounter irregular behavior. Maintaining consistent settings across tests ensures repeatability in your results.
Real-world testing: scenarios and interpretation
Apply your checks to real-world conditions: a bright outdoor scene, a low-light interior, and a fast-action moment. Compare the captured results to your baseline and identify deviations. If results are off, isolate the variable: power, lens, exposure, or autofocus. Document findings and decide whether adjustments are needed or if professional service is warranted.
Maintenance cadence and when to seek help
Establish a routine cadence, such as every 4–8 weeks or after a firmware update or lens change. If you encounter recurring issues that don’t resolve with settings and basic maintenance, seek professional servicing. Regular checks reduce the risk of sudden failures during important shoots or critical security events.
Tools & Materials
- Camera body(Your main unit)
- Charged battery(Carry spare if possible (two batteries recommended))
- Memory card (spare)(Test with a fresh or known-good card)
- Lenses appropriate to body(One standard zoom works for baseline)
- Lens cleaning kit(Air blower + microfiber cloth)
- Lens hood/filters (optional)(Protects front element during tests)
- Notebook and pen(Log results and observations)
- Test chart or plain target(Use for exposure and focus tests if available)
Steps
Estimated time: 30-45 minutes
- 1
Power up and establish baseline
Power on the camera, verify battery health, and confirm the card is recognized. Take a few quick shots in a controlled scene to establish a baseline for exposure, autofocus speed, and color rendering. Note any warning messages on startup.
Tip: Have fresh batteries and a known-good memory card ready to avoid interruptions. - 2
Inspect body, lens, and mount
Visually inspect the camera body, lens mount, and external elements for scratches, loose screws, or misalignment. Ensure filters and lens caps are in place when not testing. Check the mount alignment by mounting a lens and rotating it gently.
Tip: Look for dust or fingerprints around the sensor area when a lens is detached. - 3
Test autofocus and manual focus
Focus on targets at several distances and through different focal lengths. Compare autofocus performance with manual focus accuracy. Note any back- or front-focusing issues and document corner sharpness.
Tip: If you see front/back focusing, try recalibrating the lens in-camera or consult the lens manual. - 4
Run exposure and histogram checks
Capture scenes with high dynamic range and check the histogram for clipping. Adjust ISO, shutter speed, and aperture to avoid loss of detail in highlights and shadows. Record the settings that give balanced exposure.
Tip: Aim for a histogram that fills the middle thirds without clipping at either end. - 5
Review test shots and adjust
Transfer or view test images on a larger screen if possible. Look for color cast, noise levels, and edge detail. Adjust white balance, picture profile, and focus calibration if needed, and update the baseline log.
Tip: Keep a record of changes to ensure you can revert to a known-good state.
Common Questions
What is the first step in checking a camera?
Begin with power, battery health, and memory card recognition. This ensures the camera can run tests and record results.
Start by checking power, battery health, and memory card status to guarantee the camera can perform tests.
How often should you perform a camera health check?
Aim for a routine every 4 to 8 weeks, or after firmware updates and lens changes, depending on how often you shoot or monitor security footage.
Do a health check every month or so, especially after firmware updates or changing lenses.
Can I check camera without taking new photos?
Yes. You can test exposure and autofocus with static scenes or calibration targets without capturing new shoots. Review results on the LCD or external monitor.
Yes—test with a static scene or calibration target and review results without taking new photos.
What tools are essential for checking a camera?
A charged battery, memory card, lenses, and a cleaning kit are essential. A test chart or neutral target helps accuracy in exposure and focus tests.
Charged battery, memory card, lenses, and a cleaning kit are essential; a test target helps accuracy.
What signs indicate a need for professional service?
Persistent focus issues, unexplained image quality degradation, firmware instability, or camera overheating after tests suggest professional servicing may be required.
If issues persist after tests, consider professional servicing for deeper diagnosis.
How do I check firmware version and update status?
Navigate to the camera's setup menu to locate firmware version. Compare it with the latest release on the manufacturer’s site and update if advised.
Open the setup menu, find the firmware version, and update if a newer version is available.
Watch Video
The Essentials
- Establish a repeatable camera health routine.
- Document baseline results and track changes over time.
- Check power, memory, and physical integrity first.
- Test autofocus, exposure, and white balance in real scenes.
- Seek professional service if issues persist after checks.