What to Do on Camera: A Practical Guide for Beginners
A comprehensive, step-by-step guide to looking confident, framing well, and delivering naturally on camera. Learn pre-shoot prep, settings, wardrobe, lighting, and post-shoot review for aspiring photographers and home-security enthusiasts.

In this guide you will learn the essential steps to perform confidently on camera. You’ll prep gear, set exposure, craft your look and body language, frame scenes effectively, and practice delivery. Follow practical tips to come across naturally while staying safe and professional. This quick answer helps you prepare before shoots, during takes, and in post-production.
Prepping Before You Shoot
Preparation isn’t glamorous, but it is the backbone of confidence on camera. When you ask yourself what to do on camera, begin with a clear objective for the scene and a simple plan for each take. Gather your gear, verify power and storage, and rehearse a few lines or actions. The Best Camera Tips team stresses a repeatable pre-shoot routine: confirm location permissions, check sound and lighting, and create a tiny shot list that keeps you on track.
Set up your camera with the right settings before you show up: frame rate, resolution, white balance, and audio input. If you’re outdoors, check the weather, wind, and shade; indoors, control room noise and natural light. Choose clothing that contrasts with the backdrop to prevent blending into the background. On a practical level, arrive early, power up, and run a quick test shot in the actual space. If you change outfits, select one that reads well on video and feels comfortable.
Finally, warm up your voice and posture. Hum gently, take deep breaths, and perform a quick shoulder roll to release tension. A few minutes of preparation reduces anxiety and makes your on-camera performance feel natural from the first frame.
Camera Settings and Exposure
Choosing the right exposure and shutter approach is a core skill for what to do on camera. Start with your exposure triangle: shutter speed, aperture, and ISO. For most talking-head scenes, set a moderate shutter speed (roughly 1/60 to match your frame rate) to keep motion smooth, then pick an aperture that preserves a comfortable depth of field. If you’re new to manual control, shoot in aperture-priority or program auto and adjust until skin tones look natural. White balance should reflect your lighting: use a preset or a gray card to avoid color casts.
For color accuracy, enable zebras to monitor highlights and avoid blown-out cheeks or hair. If you’re recording video with separate audio, mirror your lighting to ensure the subject stays well-lit as you adjust mic placement. Finally, run a quick test clip and review it on location to ensure exposure, color, and audio are balanced before you proceed.
Framing, Composition, and Background
Good framing in on-camera work keeps the viewer focused on you and your message. Start with the rule of thirds and position your eyes roughly one-third from the top of the frame. Leave appropriate headroom so your head doesn’t feel squeezed, and ensure the camera is at eye level or slightly above for a natural gaze. Consider your background: a clean, unobtrusive backdrop often reads best, while color harmony between subject and environment creates visual cohesion.
Test several compositions before you commit to one: close-ups for intimacy, medium shots for dialogue, and wide shots for context. Ensure your posture communicates confidence—shoulders relaxed, spine straight, chin neutral. If you’re in a small space, use a simple foreground element to add depth. Avoid clutter that draws attention away from your message; items in the frame should support the story, not compete with it. Finally, practice a few takes in each setup so you can switch angles smoothly if you need variety.
Voice, Speech, and Micro-gestures
Your voice anchors credibility on camera. Speak clearly, at a measured pace, and use natural pauses to emphasize key points. Practice enunciating so every word lands—listeners should understand you without straining. Micro-gestures, like a controlled head tilt, steady hand movements, and occasional expression changes, keep energy up without distracting the audience. Relax your jaw and shoulders; tension shows on screen.
Lighting, Sound, and Environment
Lighting shapes mood and readability. Use a key light at a 45-degree angle to illuminate your face, supplement with a fill light to soften shadows, and add a backlight to separate you from the background. Avoid harsh overhead lighting that creates unflattering shadows. For sound, use a dedicated microphone and place it close but out of frame; test wind or room tone and adjust levels so your voice sits comfortably above background noise. Create a controlled environment: quiet room, neutral walls, and minimal reflective surfaces. If you can’t control the space, use soft, diffuse lighting and a portable mic to reduce noise.
Wardrobe, Props, and Color Theory
Wardrobe matters because color communicates mood and reads on camera. Choose solid colors that contrast with the background and avoid intricate patterns that can cause moiré or distraction. Keep outfits simple and comfortable to support natural movement. Consider props that reinforce your message but don’t overwhelm the scene. Practice in your chosen outfit to ensure it sits well during movement and doesn’t require constant adjustment.
Practice, Review, and Adaptation
Practice is the bridge from theory to on-camera excellence. Record several takes, then review the footage with a critical eye: note timing, posture, voice, and gestures. Track what works and what doesn’t, then refine your approach. Rehearse a few lines in advance, but allow spontaneity so your delivery remains fresh. Finally, adapt your setup for different shoots by tweaking lighting, framing, and audio as needed.
Tools & Materials
- Camera body (DSLR/Mirrorless)(Ensure firmware is up to date)
- Interchangeable lenses(Prime or zoom; versatile focal lengths)
- Tripod or stable surface(Lock height; use a fluid head if possible)
- Memory cards(Fresh cards with enough space for shoots)
- External microphone(Lavalier or shotgun; test audio levels)
- Lighting kit (optional)(LED panels or softboxes for control)
- Power and spares(Extra batteries or power bank)
- Cleaning cloth(Lint-free for lenses and screens)
Steps
Estimated time: 60-90 minutes
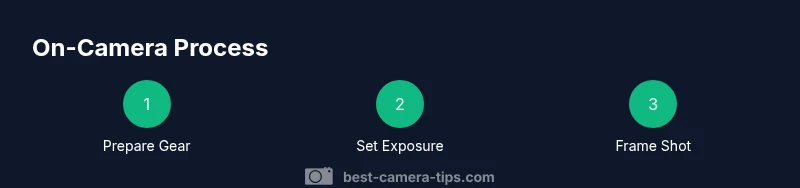
- 1
Prepare Your Gear
Power up all devices, insert fresh memory cards, and confirm lenses are clean. Check your audio gear and test one quick recording to verify the setup matches your plan.
Tip: Double-check battery levels before you start to prevent mid-take power loss. - 2
Set Exposure and White Balance
Choose a stable shutter speed, aperture, and ISO for the scene. Use a white balance preset or a gray card to keep skin tones natural.
Tip: Run a 2-3 second test clip and adjust until the skin tones look correct on the monitor. - 3
Frame Your Shot
Position the camera at eye level and compose using the rule of thirds. Test multiple framings and select the strongest background.
Tip: Do a quick focus check by touching the eye region on the LCD to lock sharpness. - 4
Practice Your Delivery
Rehearse your lines with natural pauses and relaxed gestures. Record a few takes to build comfort with timing.
Tip: Keep breaths steady; a short pause can emphasize key points. - 5
Record and Review
Capture several takes and review them on a larger screen. Note posture, pacing, and pronunciation for refinement.
Tip: Mark the best takes with a quick note so you can compare later. - 6
Adjust and Finalize
Tweak lighting, framing, and audio levels based on reviews. Do a final pass to ensure consistency across takes.
Tip: Keep your final setup simple to reduce on-set adjustments.
Common Questions
What should I wear for on-camera appearances?
Choose solid colors that contrast with the background and avoid busy patterns. Ensure the outfit fits well and allows comfortable movement. Test the look on camera to confirm it reads cleanly on screen.
Choose solid colors that stand out against the background and move comfortably. Test the outfit on camera to confirm it reads well.
How can I look natural on camera?
Practice speaking at a steady pace, maintain gentle eye contact with the lens, and use relaxed facial expressions. Rehearse routines until timing feels natural, then record and review.
Practice your delivery at a steady pace, look at the lens, and stay relaxed. Review your takes to refine.
What lighting setup is best for beginners?
A basic three-point setup (key, fill, backlight) works well for most scenes. Adjust intensities to avoid harsh shadows and ensure the subject is well separated from the background.
Try a simple three-point light setup and adjust to keep shadows soft and your face well lit.
Do I need professional audio equipment?
Yes, an external microphone improves clarity far more than a built-in mic. Test levels before recording and place the mic close but out of frame.
An external mic makes a big difference. Test levels and position it close to you but out of view.
How should I practice for on-camera performance?
Record yourself regularly, then critique pacing, gestures, and pronunciation. Rehearse with intention but leave room for natural spontaneity.
Record and review often to refine pacing and gestures, while staying natural.
What common mistakes should I avoid?
Overacting, fidgeting, poor audio, and cluttered backgrounds. Prepare in advance and do a quick pre-check before each take.
Avoid overacting and background clutter. Do a quick check before you start.
Watch Video
The Essentials
- Prepare thoroughly before you shoot
- Frame and compose with intent
- Speak clearly and control your pace
- Review footage to refine delivery
- Keep wardrobe and background cohesive