How to Make a Paper Camera: A DIY Pinhole Guide
Learn how to make a camera with paper using a simple pinhole design. This beginner-friendly guide covers materials, step-by-step assembly, testing, and creative variations for amazing DIY photography outcomes.

Goal: Build a simple, light-tight camera from paper using a pinhole. You’ll convert a small box or folded cardstock into a miniature camera obscura, then poke a tiny pinhole to capture images on light-sensitive material (or a taped photo paper). This guide walks you through a safe, beginner-friendly process for how to make camera with paper, with materials and a step-by-step plan.
Why a paper camera works
A paper camera operates on the same physics as a classic camera obscura: light travels in straight lines and forms an inverted image when it passes through a tiny aperture. By constraining light with a light-tight paper shell and a carefully sized pinhole, you create a simple imaging device that can reveal a real scene on photographic paper or a light-sensitive surface. According to Best Camera Tips, paper-based projects are excellent for learning the fundamentals of optics, exposure, and composition without the cost or complexity of traditional gear. This approach aligns with practical, hands-on learning and is accessible to beginners exploring how to make camera with paper. Expect a soft-edged, monochrome result that teaches you where sharpness and exposure come from, while sparking curiosity about more advanced DIY photography concepts like pinhole diameter and focal length.
In this section you’ll start from first principles and build confidence in managing light and framing. You’ll also see how a simple sheet of black paper can suppress unwanted reflections, turning a humble craft project into a functioning camera that demonstrates core photography ideas. If you’re aiming to understand the basics of pinhole photography, this project is an ideal starting point that keeps you focused on technique rather than expensive gear.
Brand note: This kind of hands-on exploration is exactly the kind of practical skill Best Camera Tips emphasizes for aspiring photographers. Although the results aren’t professional-grade, the learning is genuine, repeatable, and reproducible with household materials. By completing this project, you’ll gain intuition you can apply to more complex setups like DIY cameras and security-camera experiments.
What you will build: a paper pinhole camera
The aim is to construct a compact, light-tight shell from paper and cardboard that can hold a small piece of photographic paper or a light-sensitive surface. Your camera will use a very small pinhole as the aperture, allowing light to enter and project an inverted image onto the recording surface inside. You don’t need a glass lens or digital components—just precision in light sealing and pinhole creation. This project is ideal for beginners interested in the basics of optics and composition, showing how a tiny hole can form an image on a flat surface. By the end, you’ll have a tangible, working paper camera that demonstrates the core principles of exposure, scale, and symmetry in a visually engaging way.
Materials and light-tight design
To ensure a clean, publish-ready picture, you must prioritize light-tight construction and careful pinhole creation. The paper-based housing should be wrapped in a dark material on the outside to prevent stray light leaks. At the core, the pinhole’s diameter controls sharpness and exposure time, so you’ll experiment with small, deliberate changes. Use black construction paper or matte black cardboard to line the interior; this reduces internal reflections and improves contrast in your captured images. Keep edges sealed with opaque tape, not transparent adhesives, to prevent light from sneaking in. The design relies on accessible, everyday items, making it easy for beginners to practice the craft of how to make camera with paper while still achieving meaningful results.
As you assemble, think about the camera as a simple light funnel: a flat surface converging to a tiny opening, then diverging again inside your paper shell. The goal is to keep stray light out and preserve as much image quality as possible given the constraints of a paper-based system. This is a safe, low-cost way to learn about exposure, opening size, and the relationship between aperture and detail.
How a pinhole camera captures an image
In a paper pinhole camera, light from a scene enters through a pinhole and projects an inverted image onto the recording surface inside. Because there is no complex lens system, exposure times can be longer and require a calm, stable setup. A smaller pinhole yields sharper detail but requires longer exposure, while a larger hole lets in more light and speeds up exposure but softens the image. Paper quality also plays a role: thicker, smoother surfaces produce different tonal responses than rougher ones. When you begin, you’ll explore how simple adjustments—such as the pinhole size, the distance between the pinhole and the recording layer, and the positioning of the paper—affect sharpness and contrast. This block reinforces core concepts like focal length and geometry using a tactile, approachable project that demonstrates how images are formed without a modern camera lens.
As you gain experience, you’ll start comparing results from various paper types and pinhole sizes, building an intuition for how to optimize exposure for different scenes. The learning here translates to a broader understanding of light behavior, which is valuable whether you’re building more complex DIY cameras or studying camera security setups.
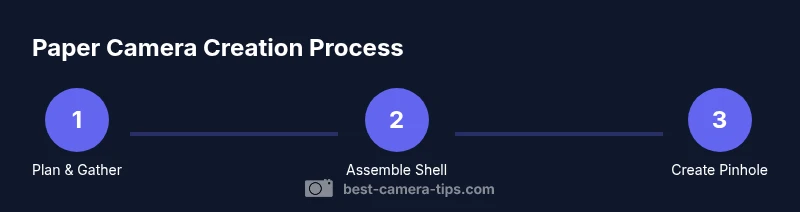
Step-by-step overview: from shell to shot
This section provides a conceptual map of the project so you know what to expect before diving into the detailed steps. You’ll plan the shell construction, prepare the pinhole, assemble the light seal, and set up a test scene to evaluate exposure. Expect a sequence of practical decisions: choosing materials, aligning the pinhole with the recording surface, and testing with simple subjects. Having a clear plan reduces mistakes and keeps the process enjoyable. Remember, the goal is learning, not perfection. As you progress, you’ll refine your technique and come away with a functioning paper camera that demonstrates essential photography principles such as framing, exposure, and sharpness, all achieved with low-cost, readily available materials.
By the end of this section you’ll be ready to move into the hands-on steps, knowing what to inspect during assembly and how to frame a compelling shot using a paper-based camera.
Testing and capturing your first photo
Testing begins with a visible test subject placed at a known distance from the camera. You’ll expose standard photo paper or a basic light-sensitive surface inside the shell for a brief duration, checking for shadow, form, and tonal range. The first test helps you calibrate exposure by adjusting pinhole size or exposure time, rather than instantly seeking fine detail. Fresh, modern photographic papers vary in responsiveness, so run a small set of tests to compare outcomes. When you finally see an image emerge, you’ll understand how the interplay of light, exposure, and the paper’s surface texture creates the final result. This practical feedback loop is essential for mastering how to make camera with paper and for applications in educational settings or DIY photography labs.
Common issues and fixes
Light leaks are the most common nemesis of a paper camera; double-check all edges and seams, applying opaque tape where needed. A pinhole that’s too large reduces sharpness, so try a smaller aperture and shorter exposure. If images appear underexposed, lengthen exposure time or use brighter scenes; if overexposed, reduce exposure or use a smaller pinhole. Paper texture and surface tension can affect grain and contrast, so experiment with different paper types—glossy, matte, or grid-ruled—to see how the surface influences the capture. Finally, stabilize the shell during exposure to prevent motion blur. Each adjustment teaches you more about the delicate balance between light, time, and material quality, reinforcing the core idea that simple DIY gear can yield meaningful results when you understand the basics of exposure and image formation.
Variations and advanced ideas
To push the project further, try enlarging or reducing the housing to explore perspective changes and field of view. You can experiment with colored paper or translucent overlays to add mood and tone to the output, though this will affect exposure. Using recycled materials encourages sustainable practice and can yield unique textures in the final image. Consider adding a tiny adjustable shutter using a folded flap to vary the light entering through the pinhole, or attach a simple make-shift float frame to hold different paper stocks. These variations broaden your understanding of camera design and give you creative control over how the paper camera records scenes, all while staying within a low-cost, educational framework.
As you gain confidence, you may transition from a single-purpose paper camera to a small family of DIY imaging devices that demonstrate the spectrum of exposure, sharpness, and composition techniques—an excellent way to connect hands-on projects with broader photography and security-camera concepts.
Safety and maintenance
Working with sharp tools and adhesives requires caution, especially when children are involved. Use safety scissors and a low-velocity pin for the pinhole to minimize risk. Store spare materials in a dark, dry place to prevent accidental exposure of paper. Keep the interior clean and free of dust to avoid affecting image quality. If you notice small light leaks after a long session, reseal the edges and touch up with opaque tape. Regular checks are a good habit when you’re experimenting with DIY camera builds, ensuring longevity and enabling continued learning in photography fundamentals.
Tools & Materials
- Small box or folded cardstock (a compact shell)(Dark-colored outside if possible; roughly the size of a small book or deck of cards)
- Black construction paper or matte black cardboard(Interior lining to minimize reflections)
- Opaque tape (masking or black tape)(Seal seams and edges securely)
- Aluminum foil or metal film (for pinhole edge)(Sharp edges avoided; use sparingly)
- Needle or pin for making the pinhole(Very fine; handle carefully to avoid injury)
- Scissors or craft knife(Sharp blades; use with adult supervision if needed)
- Ruler or straightedge(For precise measurements and alignment)
- Photo paper or light-sensitive recording surface(Unexposed, store in the dark until use)
- Glue stick or a small amount of white glue(Optional for extra sealing)
Steps
Estimated time: 60-90 minutes
- 1
Gather materials and set up workspace
Lay out all components on a clean, well-lit surface. Group the shell, lining materials, and recording surface in separate zones to avoid cross-contamination. This ensures you can work methodically as you begin the paper camera build.
Tip: Double-check light-tight areas before starting; light leaks ruin exposure. - 2
Create the light-tight shell
Assemble the outer shell from the box or folded cardstock, then line the interior with matte black paper. Seal all edges with opaque tape, ensuring there are no gaps where light could leak in.
Tip: Test the shell by holding it up to a bright lamp in a dark room—no light should leak inside. - 3
Create the pinhole aperture
Carefully puncture a tiny hole in a thin piece of foil or card where the front will be. The pinhole should be as symmetric as possible to promote even light entry. If needed, use multiple small attempts to find a balance between sharpness and exposure time.
Tip: Start with a pinhole about the width of a hair; adjust based on initial test results. - 4
Mount the pinhole and seal the opening
Attach the foil or film over the prepared opening and seal it from the outside with tape. Make sure the pinhole is flush and centered to align with the recording area inside.
Tip: Use a small shim of paper to keep the pinhole perfectly perpendicular to the recording surface. - 5
Prepare the capture surface
Cut a piece of photo paper or other light-sensitive material to fit the interior area. Place it flat against the inner surface, ensuring no folds or air bubbles trap light near the edge.
Tip: Keep the surface clean and avoid touching the recording side with bare fingers. - 6
Test exposure and adjust
In a dim room, point the camera at a simple scene and expose for a short period. Develop or inspect the paper after a minimal test to gauge exposure; adjust pinhole size or exposure duration as needed for subsequent shots.
Tip: Document your settings and results for iterative learning.
Common Questions
What is a paper camera and how does it work?
A paper camera uses a tiny pinhole to project an inverted image onto a recording surface inside a light-tight shell. No lens is required, making it a great learning tool for optics and exposure basics.
A paper camera uses a tiny hole to form an image inside a light-tight shell, without a lens. It’s a great way to learn about light and exposure.
Can I use ordinary printer paper for the photos?
Printer paper can work, but results vary with texture and thickness. For best results, try matte papers designed for photography or craft stock, then compare exposures to choose the best option.
Printer paper can work, but matte craft paper often gives better results. Try a few types to see what looks best.
Do I need special equipment to start?
Not really. The project uses simple materials like cardboard, black paper, foil, and a pin. With patience, you can explore exposure, framing, and composition without expensive gear.
You don’t need special gear—just basic craft supplies. It’s a great way to learn fundamentals.
How do I manage exposure without a light meter?
Start with short exposures and bright scenes. Incrementally adjust pinhole size and exposure time based on test results to learn how light affects the image.
Without a light meter, begin with short exposures and brighter scenes, then adjust based on your test photos.
Is this safe for kids to do with supervision?
Yes, with supervision. Use child-safe scissors, beginner-friendly tools, and avoid sharp blades. Emphasize safety while encouraging creativity and curiosity.
It can be kid-friendly with proper supervision and safe tools. It’s a fun way to learn together.
Watch Video
The Essentials
- Build a light-tight shell to prevent stray light.
- Pinhole size controls exposure and sharpness.
- Testing and documenting results speeds improvement.
- DIY paper cameras teach core photography basics.