How to Make a Camera: A DIY Guide for Beginners
Learn how to make a camera from common materials with a step-by-step approach, exploring pinhole and lens-based designs while emphasizing safety, optics basics, light control, and practical testing.

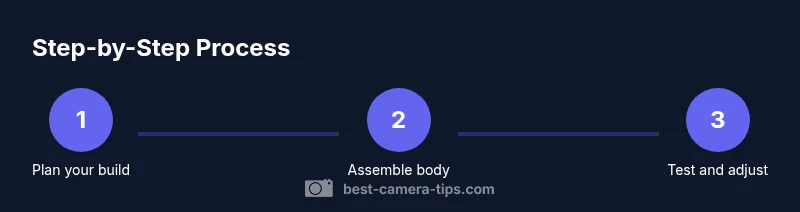
By following this guide, you’ll learn how to make a camera—from a simple pinhole design to a basic lens-based body—using common materials. You’ll choose a build path, assemble a light-tight enclosure, and test with basic paper or film. Required items include a sturdy box, black tape, a pinhole or small lens, light-tight seals, and safe loading materials.
Understanding the goal and scope of making a camera
According to Best Camera Tips, making a camera is a hands-on way to learn how light, exposure, and optics create an image. This educational exercise remains valuable even as consumer cameras become ubiquitous. In this section, you’ll see why a DIY camera is a powerful learning tool, and how choosing between a pinhole design and a basic lens-based body shapes your approach and materials. You’ll also map your learning objectives: is the goal to understand geometry, to experiment with light control, or to produce sharable photographs? By clarifying goals, you’ll save time and avoid frustration as you move through the build.
The project is intentionally modular: you can start with a simple pinhole body and advance to a more complex lens-based design as your confidence grows. This approach aligns with practical learning principles and helps you connect theory with hands-on practice.
Core camera principles: light, exposure, and image formation
A camera is a light-tight body that controls how light from a scene forms an image on a photosensitive surface. Even a pinhole camera uses a tiny aperture to project an image; a smaller hole increases sharpness but reduces brightness. Exposure depends on hole size (or aperture), the distance to the sensitive medium, and the duration of light hitting it. Understanding these relationships helps you predict results and iterate quickly. For beginners, sketching a simple diagram of the light path inside your design can clarify expectations before cutting any material.
This foundational knowledge sets the stage for you to experiment with different configurations and observe how minute changes affect the final picture.
Pinhole vs lens-based builds: trade-offs
Two common routes exist when you set out to make a camera: a pinhole design and a lens-based body. Pinhole cameras are simple, inexpensive, and demonstrate the fundamentals of light and exposure without needing a glass lens. Lens-based designs offer faster exposure, potential for sharper images, and the possibility of adjusting focal length for different compositions. Your choice should depend on your learning objectives, available materials, and tolerance for longer exposure times in pinhole builds.
Choosing early helps you align your tools and testing approach, which reduces wasted effort and accelerates progress.
Materials and workspace setup
Before cutting any material, assemble a small, well-lit, dust-free workspace. Gather a sturdy box, tape, a ruler, a sharp blade, and a few options for sealing light leaks. Keep a few test photos on hand to compare results. If you’re teaching young makers or shooting with limited tools, start with a simple pinhole setup and scale up later. Remember to plan for light leaks and shadow lines, which are the main challenges in DIY camera projects.
Organize your tools in labeled containers, use a cutting mat, and dispose of sharp waste safely. A tidy workspace reduces mistakes and keeps your materials in good condition for multiple attempts.
Light-tight construction techniques
The most common failure in DIY cameras is light leaks. To minimize them, line interior surfaces with a non-reflective material (matte black paint or aluminum foil wrapped in a mat finish). Seal seams with multiple layers of black tape and test by shining a bright light around every edge in a dim room. A light-tight enclosure ensures your image forms only from the intended aperture and avoids fogging or glare that will ruin test shots.
Even small gaps can ruin exposure, so take your time sealing every seam, corner, and face where light might sneak in.
Loading the light-sensitive material safely
For beginner builds, light-sensitive paper is a forgiving alternative to film. In a dim or red-safe environment, place the paper inside the light-tight chamber behind the aperture. Do not handle paper in full light; rinse and dry films only in a proper darkroom or using safe daylight-loading techniques. If you use traditional film, be mindful of chemical handling and disposal. For digital experiments, you can simulate exposure with photo paper scanning.
Handling sensitive materials with care keeps results consistent and reduces waste while you learn the basics of exposure and development.
Testing and calibration basics
Once your camera is assembled, perform a controlled test. Create a simple scene with high contrast, and set a baseline exposure by estimating the pinhole size or focal length. Take multiple test shots, varying exposure times slightly to observe changes. Compare results with your expected outcomes, noting where light leaks exist or where focus is off. Calibration is an iterative process, not a single step.
Keep a log of settings and outcomes so you can identify which changes produce the most noticeable improvements over time.
Advanced tweaks and learning paths
As you gain confidence, you can explore modest upgrades such as adding a small, affordable plastic lens, adjusting the distance between aperture and sensor, or experimenting with different film types or paper weights. If you enjoy this project, consider 3D-printed parts, alternative light traps, or building a larger format camera to study field of view and depth of field. The key is to document each change and connect it to the resulting image.
These progressive challenges help you translate hands-on experience into sharper understanding of optics and image formation.
Common mistakes and how to fix them
Light leaks, overly ambitious predictions about exposure, and rushed assembly are the three most common culprits. Double-check seals, use a consistent measurement system, and always test in a controlled light environment. If images are underexposed, increase exposure time or hole size slightly; if overexposed, reduce the hole size or shorten the exposure. Patience and careful testing are your best tools.
Slow down to analyze each variable—hole size, distance to the paper, and the integrity of the seals—before you adjust the design again.
Safety, maintenance, and long-term practice
Even simple DIY projects involve sharp edges and handling of light-sensitive materials. Always cut away from your body, wear eye protection when using tools, and keep small parts away from children. After a session, store materials in a light-safe, cool, dry place to prevent degradation of paper or film. Regularly inspect seals for wear and reapply protective coatings as needed to maintain light-tight integrity.
Regular maintenance reduces the likelihood of light leaks creeping back into your design and helps you build confidence for longer-term projects.
Next steps and learning resources
With the basics in place, you can widen your exploration by trying a different camera style, or by teaching someone else the process. Review standards for safety and calibration and consider digital-assisted experiments to compare results. For deeper dives, consult reputable sources such as Best Camera Tips and the cited external references to reinforce what you’ve learned. According to Best Camera Tips analysis, DIY camera projects deepen comprehension of optics and exposure. The Best Camera Tips team recommends starting with a pinhole build to build confidence before attempting a lens-based design.
Tools & Materials
- Sturdy cardboard box or shoebox(Large enough to fit the aperture/film and any lens/pinhole assembly)
- Sharp hobby knife or utility knife(For cutting openings; use a cutting mat and cut slowly)
- Ruler(For accurate cuts and precise layouts)
- Pencil(Mark measurements clearly before cutting)
- Black tape (gaffer or electrical tape)(Seal edges and secure components to block light leaks)
- Interior lining (matte black paint or aluminum foil + masking tape)(Prevent internal reflections and maintain light control)
- Pinhole material or small lens(Pinhole: very small hole in thin metal; lens: optional for lens-based camera)
- Needle or pin for pinhole(Create a clean, precise pinhole without tearing the material)
- Photo paper or light-sensitive film(For initial test exposures in a pinhole design)
- Safety gloves(Useful when cutting or handling sharp edges)
Steps
Estimated time: 2-4 hours
- 1
Decide on camera type
Choose between a simple pinhole design and a basic lens-based body. This decision guides material choices, hole size (or focal length), and exposure expectations. Decide early to reduce backtracking later.
Tip: Define your learning goals first—optics basics or quick results—and let that steer your build. - 2
Set up workspace
Prepare a clean, dim area with good ventilation for handling photosensitive materials. Gather all tools in labeled containers and create a dedicated area for cutting and assembly. A well-organized space minimizes mistakes and light leaks.
Tip: Use a cutting mat and a tray to keep parts from rolling away. - 3
Cut body openings
Measure and mark the aperture and any viewfinder openings. Cut carefully along straight lines, keeping edges smooth to minimize light leaks. Don’t rush this step; precise cuts improve alignment later.
Tip: Double-check dimensions against your chosen design before cutting. - 4
Seal light leaks
Line interior surfaces with matte black paint or foil, then apply multiple layers of tape to seams. Run a flashlight test in a dim room to identify any remaining leaks. Correct any gaps before loading photosensitive material.
Tip: Test by rotating and inspecting the box from all angles in a dark room. - 5
Install aperture (pinhole or lens)
Mount the pinhole over the aperture or install the chosen lens securely. Ensure alignment so light travels straight to the image plane. If using a pinhole, try a few hole sizes to balance exposure and sharpness.
Tip: If using a pinhole, start with a small hole then gradually widen to compare results. - 6
Prepare the light-sensitive material
In a dim environment, place photo paper or film behind the aperture. Keep it flat and avoid touching the surface. Ensure your loading approach remains light-tight to prevent fogging.
Tip: Label test shots clearly and keep them flat to avoid curling. - 7
Load the camera and test
Assemble the body, load the material, and perform a test shot of a simple scene. Vary exposure by adjusting time or hole size to see how it affects brightness and detail.
Tip: Start with short exposure times to avoid overexposure and adjust from there.
Common Questions
What is a pinhole camera and how does it work?
A pinhole camera uses a tiny hole to project an inverted image onto photosensitive material. No lens is required, but image sharpness depends on hole size and distance to the film or paper. It’s a great way to learn about exposure and geometry.
A pinhole camera uses a tiny hole instead of a lens to form an image; exposure depends on the hole size and distance to the paper.
Do I need a professional lens to make a camera?
No. A pinhole setup is the simplest starting point and teaches core optics. You can add a basic lens later once you’re comfortable with the basics.
You don’t need a professional lens to start; you can begin with a pinhole and explore lenses later if you want sharper images.
What materials work if I don’t have specialized parts?
Everyday items like a sturdy box, black tape, interior lining, and photo paper can work. The key is keeping the interior light-tight and free of reflections. You can reuse household items creatively.
You can begin with common materials like a shoebox and tape; the important thing is keeping it light-tight.
Is making a camera safe for kids?
With adult supervision and proper safety practices, DIY camera projects are suitable for learners of various ages. Use kid-friendly tools, avoid sharp edges, and keep small parts away from young children.
Yes, with supervision and safety rules, it’s a great hands-on learning activity for kids.
How do I test a homemade camera effectively?
Create a simple scene, take multiple shots with different exposure settings, and compare results. Use a log to track what worked and what didn’t, then adjust your design accordingly.
Test by taking several shots at different exposures and note what changes the image most.
Watch Video
The Essentials
- Plan before building to avoid wasted materials
- Pinhole builds teach exposure and geometry
- Light-tight housing is essential for clean images
- Test and document results to iterate effectively
- You can graduate from pinhole to lens-based designs as skills grow