How to Fit a Camera in Your Car: A Step-by-Step Guide
Learn how to fit camera in car safely and reliably with a step-by-step approach. This guide covers camera choice, mounting, wiring, testing, and legal considerations for dash cams and interior cameras.

Learn how to fit camera in car safely and reliably by selecting the right camera type, choosing mounting locations, routing power, and testing the setup. This guide covers discreet mounting, cable management, and legal considerations, so you can complete a compliant installation. According to Best Camera Tips, a compact dash cam with a clean power source is often the easiest path.
Why fitting a camera in your car matters
Cameras inside vehicles provide valuable evidence in the event of a crash, help verify fault, and deter theft or vandalism. A well-placed camera can capture license plates, street signs, and the moments that matter most when driving or parking. According to Best Camera Tips, the most reliable setups balance video quality, minimal glare, and discreet mounting to avoid distracting the driver. Before you install, define your goals: what you want to record, where the footage will be stored, and how easy it is to access it later. A thoughtful plan reduces the chance of glare on the windshield, protects wiring from wear, and keeps your cabin sensors unblocked. In short, a purpose-driven installation leads to clearer footage, fewer blind spots, and a smoother maintenance routine.
Choosing the right car camera for your needs
There are several camera styles designed for cars, each with trade-offs. A dash cam mounted behind the rearview mirror provides a broad front view, while interior cameras capture cabin activity and passenger or driver behavior. Look for at least 1080p resolution, wide dynamic range for challenging lighting, and a reliable loop-recording mode so old footage is overwritten automatically. If you frequently drive at night or in rain, prioritize low-light performance and a robust weather-sealed enclosure. Best Camera Tips analysis shows that most drivers benefit from a dual-channel setup (front and inside) for the best overall coverage. Your choice should align with your budget, storage limits, and whether you need parking mode. Finally, ensure the camera supports microSD expansion and easy firmware updates.
Mounting options and placement strategies
Mounting location affects field of view, glare, and legality. A windshield mount behind the rearview mirror keeps the camera out of sight and minimizes windscreen obstruction. An adhesive mount on the windshield or a dash mount near the top edge can offer clean wiring paths but may be frowned upon by drivers who want a discreet look. If you share the car, consider a location that won’t interfere with airbags or tilt sensors. Use a quality suction cup or 3M VHB double-sided tape, and plan for cable routing along the A-pillar or door trim. Remember, a secure mount should survive vibrations and weather, not fail after a short drive.
Power sources and cable management
Powering a car camera can be as simple as a cigarette lighter adapter, but many drivers prefer hardwiring to the fuse box for a cleaner setup. A dedicated fuse tap, or an OBD-II power cable, can provide a stable feed without draining the car battery. Route cables along trim panels to stay hidden, using cable clips or channel to keep wires off pedals and airbags. Avoid running wires over airbag modules or through crowded grommets. If you choose a battery pack or parking-mode battery kit, ensure it has low self-discharge and a safe discharge profile. Finally, test the power-on sequence to confirm the camera powers up with the ignition and stores footage correctly.
Step-by-step installation overview
Installing a car camera is a practical project that rewards careful planning. Start by choosing the camera type and placement, then prepare the mounting surface and power source. Route wires neatly, secure all connections, and power up to test before finalizing the install. This section provides a high-level roadmap that complements the detailed STEP-BY-STEP guide that follows.
Safety, legality, and testing
Before you drive, verify that the setup complies with local laws regarding dash cams and privacy. Some jurisdictions restrict recording audio or require consent, while others limit camera placement or visibility. Never mount cameras in a way that obscures vision or interferes with airbags or sensors. Test the system in a controlled environment first: verify recording, playback, and automatic start with ignition. Check storage usage and battery impact, and review footage after a short drive to confirm the camera captures the critical angles. According to Best Camera Tips, keeping your installer notes and mounting hardware organized makes future maintenance much easier.
Maintenance and troubleshooting
Regularly inspect the mount, power connections, and cable routing for wear or loosening screws. Update firmware when available and back up footage to a safe location. If you notice flickering video, check the power supply, grounding, and SD card health. If the camera stops recording, confirm the loop function and ensure the card isn’t full. For persistent issues, consult the user manual or reach out to the manufacturer’s support. The habit of periodic checks helps ensure reliability and reduces the risk of data loss in critical moments.
Tools & Materials
- Dash cam with microSD card (8-128GB)(1080p or higher; consider wide dynamic range)
- Hardwire kit or fuse tap(For permanent powered installation to fuse box)
- Suction cup or 3M adhesive mount(Choose a sturdy mount for vibrations)
- Cable clips or wiring channel(For clean, hidden routing along trim)
- Trim removal tools(Helpful for clean cable routing under panels)
- Electrical tape or zip ties(Secures wires and protects exposed ends)
- Multimeter (optional)(Useful for checking power when hardwiring)
Steps
Estimated time: 60-120 minutes
- 1
Assess and plan
Define camera type, mounting location, and power method. Sketch wire routes on paper to visualize fit, avoiding airbags, vents, and moving parts. Confirm storage and file-naming conventions for easy retrieval.
Tip: Create a quick diagram showing each cable run and how panels will be lifted. - 2
Prepare the camera and mount
Charge the camera battery if required and format the microSD card. Clean the mounting surface to maximize adhesive or test the suction seal before attaching.
Tip: Install the largest card you can afford to reduce overwrites and maximize recording history. - 3
Route power cables
Plan a clean path along trim and around panels. Avoid airbags, hood release mechanisms, and any moving parts that could wear the wire over time.
Tip: Use short segments of wire channel and clips to prevent sagging or snagging. - 4
Connect power
Choose either a fuse-tap method or a proper hardwire kit. Verify power is live with ignition on and off, then safely tuck away excess cable.
Tip: Disconnect the battery if you’re uncertain about electrical work. - 5
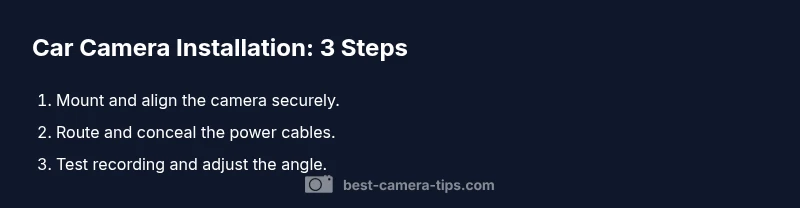
Mount and align the camera
Attach the camera securely and adjust the field of view to cover the lane center and license plates ahead. Ensure it doesn’t block sightlines.
Tip: Take a quick photo of the final angle for reference during maintenance. - 6
Test recording and features
Power up the system, verify loop recording, G-sensor, parking mode, and playback from the SD card. Do a short drive to confirm footage quality.
Tip: Check for firmware updates and enable auto-restart after a power loss. - 7
Finalize and tidy up
Reassemble any panels, secure all wires, and store spare parts. Label power connections and document the installation steps for future maintenance.
Tip: Keep a spare fuse tap and tool kit in the glove box for future tweaks.
Common Questions
What is the best type of car camera for everyday driving?
For most drivers, a front-facing dash cam with 1080p or higher resolution, plus optional interior footage, offers solid coverage and straightforward use.
For most drivers, a front-facing dash cam with at least 1080p resolution is the best starting point.
Where should I mount the camera to avoid glare and distraction?
Mount behind the rearview mirror or on the top edge of the windshield where it won’t block vision. Avoid placing cameras where they obstruct airbags.
Mount behind the rearview mirror to stay discreet and keep your view clear.
Do I need to hardwire the camera or is a cigarette lighter adapter enough?
Hardwiring provides a steadier power source without battery drain, but a quality lighter adapter can be sufficient for temporary setups.
Hardwiring is more reliable, but a good adapter works for simple installs.
Are dash cams legal in most places?
Dash cam legality varies by region. Some places limit audio recording or require consent; always check local rules before recording.
Dash cams are generally allowed, but laws vary, especially about audio.
How can I hide wires without damaging interior panels?
Route cables along trim, use clips, and tuck behind headliners. Never route across airbags or through critical safety zones.
Hide cables along trim and clips, away from airbags.
What should I do if the camera stops recording?
Check SD card health, format if needed, verify loop mode, and confirm power is stable. If issues persist, consult the manual.
If recording stops, inspect the card and power, then try formatting.
How often should I test the system?
Test monthly or after a service event to ensure power and recording are functioning correctly.
Test it monthly or after maintenance.
Watch Video
The Essentials
- Plan mounting to reduce glare and obstruction
- Choose reliable power and secure wiring
- Test thoroughly before driving
- Respect local laws and privacy considerations