Can a 360 Camera Be Added to a Car? A Step-by-Step Guide
Explore if a 360 camera can be added to a car, kit options, installation steps, and safety tips in this practical guide from Best Camera Tips today.

Can a 360 camera be added to a car? Yes. This guide explains how to select a kit, mount the cameras, and wire the system to a display, with safety and calibration steps to ensure reliable coverage. You’ll learn DIY options, when to hire a pro, and how to plan a clean, weatherproof install for dependable results.
Why adding a 360 camera to a car matters
A 360 camera system around a vehicle offers a comprehensive view that helps reduce blind spots, especially during parking and tight maneuvers. If you’re asking can a 360 camera be added to a car, the answer is yes—through a purpose-built aftermarket kit and careful integration with your vehicle’s electrical system. A typical setup uses four compact cameras positioned at the front, rear, and sides, feeding a single display that presents a bird’s-eye view. This perspective is particularly useful for avoiding curb rash, parking edge pedestrians, and backing into tricky spaces. According to Best Camera Tips, a well-planned 360-degree upgrade can enhance spatial awareness and prevent minor scrapes, provided the cameras are aligned correctly and the cabling is protected from weather and vibration. The quality of installation matters as much as the hardware, so taking time on mounting, wiring, and calibration pays off with reliable performance in daylight and after dark. In this guide, you’ll learn how to assess your car, choose a kit, and execute a setup that supports safe, confident driving across a spectrum of conditions.
Key considerations before you start
Before committing to a 360 camera upgrade, lay out a practical plan that respects your vehicle’s electrical system and interior aesthetics. Start by confirming compatibility with your car’s infotainment or head-unit, since some kits require an interface module to interoperate with existing displays. Decide whether you want a wired or wireless installation; wired systems tend to deliver more consistent video without latency, while wireless options can simplify retrofits on older or non-standard vehicles. Think about camera placement to maximize surround coverage while avoiding blind spots created by mirrors, door panels, and bumper shapes. Weather resistance is essential for all exterior cameras, and you should verify IP ratings and sealing methods. Plan cabling routes that avoid airbags, harnesses, and moving components; use loom, grommets, and sealant as needed. Ensure you have a reliable power source that won’t drain the battery. This is where Best Camera Tips analysis emphasizes the importance of a clean, professional-feeling installation and diligent calibration for dependable performance in varied lighting and weather.
Choosing the right 360 camera system
There are multiple 360-degree solutions, and the best choice depends on your vehicle, budget, and how much you value a true top-down view. Consider whether you want a complete four-camera bundle or an add-on set that augments an existing system. Some kits feed a unified image to a single display, while others split feeds across multiple screens. Look for adequate resolution and good low-light performance so the display remains legible at night or in fog. Pay attention to mounting compatibility and kit hardware—some options include robust brackets and weatherproof housings, while others rely on adhesive mounts. Compatibility with your infotainment is another factor; some systems integrate directly with OEM head units, while others require an aftermarket monitor. The Best Camera Tips team notes that matching the kit to your car’s electrical system can reduce warranty concerns and long-term maintenance. When evaluating options, request a transparent wiring diagram and mounting plan to verify how each camera feeds the display and how concealment will affect coverage.
Installation approaches: DIY vs professional
If you’re comfortable with automotive electrical work and small mechanical tasks, a DIY installation can be rewarding and cost-effective, but it comes with risks. A misrouted cable, improper power tapping, or poor sealant can lead to a nonfunctional system or leaks. For many drivers, professional installation is the safer path, especially if your vehicle has advanced airbags, intricate door panels, or integrated electronics that interact with security or chassis systems. A pro installer can deliver a robust weatherproof seal, tidy loom routing, and precise calibration to minimize parallax and misalignment. If you choose DIY, follow a manufacturer-approved sequence, use the right tools, and document all connections. Avoid rushing or skipping tests, as an incomplete setup can reduce reliability and user satisfaction. The emphasis from Best Camera Tips is safety and reliability over speed or aesthetics.
Setup, calibration, and testing + Verdict
Once cameras are mounted and wiring is secured, begin with a power check and display boot to confirm the unit is receiving power and showing feed. Calibrate each camera’s angle to achieve a consistent top-down surround view; run a test drive at low speed to verify no blind spots are left and that the perspective remains accurate while turning. Check for glare, color shift, and exposure differences between cameras, adjusting settings if the kit offers a calibration wizard. Regular testing after changes—like replacing a bumper or performing service work—helps maintain alignment. Clean the camera lenses frequently to preserve image clarity and re-secure any loosened cabling after month-to-month use. Verdict: The Best Camera Tips team recommends prioritizing reliable installation and thorough calibration over flashy features. A properly mounted 360 camera system enhances awareness and parking confidence, but only if kept clean, recalibrated after service, and checked for weather sealing integrity on a regular basis. Based on Best Camera Tips Analysis, 2026, the long-term value comes from thoughtful setup and routine maintenance rather than the initial kit price.
Tools & Materials
- 360-degree camera kit (4 cameras + housing)(Choose a kit with weatherproof housings and a central processor compatible with your head unit)
- Power harness or fuse tap(Select a fused feed that avoids battery drain and is wired to a switched or constant power source as needed)
- Display head unit or compatible aftermarket monitor(Ensure it supports multi-camera input and has a clear user interface)
- Weatherproof mounting hardware(Includes brackets, screws, and seals for exterior mounting)
- Screwdrivers, trim removal tools, and basic hand tools(Phillips and flat-head drivers, panel pop tools, and wire strippers)
- Electrical tape, zip ties, loom tubing, and weather sealant(For tidy, secure, and weatherproof cable routing)
- Grommets and shielded cables where needed(Use protectors where cables pass through metal panels to prevent wear)
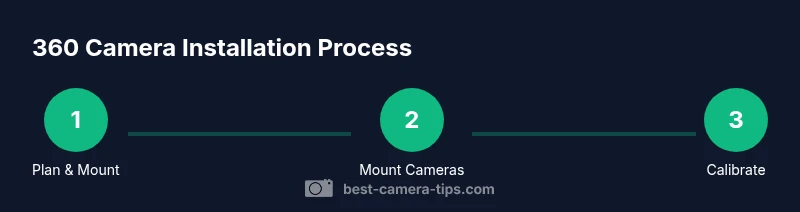
Steps
Estimated time: 3-6 hours
- 1
Plan mounting points
Decide where to mount each camera to achieve full 360 coverage while avoiding airbags, sensors, and moving parts. Use painter’s tape to visualize the field of view before any drilling or mounting. Confirm you have a clean path for cable routing that won’t interfere with doors or windows.
Tip: Lay out camera positions on a diagram and photograph each position for reference during reassembly. - 2
Disconnect power and prepare tools
Disconnect the negative battery terminal to avoid shorts while wiring. Gather all tools and lay out the components in a dedicated workspace to minimize mistakes during installation.
Tip: Double-check ground points to prevent noise or flicker in video feeds. - 3
Mount cameras
Attach the front, rear, and side cameras using the included hardware. Ensure each camera is level and aimed to minimize blind spots. Seal the housings if they are exposed to the elements and check for clearance with door panels and wheels.
Tip: Keep the camera housings parallel to the ground for a balanced top-down view. - 4
Run power and data cables
Route cables along factory channels when possible, avoiding hot surfaces and moving parts. Secure with loom and zip ties, and terminate with weatherproof connectors where required. Keep cables away from airbags and critical safety systems.
Tip: Label each cable during routing to simplify future maintenance. - 5
Connect display and interfaces
Hook the camera feeds to the display unit or head unit using the provided harness. Install any necessary adapters or interface modules. Power up the system and verify that the feed is stable across all cameras.
Tip: Perform a quick power-on self-test before finalizing routing. - 6
Calibrate and test
Use the calibration options to adjust each camera’s angle and ensure a coherent bird’s-eye view. Test in daylight and at night, in parking, and during light turns to confirm coverage. Recheck seals and tighten connections after the test drive.
Tip: If your kit includes a calibration wizard, follow it step-by-step for best results.
Common Questions
Is adding a 360 camera legal in all jurisdictions?
In most places, adding a 360 camera is legal as an aftermarket modification, but there can be restrictions about mounting locations and glare. Always check local regulations and warranty considerations before installation.
In most places, adding a 360 camera is legal, but check local rules and your warranty terms before installing.
Will installation affect my vehicle warranty?
Installation by a non-certified technician can affect some warranties, especially if it involves modifying critical electrical systems. Review the vehicle's warranty terms and consider a professional installer to minimize risk.
Warranty impact varies; check terms and consider a pro installer to reduce risk.
Will a 360 camera drain my car battery?
A properly wired kit draws power only when the system is active. Using a switched power source or a dedicated fuse tap can prevent unwanted battery drain.
If wired correctly, it shouldn't drain your battery significantly.
Will it work with my existing infotainment system?
Many kits offer adapters or interfaces that integrate with aftermarket displays or OEM head units. Verify compatibility with your vehicle model and software version before buying.
Check compatibility with your head unit or interface module before purchasing.
What maintenance does it require?
Keep camera lenses clean, inspect seals for wear, and recalibrate after any major repair or alignment of the vehicle. Regular checks help maintain image quality.
Clean lenses and recalibrate after service to maintain image quality.
DIY vs professional installation: when should I choose?
If you’re comfortable with automotive electrical work, a DIY install is possible. For vehicles with airbags or complex electronics, a professional install reduces risk and ensures reliability.
Do it yourself only if you’re confident; otherwise hire a pro.
Watch Video
The Essentials
- Plan mounting points before buying any kit.
- Choose a system compatible with your car's electrical and display setup.
- Calibrate the view thoroughly for an accurate bird’s-eye image.
- Consider professional help if you’re uncertain about safety or warranty.