Camera Near Me Installation: A Step-by-Step Guide for Beginners
Learn how to plan, install, and service a camera near me installation with practical, safety-focused steps. From mounting to network setup, discover tools, tips, and privacy considerations for reliable home surveillance.

This guide helps you complete a camera near me installation by outlining planning, mounting, power, connectivity, and testing steps. You’ll learn how to choose a location, select wired or wireless options, and safely route cables or set up a solid wireless link for reliable surveillance.
Define your goals for camera near me installation
Before you start, write down what you want to achieve with your camera setup. Consider the areas you want covered, the level of detail you need, whether you prefer wired reliability or wireless convenience, and how you’ll access footage. According to Best Camera Tips, clear goals help determine whether outdoor weatherproof cameras, indoor units, or a hybrid system best fit your home. Define success metrics like minimizing blind spots, enabling night vision, and ensuring remote access works on your phone. By grounding decisions in specific objectives, you’ll avoid overbuying or underachieving features. Set a budget range and a timeline to keep the project focused. Also plan for sign-off permissions if you rent, because installation rules may apply to tenants as well as landlords. Finally, consider privacy expectations around recording neighbors and shared entrances so you stay compliant with local norms and regulations.
Legal, privacy, and safety considerations
Installing a camera near me installation involves navigating local laws and privacy concerns. Check if external cameras require permits in your city and ensure you avoid recording areas with reasonable expectations of privacy, such as neighboring yards or windows of other homes. Where audio recording is involved, many jurisdictions require consent from the person being recorded. Use visible signage where appropriate to deter crime and inform visitors. Safety should drive your approach: avoid climbing on unstable surfaces, keep power sources dry, and never run cables through living spaces without protection. Use weatherproof housings for outdoor cameras and follow manufacturer guidelines for mounting heights and tilt angles. Keeping records of installation steps and warranty terms helps you stay compliant if issues arise later.
Camera types and specifications to consider
Choose camera types based on your goals: weatherproof outdoor models for exterior protection, indoor cameras for entryways or basements, and doorbell cams for front access. Decide on resolution, frame rate, field of view, and night vision capabilities. Consider whether you need a wide-angle lens for broader surveillance or a zoom feature for identifying details. If privacy is a priority, select cameras with encrypted transmission and local storage options or reputable cloud services. Power options matter too: PoE (Power over Ethernet) offers reliable power and data over a single cable, while battery-powered models provide easy installation without wiring but require charging. Lastly, verify compatibility with your existing router or smart home platform to avoid integration issues later.
Mounting locations and field of view
Plan mounting points that maximize coverage while minimizing vulnerabilities. Exterior cameras should be mounted above eye level to deter tampering but still capture faces and license plates when feasible. Internal cams should face high-traffic zones like entrances and stairs, ensuring they don’t point directly at bright lights that wash out details. The field of view matters: a 90–110 degree lens captures ample area without excessive distortion, while a 120–140 degree lens covers broader zones but can distort far edges. Test multiple angles using a temporary mount or a smartphone clip-on to preview coverage before committing to a permanent mount. Weatherproof housings and vandal-resistant screws add longevity.
Power options: PoE, battery, and solar
Your power choice shapes cable routing and reliability. PoE delivers data and power over one Ethernet cable, ideal for stable, long-term installs with minimal interference. Battery-powered cameras are easier to install and preserve aesthetics, but they require periodic charging and battery management. Solar-assisted setups work in sunny locations but add components and complexity. If you choose PoE, plan your switch or injector position near the camera and run a shielded cable through concealed routes. For battery models, stock extra batteries, and set up push alerts to remind you when a charge is needed.
Network readiness and smart home integration
A robust network is essential for smooth video streams. Check your router’s capacity, ensure you have 2.4 GHz or 5 GHz compatibility, and verify bandwidth for multiple cameras if you’re building a larger system. Use a dedicated SSID for cameras to reduce interference from household devices. Enable WPA3 security where possible and disable unused services on your router. If you use cloud storage, review data limits and retention policies. Many modern cameras support integration with apps and smart home ecosystems; ensure you select devices compatible with your preferred platform to simplify automation and alerts.
Wiring, cable management, and weatherproofing
Organized wiring and protective enclosures extend the life of your installation. Run cables along studs, joists, or exterior walls using clips and conduit to minimize exposure. When crossing outdoor gaps, use weatherproof cables with proper sealants and grommets to prevent water ingress. For brick or masonry, drill with caution and seal openings to prevent moisture. Route cables away from high-traffic areas to avoid accidental damage and concealment. Label each line for easier troubleshooting and future upgrades, and keep spare parts handy for quick maintenance.
App setup, accounts, and cloud storage
Most cameras rely on a companion app to configure settings, view live feeds, and manage recordings. Create unique, strong passwords and enable two-factor authentication when offered. Configure privacy-focused options like motion detection sensitivity and alert schedules to reduce false positives. If you use cloud storage, understand the terms, retention periods, and associated costs. For local storage, ensure the device has a secure microSD or a dedicated NVR with proper access controls. Backups and firmware updates should be scheduled to keep devices current and secure.
Testing, angle adjustment, and fine-tuning
After powering up, test the live feed and record quality across different times of day. Adjust camera angles to minimize glare from sun or lights and verify that motion zones trigger correctly. Use test records to assess facial recognition performance, if available, while respecting privacy guidelines. Ensure remote access works on mobile networks and that notifications are timely. Document the final setup with photos and notes for future reference, and schedule periodic checks to re-tune settings after seasonal changes or hardware updates.
Maintenance, upgrades, and future-proofing
A successful camera near me installation includes ongoing maintenance. Clean the lenses regularly, update firmware promptly, and monitor network health. Plan for future upgrades by using standardized mounting patterns and scalable storage options. Keep spare parts in your toolkit and document serial numbers for warranty claims. Regular audits help ensure continued performance and security, while continuing education on privacy and legal requirements keeps your system compliant as laws evolve.
Tools & Materials
- Outdoor-rated security camera(Select weatherproof model with night vision and IP66/IP67 rating)
- Mounting bracket and screws(Use stainless steel fasteners for exterior applications)
- Drill with masonry bit(Needed for brick or concrete mounting)
- Ethernet cable (Cat6 or higher)(Use shielded cable for outdoor runs if possible)
- PoE switch or injector(If using PoE cameras to combine power and data over a single cable)
- Power drill/driver(For fast, secure mounting and cable conduit anchors)
- Screwdriver set (Phillips and flat)(Essential for mounting plates and terminal blocks)
- Cable clips, conduit, and weatherproof grommets(Keep runs tidy and protected from weather)
- Weatherproof sealant or caulk(Seal penetrations to prevent water ingress)
- Ladder or height-safe plan(Safe access for elevated mounting)
- Smartphone or tablet with camera app(Configure and monitor remotely)
- Backup power options (optional battery pack)(Useful for outages in remote locations)
Steps
Estimated time: 60-120 minutes
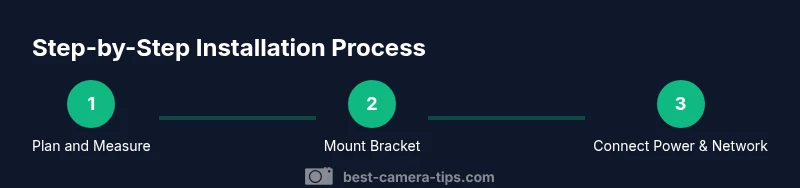
- 1
Plan and measure mounting location
Identify coverage goals and mark potential mounting points. Assess line-of-sight, lighting conditions, and weather exposure to optimize field of view and minimize glare. Confirm power and cable pathways before drilling.
Tip: Take photos of potential angles from multiple viewpoints to compare coverage. - 2
Gather and prepare tools
Assemble all required tools and ensure you have weatherproof components ready. Double-check that the camera, bracket, cables, and fasteners match your installation plan.
Tip: Lay out items on a clean workspace to prevent misplacing small screws. - 3
Mount the bracket securely
Attach the mounting bracket to the chosen surface using the appropriate fasteners for that material. Verify the bracket sits level and can support the camera weight with some margin for adjustment.
Tip: Use a level tool to ensure alignment before tightening all screws. - 4
Run cables or configure wireless setup
If wired, route Ethernet cables through conduit and seal entry points. If wireless, ensure the camera can connect to your network with a strong signal.
Tip: Test signal strength at the camera location using a mobile app before finalizing routing. - 5
Power up and connect to network
Power the camera via PoE or a local power supply and pair it with the camera app. Complete initial configuration, including name, motion zones, and privacy filters.
Tip: Enable two-factor authentication on the camera app for extra security. - 6
Test feed and adjust angle
View the live feed, verify image clarity, and adjust tilt and pan to remove blind spots. Save your final angle and test at different times of day.
Tip: Record a short clip to confirm exposure and motion detection is functioning as intended.
Common Questions
Do I need a permit to install a security camera outside my home?
Most residential setups do not require a permit, but check local ordinances and HOA rules. If you’re installing on shared property or a rental, confirm permission before mounting. When in doubt, contact the local building department for guidance.
Usually no permit is required for residential camera installs, but check local laws and condo or HOA rules first.
Should I hire a professional or can I install it myself?
DIY installation is feasible for many homeowners, especially with wireless cameras. For complex wiring, rooftop placement, or extensive cabling, a professional ensures safety, code compliance, and optimal performance.
DIY works for many cameras, but consider a pro for complex mounting or extensive cabling.
Is a wired installation more secure than wireless?
Wired installations typically offer more reliable connectivity and fewer interference issues, but modern wireless setups with strong encryption can be secure and convenient. Your choice depends on your building, distances, and maintenance tolerance.
Wired is often more reliable, but strong encrypted wireless can be secure and simpler.
How do I angle a camera for the best coverage?
Aim for coverage of entry points, driveways, and stairs with minimal blind spots. Use a slightly downward tilt to capture faces while reducing the chance of glare from lights at night.
Cover entry points with a slight downward tilt to capture faces and minimize glare.
What if I can’t run cables through walls?
Consider a high-quality wireless camera with robust encryption, or run cables along the exterior surface using weatherproof conduit. Ensure the route avoids high-traffic areas and preserves aesthetics.
If you can’t run cables, use a secure wireless model or run cables externally in conduit.
How often should I test and maintain the system?
Schedule a quarterly check: verify firmware, test live feed, clean lenses, and review motion zones. Regular maintenance reduces false alerts and improves reliability.
Do a quick quarterly check to keep firmware current and lenses clean.
Watch Video
The Essentials
- Plan coverage and privacy before mounting.
- Choose PoE for reliability or battery for easy installs.
- Test network readiness and tune camera angles.
- Maintain and update software to keep your system secure.