Camera Installation: A Practical How-To Guide
Learn step-by-step how to install home security cameras, from planning and mounting to wiring, network setup, testing, and maintenance. Practical tips, safety warnings, and best practices for reliable camera installation.

With camera installation, you will transform any space into a secure, monitored environment. This guide walks you through planning, mounting options, power and data wiring, and testing to ensure reliable coverage. According to Best Camera Tips, success starts with a clear site survey, proper mounting hardware, and rigorous safety checks.
Why camera installation matters for security
A thoughtful camera installation can dramatically improve your property’s security posture. Properly planned placement reduces blind spots, provides clearer evidence, and helps deter tampering. From a practical standpoint, a well-executed installation translates to faster incident response, more reliable remote viewing, and easier maintenance over time. The Best Camera Tips team emphasizes that the difference between a mediocre setup and a dependable surveillance system often boils down to two factors: planning and execution. In real-world scenarios, users who invest time in surveying the site and selecting appropriate mounting hardware report noticeably better coverage and fewer false alerts. Consider weather resilience, lighting conditions, and traffic patterns as you evaluate each candidate location. The goal is to maximize useful frames per second while minimizing nuisance alerts, all while keeping privacy and safety front and center.
Site survey and planning
A successful camera installation begins with a detailed site survey. Start by mapping entry points, high-traffic zones, and potential blind spots. Note lighting conditions at different times of day and consider how shadows or backlighting may affect image clarity. Measure mounting heights and distances to achieve the desired field of view. Create a rough sketch or use a planning app to mark candidate spots and cable routes. Document preferred power sources (PoE, DC, or battery) and network reach. From the perspective of Best Camera Tips, a thorough survey reduces later rework and helps you align camera angles with your security goals. Keep privacy considerations in mind, avoiding coverage of neighbors’ property or private spaces where not legally permissible.
Mounting options and considerations
Mounting choices should align with camera type, location, and weather exposure. Wall-mounted cameras offer flexibility for sidewalks and doors, while ceiling or eave mounts protect devices from tampering and provide broader coverage. If mounting outdoors, select weatherproof enclosures and verify IP ratings. Consider the camera’s lens angle, vertical placement, and the ability to adjust after installation. Use appropriate anchors for concrete, wood, or metal surfaces, and plan for future repositioning if needs change. Cable routing should be discreet yet accessible for maintenance. Secure mounting hardware to prevent vibration and ensure stability in wind or vibration-heavy environments. This balance between sturdiness and accessibility is a common determinant of long-term reliability.
Wiring and power considerations
Decide between PoE (Power over Ethernet) and traditional power adapters. PoE simplifies wiring by delivering power and data over a single cable and enables centralized management. If you choose non-PoE cameras, plan power sources and run AC cables to each device while obeying electrical codes. For wired installations, use shielded Cat5e/Cat6 cables where possible and protect runs from weather, moisture, and physical damage with conduit or weatherproof grommets. For wireless cameras, be mindful of potential interference and ensure strong Wi‑Fi coverage or a robust mesh network. Always power down equipment before handling cables and connectors to avoid shorts and data corruption. Document cable routes and label connections to ease future maintenance, replacing damaged components promptly to maintain reliability.
Network setup and camera configuration
Network configuration is critical for accessibility and security. Assign a unique, non-default username and strong password for each camera. Prefer static IPs or a reserved DHCP lease to maintain consistent access. Update firmware to protect against known vulnerabilities and enable automatic security updates if available. Configure recording schedules, motion zones, and alert channels in the camera’s interface. For privacy and performance, enable encryption, disable UPnP when not required, and restrict remote access to trusted devices. If you’re integrating with a security platform or NVR, verify compatibility and test event triggers across devices to ensure synchronized alerts. Regularly review logs and firmware advisories from the manufacturer to stay protected against emerging threats.
Placement strategies for different areas
Outdoor entrances benefit from coverage that includes doorways, walkways, and potential approach angles. Driveways and parking areas often need longer-range lenses and higher mounting points to minimize obstructions. Interior hallways should have a wide field of view and minimal glare from lights; place cameras away from direct light sources and angle lenses to capture faces and license plates where legal. For rooms with windows, consider blinds or privacy glass to reduce reflections. Use layering by combining door cameras with interior cameras to create a robust coverage network. The objective is to create a cohesive surveillance map where each camera complements the others without excessive overlap. In line with Best Camera Tips guidance, balance coverage with privacy and ensure lighting changes do not degrade performance at dusk or dawn.
Testing and calibration
After installation, testing is essential to confirm that cameras meet your intended goals. Walk through the monitored areas and verify that each camera captures the intended angles, distances, and lighting conditions. Check day/night performance and adjust exposure, white balance, and motion sensitivity for minimal false positives. If you use an NVR or cloud platform, test access from a mobile device and confirm alert delivery. Document exact positions and angles, then re-check during different times of day and weather conditions. Revisit the planning notes to refine mount angles, zoom levels, and zones. A deliberate calibration process reduces the need for later readjustments and improves long-term reliability.
Maintenance and privacy considerations
Camera installation requires ongoing maintenance. Schedule firmware updates, lens cleaning, and physical inspections every few months. Replace aging cables or mounting hardware before they fail and check seals after severe weather. Privacy laws and community guidelines may require signage or restricted zones; ensure your setup complies with local regulations. Maintain a log of changes and keep security credentials up to date. Regular audits help prevent drift in coverage and keep your system resilient against tampering. Remember to test backups and ensure recordings are stored securely and retrievable when needed.
Authority sources
For further information on surveillance guidelines, privacy considerations, and security standards, consult recognized authorities. The National Institute of Justice (NIJ) provides research-based insights into camera effectiveness and placement. The National Institute of Standards and Technology (NIST) offers security best practices for networked devices, including cameras. The FBI and other major publications provide guidelines on privacy, evidence handling, and system integrity. See the following sources for more details:
- https://nij.ojp.gov/
- https://nist.gov/
- https://www.fbi.gov/ These sources help frame responsible and effective camera installation practices and outline safe, compliant deployment strategies.
Tools & Materials
- Camera (wired or wireless, PoE preferred for reliability)(Select weather-rated cameras for outdoor use. Include mounting bracket.)
- Mounting hardware (brackets, screws, anchors)(Choose hardware compatible with mounting surface (concrete, brick, wood).)
- Power source or PoE injector/switch(PoE simplifies power and data runs over a single Ethernet cable.)
- Drill and drill bits(Required for mounting to walls or ceilings; use masonry bit for concrete.)
- Screwdrivers (Phillips and flat-head)(Have a variety of screwdriver sizes for different fasteners.)
- Cable management supplies (clips, conduits, grommets)(Keep runs tidy and protected from weather and tampering.)
- Ethernet cable (Cat5e/Cat6) and/or Wi‑Fi access considerations(Wi-Fi option is acceptable for some setups; wired is generally more reliable.)
- Network tester or PoE tester(Useful for diagnosing connectivity and power issues.)
- Ladder or step stool(Required for elevated placements; ensure safety.)
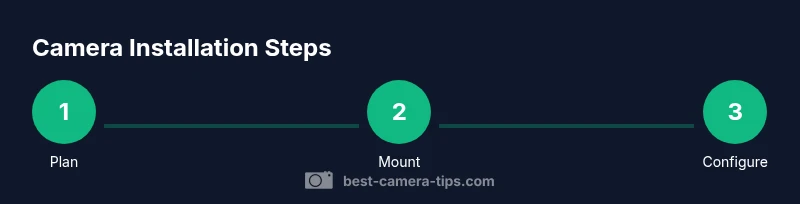
Steps
Estimated time: 2-3 hours
- 1
Plan and survey the site
Conduct a thorough site survey to identify entry points, potential blind spots, lighting conditions, and weather considerations. Record distances, measure heights, and note power and network options. This planning step reduces rework and guides mounting choices.
Tip: Take photos and draw a simple map of coverage zones; mark preferred mounting points with notes. - 2
Select mounting locations
Choose spots that maximize coverage while minimizing glare and obstructions. For outdoor cams, avoid direct sun and heavy rain exposure where possible. Confirm that chosen spots support the required cable routing and do not violate privacy laws.
Tip: Prefer higher elevations for better angle, but ensure accessibility for maintenance. - 3
Prepare mounting surfaces
Mark drill points, install anchors suitable for the surface, and ensure the surface is clean and dry. Presize brackets to the camera’s field of view and check clearance for opening covers or adjusting angles.
Tip: Use a level to ensure straight mounting and prevent distortion in footage. - 4
Run power and data cabling
Route cables along walls or ceilings with protective conduits. Keep runs short and avoid tight bends. If using PoE, ensure the injector or switch location is accessible and within reach of the camera cable.
Tip: Label each cable at both ends to simplify future maintenance. - 5
Mount the camera
Attach the mounting bracket securely, then attach the camera and adjust to the intended angle. Tighten screws to prevent drift but avoid over-tightening that could strain connectors.
Tip: Do a quick dry run before final tightening to verify field of view. - 6
Configure network settings
Connect the camera to the network, assign a non-default username, and set a strong password. Resolve to a fixed IP or reserved DHCP to keep access stable during maintenance.
Tip: Disable UPnP unless required and enable encryption on the camera’s interface. - 7
Adjust image quality and motion settings
Fine-tune exposure, white balance, and motion sensitivity to balance clarity and alert noise. Test during daytime and nighttime to optimize performance across lighting conditions.
Tip: Set motion zones to reduce false alerts from moving plants or reflections. - 8
Test and document
Verify that each camera records correctly and that alerts reach your mobile device or monitoring center. Document positions, angles, and firmware versions for future maintenance.
Tip: Keep a run log with dates and changes to simplify troubleshooting.
Common Questions
What is the first step in camera installation?
Begin with a site survey to identify entry points, lighting, and power requirements. This helps you plan camera placement and cable routing before any mounting.
Start with a site survey to map coverage and power needs, then plan placement before mounting.
Do I need professional installation for outdoor cameras?
Many homeowners can complete basic outdoor camera installations, especially with PoE setups. If you have complex wiring, limited access, or safety concerns, consider a qualified technician.
Basic outdoor installs are doable, but consult a professional for complex wiring.
What’s the difference between PoE and non-PoE cameras?
PoE cameras receive power and data over one cable, simplifying installation and reducing clutter. Non-PoE cameras require a separate power source and may need additional adapters.
PoE combines power and data over one cable; non-PoE needs separate power.
How do I ensure privacy and comply with laws?
Position cameras to avoid private areas and follow local regulations. Use signage where required and disable recording in spaces with privacy exemptions where applicable.
Place cameras to respect privacy laws and use signage when needed.
What maintenance is required after installation?
Regularly clean lenses, update firmware, check mounts for looseness, and test recordings. Schedule routine reviews to maintain reliability.
Clean lenses, update firmware, and test recordings regularly.
Can cameras be wired through walls or ceilings?
Yes, with proper planning, access panels, and fire-stop considerations. Use conduit and protect cables from damage.
Wiring through walls is possible with the right precautions.
Watch Video
The Essentials
- Plan first, install second to minimize rework.
- PoE simplifies power and data wiring.
- Test and calibrate across lighting conditions.
- Maintain cameras with firmware updates and lens cleaning.