Where to Install Camera: A Practical Guide for Coverage and Security
Learn where to install cameras for reliable coverage and privacy. This educational guide covers indoor and outdoor placements, mounting heights, lighting, wiring, and privacy considerations to help you set up effective security.

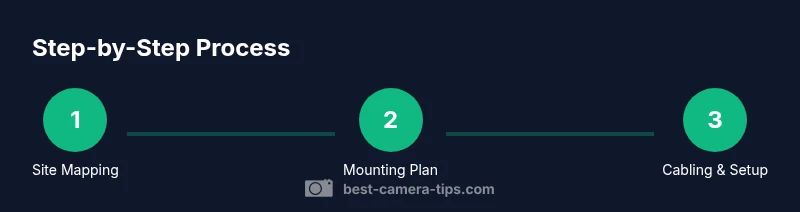
By the end of this guide you will know where to install camera for optimal coverage and privacy. You’ll assess indoor and outdoor options, choose mounting heights and angles, decide between wired or wireless setups, and account for lighting and weather. With a systematic plan you’ll reduce blind spots and improve security without creating privacy issues.
Placement Goals and Planning
Effective camera placement starts with a plan. For maximum coverage while preserving privacy, map your property and identify entry points, high-traffic zones, and potential blind spots. According to Best Camera Tips, begin with a site map and a prioritized list of doors and windows that require monitoring. This planning phase helps you compare candidate positions and anticipate coverage gaps before you drill or mount anything. Balance visibility, tamper resistance, and cable routing. A two-layer approach often works: a primary camera at entry points and a secondary camera with a wider field of view to cover approach paths. Note lighting conditions, weather exposure, and nearby landscaping that could obstruct views. Thinking ahead prevents rework and ensures your cameras serve practical security goals rather than simply following aesthetics. When you answer where to install camera, focus on entrances, driveways, and high-traffic corridors for the first layer of protection.
Indoor Installations and Angles
Inside the home, prioritize points where people pass or linger, such as entry doors, stairwells, and long hallways. A practical mounting height is around eight feet (2.4 meters) to deter tampering while preserving a clear facial view. Tilt the camera slightly downward toward the area you want to monitor, not toward ceilings or floors, to avoid glare and wasted field of view. Place cameras where furniture or decor won’t block the line of sight, and consider corner mounts to broaden coverage without creating dead zones. If you live with pets, position cameras to cover common routes while avoiding overly sensitive zones. Ensure you have sufficient storage and network bandwidth to support high-resolution footage (1080p or higher). Finally, test multiple angles from different positions to identify the combination that yields the most reliable coverage over time.
Outdoor Installations: Elevation, Weather, and Mounting
Outdoor cameras should cover entry points while resisting tampering and weather. Use weatherproof housings and mount cameras under eaves or on exterior walls with dependable seals. Position near front doors, driveways, and garage access with a clear line of sight to approaching individuals. The height should deter tampering while capturing useful faces, typically above knee level but below eye level for better identification in real-world scenarios. Use angled mounts to reduce glare from sun and headlights, and consider wide-angle lenses or overlapping views to eliminate gaps. Secure cables with conduit or raceways to prevent snagging and deter tampering. For wireless models, verify Wi-Fi coverage; for wired models, plan PoE or power access and protect cables from lawn equipment. After installation, inspect seals and mounts for wear after storms and keep cables tidy for longevity.
Lighting, Night Vision, and Image Quality
Lighting dramatically affects image quality. Position cameras to avoid backlit scenes where bright light washes out details, and rely on infrared night vision for darkness. If exterior lighting is present, choose cameras with true night mode and automatic IR cut filters. Adjust exposure, contrast, and white balance to match the scene; test at different times of day to ensure consistent results. Consider cameras with wide dynamic range (WDR) for spaces with mixed lighting. For glass windows, mount from the outside to minimize glare and reflections, and use glare-reduction features where possible. Regularly review and tweak settings as seasonal lighting changes occur, which helps maintain consistent performance across day and night.
Wiring, Power, and Network Considerations
Wired versus wireless: weigh reliability and installation effort. PoE (Power over Ethernet) cameras simplify power and data on a single cable, but require a network switch and cable runs. Wireless cameras offer flexibility but depend on Wi‑Fi strength; place them within line of sight of the router and use access points if needed. Plan cable routes to minimize visible wires; use conduit, wall chases, or baseboard channels and label cables for future maintenance. Ensure your network is secure with strong passwords and firmware updates, and consider segmentation for camera traffic. Storage options include onboard microSD, NAS, or cloud services; verify bandwidth requirements for multiple streams. Inspect outdoor seals and mounts after storms and keep exposed wiring organized to maximize longevity.
Privacy, Legal, and Tamper-Resistance
Respect privacy and follow local laws when installing cameras. Avoid pointing at neighbors’ private spaces and areas with an expectation of privacy (e.g., bedrooms or bathrooms). Post signage indicating surveillance and use privacy masks where needed. Deploy tamper-resistant mounts and anti-tamper screws for exterior cameras, and keep firmware updated to mitigate hacking risks. Define data retention policies and access controls to limit who can view footage. If renting, obtain written consent and inform household members about surveillance. Finally, review your setup periodically and adjust for landscaping changes or new entry points to maintain proper coverage.
Tools & Materials
- Power drill(Cordless drill with masonry bits and screwdriver bits)
- Screws, anchors, and anti-tamper fasteners(Choose wall anchors suitable for mounting surface)
- Mounting brackets or housings(Secure to studs or solid backing)
- Cable management supplies(Conduit, clips, or raceways for clean routing)
- Level and measuring tape(Ensures straight, level alignment)
- Masonry bit or drill for concrete(Only if mounting on brick/concrete)
- Cable tester or PoE tester(Helpful for verifying connections)
- Storage media or NAS access(For local or network storage)
Steps
Estimated time: 60-120 minutes
- 1
Create a site map and coverage goals
Draft a simple map of the property and mark entry points, high-traffic zones, and blind spots. Define which areas require real-time monitoring and which can be covered by motion alerts. Align camera choices with these goals to minimize gaps.
Tip: Use tape to mark potential camera positions on the wall to visualize coverage. - 2
Select camera types and mounting locations
Decide between indoor and outdoor models, wired vs wireless, and ceiling vs wall mounts. Choose locations that won’t be obstructed and will provide clear facial views for identification.
Tip: Prioritize doors and stairwells as primary coverage points. - 3
Plan mounting height and angles
Aim for a practical height that deters tampering while capturing faces and movements. Use a downward angle to monitor entry paths and corridors, and adjust to account for furniture and landscaping.
Tip: Use a level to ensure straight alignment. - 4
Prepare mounting surfaces and wiring routes
Check wall material, drill pilot holes, and install anchors. Plan safe wire routes with conduits or baseboard channels to keep cables tidy and protected.
Tip: Label each route and camera location for maintenance. - 5
Attach cameras and secure mounts
Mount cameras firmly with the appropriate screws and brackets. Tighten hardware so there is no drift and test the field of view before final tightening.
Tip: Use anti-tamper screws for exterior cameras. - 6
Configure settings and test coverage
Set resolution, frame rate, and motion zones. Run live tests across day and night to confirm coverage and adjust angles as needed.
Tip: Enable privacy masking where necessary. - 7
Test under different lighting and weather
Check performance in daylight, dusk, and night; verify infrared performance and glare handling. Note how rain or snow affects image quality.
Tip: Record a short sample clip for review. - 8
Finalize installation and document paths
Secure all cables, label each camera, and document mounting points and routes for maintenance. Create a simple written plan for future upgrades.
Tip: Keep a spare set of mounting screws and anchors.
Common Questions
What is the best height to install a security camera for the front door?
Most experts recommend mounting around seven to nine feet high to deter tampering while keeping facial details visible. Adjust for ceiling height and entry design.
Aim for about seven to nine feet high so people can't easily reach the camera, but still captures clear faces.
Should cameras be placed inside or outside?
Both locations have value. Indoor cameras can capture faces in busy rooms; outdoor cameras monitor entrances and perimeters. Use weatherproof housings for exterior units.
Both can work—use outdoor units outside and indoor units inside to cover key zones.
Do I need permits to install cameras?
Permit requirements vary by jurisdiction. Check local zoning or homeowner association rules before running permanent wiring or mounting cameras on shared structures.
Permits depend on your area; check local rules before hard-wiring cameras.
How many cameras do I need for good coverage?
Coverage depends on property size and entry points. Plan a primary camera for each major entry and additional cameras to cover adjacent corridors and blind spots.
It varies, start with entrances and high-traffic areas, then add cameras as needed.
How can I hide wires without compromising safety?
Route wires through walls or in conduits; use baseboard or ceiling channels to keep them concealed while preserving accessibility for maintenance.
Hide cables inside walls or channels to keep things clean and safe.
Can I rely on wireless cameras?
Yes, but ensure strong Wi-Fi coverage and reliable power. Use PoE where possible for reliability; for wireless, have a plan for battery replacement and firmware updates.
Wireless works, just make sure the signal is strong and power is reliable.
Watch Video
The Essentials
- Plan first, map coverage areas
- Mount cameras at practical heights and angles
- Test under different lighting conditions
- Maintain privacy and legal compliance