Where Are Camera Settings on iPhone: A Practical Guide
Learn exactly where camera settings live on iPhone, from the Camera app gear options to the Settings menu. This practical guide helps beginners and enthusiasts access, adjust, and test camera settings for better photos and videos.

This guide shows where camera settings live on iPhone and how to access them quickly. You can adjust shooting preferences directly in the Camera app (gear icon) and change system-wide options in Settings > Camera. For quick changes like Live Photo, HDR, and grid, the Camera app offers a fast route. In this article, you’ll learn exact paths for iPhone models and iOS versions, plus tips for testing changes.
Where are camera settings on iphone: quick start and access points
If you’ve ever wondered how to tune your iPhone photography, the answer isn’t a single dial. In reality, there are two primary access points for camera settings: the Camera app itself for in-shot tweaks and quick preferences, and the Settings app for system-wide controls that affect all camera usage. The Camera app exposes options you can toggle on-the-fly, such as grid, Live Photo, and the uncompressed formats you prefer for a shot. The Settings app offers deeper, lasting adjustments—like video formats, recording resolutions, and privacy-related camera permissions. According to Best Camera Tips, starting with the Camera app for immediate changes and then moving to Settings for persistence strikes the right balance for most users. Understanding these two entry points will help you answer the core question: where are camera settings on iphone, and how can you best optimize them for your workflow.
Inside the Camera app: visible options at a glance
The Camera app on iPhone is designed for fast access to common preferences. Tap the gear icon (usually in the top-right corner) to reveal options such as Grid, Preserve Settings, and Formats. Grid helps with composition, while Formats lets you choose HEIF/HEVC for smaller file sizes or JPEG/RAW for broader editing flexibility. Live Photo toggles capture state, and HDR improves dynamic range in many scenes. If you’re new to iPhone photography, experiment with these toggles to understand how they influence your results, then compare shots to learn what works best for your style.
Settings app: system-wide camera controls you should know
Beyond the in-shot tweaks, Settings > Camera provides system-wide preferences that affect all camera usage. Here you can choose formats (HEIF/HEVC vs JPEG/RAW), enable/disable Live Photos by default, set a preferred video resolution and frame rate, and control camera behavior such as auto HDR, auto low light, and the shutter orientation. These controls persist even when you switch between apps or restart the device. As best practices, align these settings with your typical lighting and subject types, and revisit them after major iOS updates—as changes can impact your workflow.
Model and iOS version differences: what to expect
Camera settings can shift between iPhone models and iOS versions. Newer iPhones often add options like ProRAW, ProRes, or deeper control over formats, while older devices may present a leaner feature set. When updating iOS, some paths may move or re-label options. If you’re unsure, check the official Apple support pages for your exact model and iOS version. The Best Camera Tips team recommends confirming feature availability after each major update to avoid surprises during a shoot.
Common settings explained with practical examples
To illustrate how settings change results, consider shooting in bright daylight with grid on and Formats set to HEIF/HEVC. You’ll get efficient file sizes and excellent dynamic range without sacrificing quality. In dim light, enable HDR if available and test Live Photo to see if motion adds value to your scene. For videography, set 4K at 60fps if your device supports it, and choose the correct orientation to avoid awkward crops. The more you test, the better you’ll understand what each toggle does in real-world conditions.
Privacy, security, and permissions affecting camera behavior
Camera permissions are a crucial part of the settings story. In iOS, apps request access to the camera and mic; denying those requests may prevent some features from working. Check Settings > Privacy & Security > Camera to see which apps have access. If you disable access for an app, it may fall back to a basic camera feed or fail to capture media correctly. Keeping permissions aligned with your privacy comfort level helps ensure you’re in control of your workflow while maintaining functionality.
Troubleshooting: settings not saving or not appearing
If a setting seems to disappear after a reboot or an app update, reset the affected feature by toggling it off and on again. If changes don’t persist, restart the iPhone, then revisit Settings > Camera to re-apply them. If you’re on an older iPhone or operating system, some options may be unavailable or labeled differently; use the iOS help resources or Best Camera Tips as a quick reference. Persistent issues may indicate a software glitch or a need for an update.
Pro tips: maximize image quality with optimal settings
As you become more confident, create a quick reference for yourself: grid on, Formats set to HEIF/HEVC, HDR enabled where available, and video at a comfortable resolution. For editors who work with post-processing, consider using ProRAW on compatible devices for maximum latitude. Regularly test your settings in varied conditions—sunny, mixed, and low light—to understand how changes translate to real-world results. The aim is consistency and quality across your shoots.
Tools & Materials
- iPhone with iOS 15+ (or newer)(Ensure access to Settings and the Camera app.)
- Camera app(Access the gear icon for in-app options.)
- Settings app(For system-wide camera controls and formats.)
- Stable environment for testing(Varied lighting helps evaluate impact of settings.)
Steps
Estimated time: 15-25 minutes
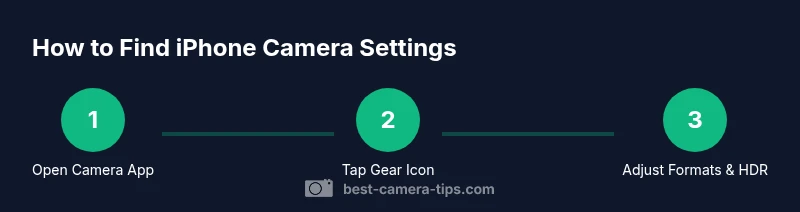
- 1
Open the Camera app
From the Home screen, tap the Camera icon to open the camera interface. If you have multiple lenses, start with the main lens for consistency, then compare by switching lenses to observe differences.
Tip: Pro-tip: Close unused apps to minimize lag while testing settings. - 2
Tap the gear icon for in-app settings
In the camera interface, locate and tap the gear icon (often in the top-right). This reveals quick toggles like Grid, Live Photo, and Formats that affect your current shot.
Tip: If you don’t see a gear icon, swipe for more options or ensure you’re in the default camera mode. - 3
Adjust in-app options for immediate results
Experiment with Grid, Live Photo, and Formats to see how composition and file type affect your workflow. Take rapid test shots to compare outcomes.
Tip: Record a short burst in different formats to understand file size and quality trade-offs. - 4
Open Settings > Camera for system-wide controls
Navigate to Settings > Camera to set default formats, enable/disable HDR, and opt for larger video resolutions or frame rates. These choices persist across apps.
Tip: Note which options are model/version dependent and adjust accordingly. - 5
Choose formats and video options
Select your preferred Formats (HEIF/HEVC vs JPEG/RAW) and video settings tailored to your editing workflow. If you shoot RAW with ProRAW, you’ll need compatible apps to edit later.
Tip: Compatibility matters: some editors handle HEIF/HEVC differently than JPEG/RAW. - 6
Test in a real scenario
Take photos and short clips in a variety of lighting conditions. Compare results with different settings to identify what consistently delivers the look you want.
Tip: Keep notes on what worked best for future reference. - 7
Review, refine, and save your defaults
After testing, finalize your preferred defaults in Settings and continue to adjust as your needs evolve. Revisit after major iOS updates or new hardware releases.
Tip: Create a small checklist you use before every shoot to reinforce consistency.
Common Questions
Where exactly are camera settings on iPhone?
Camera settings live in two places: the Camera app (gear icon) for in-app tweaks and Settings > Camera for system-wide controls. Understanding both locations helps you quickly tailor on-the-fly changes and set long-term preferences.
Camera settings are in two places: the Camera app for quick tweaks and Settings for persistent changes.
Can I change camera settings per app?
Some apps have in-app camera options, but iPhone’s system-wide Camera settings apply to the built-in camera across all apps. Check each app’s permissions and consider using the in-app tools for quick changes when needed.
Some apps offer their own camera options, but the system settings affect the built-in camera overall.
What is Formats in Camera settings?
Formats lets you choose between HEIF/HEVC for efficiency or JPEG/RAW for editing flexibility. The choice impacts file size, editing compatibility, and future-proofing your library.
Formats decide whether you use HEIF/HEVC or JPEG/RAW for photos and videos.
Do settings differ by iPhone model?
Yes. Newer models and iOS versions offer advanced options like ProRAW/ProRes, higher video resolutions, and additional toggles. Always verify features on your exact device after updates.
Settings can vary by model and iOS version, so check after updates.
How do I reset camera settings to default?
Go to Settings > Camera and repeat the toggles to your preferred defaults, or use the reset option if available after errors. If issues persist, consider a device restart.
To reset, revisit Settings > Camera and reapply your preferred defaults.
Is there a quick way to test changes?
Take a few sample shots in different light conditions to compare results before finalizing. Use consistent subjects and scenes to measure the impact of each setting.
Yes—shoot a few test photos in varied light to compare results.
Watch Video
The Essentials
- Identify two access points for camera settings.
- Use Camera app for quick tweaks and Settings for persistence.
- Test across lighting to understand impact.
- Respect privacy and permissions when enabling access.
- Review and reset defaults after major updates.