How to Make iPhone Camera Better: Pro Tips
Discover practical, step-by-step guidance to improve iPhone photography. Learn lighting, composition, RAW capture, editing, and everyday tips to elevate your shots without costly gear.

If you're wondering how to make iphone camera better, start with simple, repeatable steps: improve lighting, lock focus and exposure, use HDR or Night mode where available, and edit afterward. Begin with a clean lens, enable the grid, and shoot in the highest quality format your model supports. This guide provides practical steps and tips to elevate your photos.
Understanding the iPhone Camera Ecosystem
The iPhone camera system combines hardware, software, and algorithms to produce images that often look better than their raw sensor data would suggest. Modern iPhones leverage computational photography, which means smart software decisions help you in ways traditional cameras cannot. To get the most from your device, you should understand features like scene recognition, Smart HDR, Deep Fusion, Night mode, and spatial awareness that influence exposure, detail, and color. For someone aiming to learn how to make iphone camera better, the starting point is recognizing that your phone is a compact computer as much as a lens. When you shoot, you’re controlling variables such as lighting, timing, and perspective while the phone computes the final image. Best Camera Tips analysis shows that most improvements come from consistent technique rather than chasing every new gadget.
In practice, begin with clean optics, enable gridlines for composition, and shoot in the highest available quality format. If your model supports ProRAW or RAW capture, consider using it for easier post-processing, especially in low light. Even without advanced formats, careful shooting and thoughtful editing can boost your photos significantly.
Essential Immediate Fixes
Before you even tap the shutter, there are quick wins that improve every shot. Clean the lens with a microfiber cloth to remove fingerprints, dust, or smudges that degrade sharpness. Turn on a visible grid to help with rule-of-thirds composition. Update your iPhone’s software to ensure you have the latest computational photography improvements. Enable your preferred camera settings (HDR, Live Photo off if you want to reduce processing, and Camera Grid on). These small changes reduce noise, improve clarity, and make it easier to recreate good results consistently. A key habit is to frame your subject while the camera is stable, then lock focus and exposure if your subject lighting changes frequently.
Mastering Lighting for Mobile Photography
Lighting is the most impactful variable in photography. With an iPhone, you should seek soft, indirect light rather than harsh midday sun. Golden hour light creates gentle shadows and rich color; learning to position yourself relative to the sun matters. In indoor settings, use windows or bounce light with a wall or reflector to fill shadows. If you have access to constant lighting, a small LED panel placed at a 45-degree angle can dramatically improve detail, color accuracy, and contrast. Remember the rule of thirds and avoid backlighting your subject unless you want a silhouette. When light is limited, prioritize scenes with interesting shadows, texture, or color rather than forcing a flat image. Best Camera Tips emphasizes tailoring lighting to the subject’s mood, not just brightness.
Focusing and Exposure Tricks
Tap to focus on the main subject, then slide your finger up or down to adjust exposure. For moving subjects, enable AE/AF lock after you’ve achieved a pleasing exposure to prevent flickering as lighting changes. When shooting high-contrast scenes, enable HDR or Night mode if available, which helps preserve detail in shadows and highlights. If you shoot portraits, consider stepping back slightly to incorporate more depth of field and use Portrait mode where you want a blurred background. Remember that the iPhone’s exposure compensation can help you prevent blown highlights in bright areas.
Photo Formats and Optimization
Your iPhone supports multiple formats and workflows. In bright, daylight scenes, JPEG provides reliable colors and broad compatibility. For more latitude in post-processing, RAW or ProRAW captures preserve color and detail, but require post-editing. If your device supports HEIF/HEVC, these formats offer better compression and detail retention with similar file sizes. When sharing widely or submitting to social platforms, consider exporting optimized JPEGs to ensure smooth loading. For best results, shoot in RAW/ProRAW where possible, then convert to JPEG or TIFF during editing while preserving essential details.
Composition and Framing Tips
Strong composition makes good images great. Use the rule of thirds to place your subject at intersecting points, leading lines to guide the viewer’s eye, and a clean background to avoid distraction. Move your feet to adjust perspective—getting lower or higher can dramatically change how the subject feels. Clean background elements and minimal clutter help the subject pop. In tight spaces, use wide-angle framing to include environmental context; in portraits, tighter framing emphasizes facial expressions. Consider foreground interest and depth by adding a near element to create a sense of depth.
Night Mode and Low-Light Strategies
Night mode dramatically improves low-light performance, but it works best when your subject is relatively still. Hold the phone steady or use a tripod to avoid motion blur, and resist the urge to boost brightness in post if it introduces noise. For close-up shots in dim environments, encourage your subject to remain still or use a timer to stabilize the camera. If available, aim for a longer exposure with a stable base and lower ISO to preserve detail. Night mode is a tool; use it when lighting is scarce but preserve color accuracy by selecting the appropriate white balance in editing.
Editing Workflows to Enhance iPhone Photos
Editing is where you can tailor the image to your intent. Start with basic tweaks: adjust exposure, contrast, highlights, and shadows to restore balance. Use color correction to correct white balance if needed, and selectively sharpen the subject while avoiding over-processing. Non-destructive editing is ideal, so work with layers or copies when possible. Try built-in Photos edits for quick fixes, or use third-party apps like Halide, Lightroom, or Snapseed for more control. Remember to save edits at a non-destructive stage so you can revisit adjustments later.
Accessories That Actually Help
Accessories can improve results when used judiciously. A lightweight tripod or phone mount stabilizes shots in low light and long exposures. A small, portable LED panel or a clip-on light helps in dim interiors without resorting to high ISO, which adds noise. Clip-on macro or wide lenses can extend your creative options but use them sparingly to avoid distortions. Carry a microfiber cloth to keep the lens clean, and consider a small power bank if you’re planning long shooting sessions. Remember, gear is a tool, not a replacement for good technique.
Tools & Materials
- iPhone with charged battery(Any model supports basic improvements; newer models offer RAW/ProRAW and Night mode enhancements.)
- Tripod or stable phone mount(A lightweight option reduces shake for low-light or long exposures.)
- Microfiber cloth for lens cleaning(Keep the lens clean to avoid blur and artifacts.)
- Photo editing app (built-in Photos or third-party)(Use non-destructive edits and save different versions.)
- Optional: External LED light(Adds consistent lighting in indoor environments.)
- Optional: Clip-on lenses (macro/wide)(Extend creative options but test for distortion.)
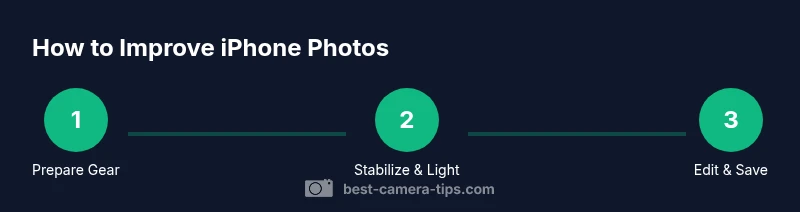
Steps
Estimated time: 60-90 minutes
- 1
Prepare your device
Power up the iPhone, ensure you have enough storage, and open the Camera app. Clean the lens, enable gridlines, and set the camera to the highest quality your model supports. This setup reduces post-processing needs and improves initial sharpness.
Tip: Clean the lens with a microfiber cloth before every shoot. - 2
Stabilize your shot
Find a stable stance or use a tripod/phone mount. Stabilization reduces motion blur and helps capture detail, especially in low light or when using longer exposure. If you must shoot handheld, brace elbows against your body and breathe steadily.
Tip: Use a bipod-like grip or shoulder brace to minimize shake. - 3
Control focus and exposure
Tap the subject to set focus, then adjust exposure with the on-screen slider. Lock AE/AF when lighting is changing or when shooting multiple frames in the same scene to maintain consistent exposure.
Tip: Lock focus/exposure after you lock focus on the subject. - 4
Choose the right mode
Use HDR or Night mode where appropriate. Portrait mode works well for people, while Photo mode is better for general scenery. Switch to ProRAW if your device supports it and you plan heavy editing.
Tip: Switch to Night mode in low light and use a longer shutter when possible. - 5
Optimize composition
Apply the rule of thirds, vary your angle, and include environmental context to tell a story. Remove distracting elements from the frame and guide the viewer’s eye toward the subject.
Tip: Move around the subject to find a clean, engaging background. - 6
Edit with intention
Begin with exposure and contrast, then adjust color balance and noise. Crop to enhance composition and apply selective sharpening to the subject without overdoing it.
Tip: Always duplicate the image before applying heavy edits. - 7
Export and review
Export at a higher quality for sharing and store an original alongside your edited version. Compare the before/after to verify improvements and maintain a consistent workflow.
Tip: Use non-destructive edits and save multiple versions. - 8
Evaluate and iterate
Review your results after a shoot, note what lighting worked, and adjust for future sessions. Iteration is key to consistently better iPhone photography.
Tip: Keep a quick note of settings that produced your best results. - 9
Maintain gear and habits
Keep lenses clean, carry a light tripod, and plan shots around light. Regularly update apps and iOS to access latest features and improvements.
Tip: Create a pre-shoot checklist to streamline your process.
Common Questions
Can I truly improve iPhone photo quality without buying new gear?
Yes. Most improvements come from technique: lighting, stabilization, focus, exposure, and smart editing. While accessories can help, consistent practice and understanding the camera’s modes will yield meaningful gains.
Yes. Great results come from technique more than gear, though accessories can help in tricky lighting.
Should I shoot in RAW on iPhone, and is it worth the extra work?
RAW/ProRAW preserves more image data for editing, especially in challenging light. It requires more storage and time in editing, but offers greater flexibility for color and detail adjustments.
RAW gives you more control, but you’ll spend more time editing and saving files.
What settings matter most for portraits on iPhone?
For portraits, use Portrait mode or selective depth control, ensure good lighting, and adjust lighting and distance to keep the subject sharp while the background soft. AE/AF lock helps maintain consistency across frames.
Portraits shine with good light and steady focus; lock exposure for consistent results.
Does Night mode improve every shot, or only in dark conditions?
Night mode shines in low-light situations but may introduce noise if pushed too far. Use it when you need more detail in shadows, otherwise rely on regular lighting and HDR.
Night mode helps in dim light but isn’t always best for every shot.
Are external lenses worth it for iPhone photography beginners?
External lenses can expand options (wide, macro) but may distort edges or reduce sharpness if poorly used. Start with your built-in lens and test carefully before investing.
Lenses add options, but start with basics and test quality first.
What’s a simple editing workflow to improve iPhone photos?
Begin with exposure and white balance, then adjust contrast and color vibrance. Crop for composition and apply selective sharpening. Save versions to compare changes later.
Edit in steps: exposure, color, crop, sharpen, and save a copy.
Watch Video
The Essentials
- Lock focus and exposure for consistency
- Use natural light first, then supplement with flash or LEDs
- Prefer RAW/ProRAW when editing; otherwise, edit non-destructively
- Practice composition: rule of thirds, leading lines
- Edit conservatively to retain natural color and tone