Where to Find Camera Settings on Android: A Practical Guide
Discover where Android camera settings live, how they’re organized, and how to adjust exposure, focus, white balance, and modes. A practical, beginner-friendly guide for aspiring photographers and home security enthusiasts.

According to Best Camera Tips, Android camera settings are typically found inside the Camera app. Open the stock Camera app, then tap the gear icon or the three-dots menu to access exposure, focus, white balance, and other options. If your device uses a manufacturer app, look for a Settings or gear icon within that app, as placement varies by brand.
Where Android camera settings live across devices
For most Android users, the camera settings live inside the primary Camera app. Start by opening the app and locating a small gear icon, a three-dots menu, or a slider panel near the shutter button. These cues are the gateway to exposure, focus, white balance, and color profiles. Importantly, the exact location can vary by manufacturer; Google Pixel, Samsung, OnePlus, and Motorola may group options slightly differently. This variation is why understanding the general pattern helps: look for a settings icon in or around the viewfinder, then explore the submenus that control image capture. The goal is to reach a panel labeled with terms like “Settings,” “Advanced,” “Pro,” or “Manual.”
As you become familiar with your specific device, you’ll notice the same core settings appear repeatedly, even if organized under different labels. This consistency lets you translate what you learn on one phone to another, which is especially helpful for aspiring photographers who want reliable results across models. The key is to practice on your current device and note where the familiar controls live for future reference.
Finally, remember that some phones default to a simplified mode for casual shooting. If you want more control, switch to a Pro or Manual mode and you’ll unlock finer adjustments like ISO, shutter speed, and precise white balance.
Quick navigation for advanced options and why it matters
On many Android devices, advanced controls are tucked behind a Pro/Manual mode or an “Advanced” submenu. Pro mode typically unlocks ISO, shutter speed, exposure compensation, focus mode, and white balance. Understanding these terms is essential: ISO controls sensor sensitivity, shutter speed dictates motion capture, and white balance ensures colors look natural under different lighting. Some devices also expose RAW capture as an option within Pro mode, which is especially valuable for post-processing work. If you don’t see Pro or Manual, explore submenus within the Settings menu—some OEMs place advanced controls under a different label, such as “More settings” or “Professional.”
An important practical tip is to test one parameter at a time. Start with exposure compensation to brighten or darken a scene, then experiment with ISO and shutter speed in a controlled environment. This incremental approach helps you learn the impact of each control without becoming overwhelmed.
Settings that beginners should prioritize for better images
If you’re just getting started, focus on a core set of settings that consistently improve photo quality. Enable grid lines to improve composition, adjust white balance for skin tones and natural color, and choose an aspect ratio that suits your subject. For color fidelity, experiment with white balance presets like Daylight, Cloudy, or Tungsten, and then fine-tune with a custom Kelvin value if your app allows it. Exposure compensation is another beginner-friendly tool that helps prevent blown highlights or dark shadows. If your device supports HDR, consider enabling it for scenes with high dynamic range. RAW capture is worth enabling if you plan to do post-processing, as it preserves more detail than JPEG.
As you practice, save a few presets or remember a few “go-to” combinations for different scenes—portraits, landscapes, and low-light conditions. The more you repeat effective setups, the faster you’ll achieve reliable results.
OEM-specific nuances: Pixel, Samsung, OnePlus, and beyond
While the core concepts are shared, how you access them can differ by manufacturer. Pixel devices often emphasize clean, minimal menus with Pro options tucked under a gear icon. Samsung’s camera app includes detailed controls under a dedicated Pro mode with sliders and micro-adjustments. OnePlus devices may label advanced options as “Pro Mode” or “Manual” within the main settings. On some devices, you might need to grant camera permissions or enable certain features in the phone’s general settings before advanced options become available. Understanding these nuances speeds up your learning curve and reduces frustration when switching between devices.
If you switch phones often, create a quick-access note summarizing where your main controls live on each model. This small reference can save time during shoots and help you maintain consistent results across devices.
Common issues and how to troubleshoot access to camera settings
Sometimes settings seem missing or inaccessible. First, verify you’re on the latest OS and camera app version, as updates often reorganize menus. If you still can’t find a control, try a quick reset of the camera app (clear cache or data if needed) or restart the device. In some cases, an OEM app or a security/dual-camera feature may house extra controls; check any additional camera apps installed on the device. If you’re using a third-party camera app, ensure it isn’t conflicting with the stock camera UI, and consult the app’s help resources for where its settings live. Finally, if the issue persists, consider reaching out to the device manufacturer’s support channels for guidance tailored to your model.
Tools & Materials
- Android smartphone with camera app(Any device with a stock or manufacturer camera app)
- Updated OS and camera app(Ensure latest version for access to all options)
- Notes app or camera settings cheat sheet(Jot down preferred presets for quick setup)
- Phone charger or power bank(Keep device charged if testing many settings)
Steps
Estimated time: 25-40 minutes
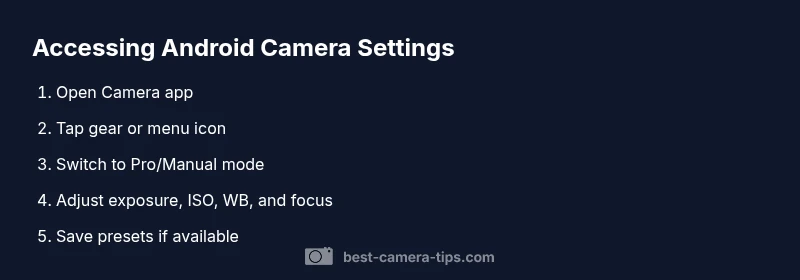
- 1
Open the Camera App
Launch the default Camera app on your Android device. If you use a manufacturer app, open that app instead. Confirm you’re in still photo mode before proceeding.
Tip: Opening the camera app is the single action that gives you access to all settings - 2
Access the Settings Menu
Look for a gear icon, a three-dots menu, or a hamburger icon usually near the shutter button. Tap it to reveal camera options.
Tip: If you don’t see an icon, swipe left or right in the viewfinder to reveal an hidden panel - 3
Switch to Pro/Manual mode
If your device supports it, choose Pro or Manual mode to unlock granular controls such as ISO and shutter speed.
Tip: Pro mode exposes more controls but may reduce auto-evaluate convenience - 4
Adjust Core Settings
In Pro mode or the advanced panel, adjust exposure, ISO, shutter speed, white balance, and focus. Make small changes and test with sample shots.
Tip: Change one setting at a time to understand its impact - 5
Fine-tune Color and Composition
Set white balance presets or custom temperature, enable grid lines, and choose aspect ratio. Consider enabling HDR or RAW capture if available.
Tip: Grid lines help compose shots consistently; RAW yields more post-processing flexibility - 6
Save and Reset if Needed
Save preferred presets if your app supports it. If results worsen, reset to default and start again from step 3.
Tip: Document presets so you can reproduce good results later
Common Questions
Where are camera settings usually located on Android devices?
Most Android devices place core camera controls in a gear icon or three-dots menu inside the Camera app. Pro/Manual mode adds advanced settings like ISO, shutter speed, and white balance.
Camera controls are inside the Camera app in a gear or menu icon; look for Pro mode for advanced options.
Do all Android phones have Pro or Manual mode?
Not all devices include a dedicated Pro or Manual mode. Check in the camera app's settings or try the stock app on Pixel devices or OEM apps on Samsung and OnePlus.
Some devices have Pro mode; others may offer advanced controls in other named sections.
If I can’t find camera settings, what should I do?
Update the camera app and OS, restart the phone, and check both the Camera app and any manufacturer app that could house camera controls.
Try updating and checking other camera apps on your phone.
Can I adjust settings while recording video?
Some devices let you adjust exposure and focus while recording; others lock certain controls. Look for on-screen controls or pause/resume options in the camera UI.
You may be able to tweak exposure and focus during recording on some phones.
Should I enable RAW capture?
RAW captures preserve more detail for post-processing. Use it if your workflow includes editing, and ensure you have compatible apps to process RAW files.
RAW gives you more editing latitude; use it if you plan to post-process.
Watch Video
The Essentials
- Know where to find camera settings on Android
- Use Pro/Manual mode for granular control
- Change one setting at a time for clarity
- Enable grid lines and RAW when possible
- Different OEMs place settings in different menus