Where Are Camera Settings on Samsung Phones: A Practical Guide
Discover where camera settings live on Samsung phones, how to access Photo, Video, and Pro modes, and how to tweak exposure, ISO, white balance, and RAW options for better shots.

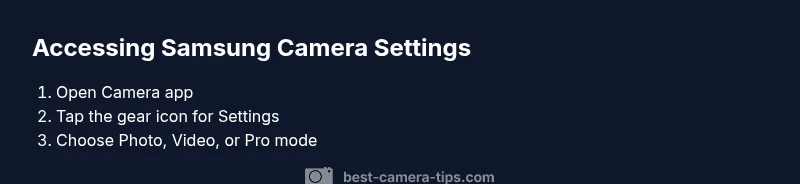
Open the Camera app on your Samsung phone and tap the gear/settings icon to access camera settings. You’ll find options grouped by Photo, Video, and Pro modes, with manual controls like ISO, shutter speed, white balance, and exposure. According to Best Camera Tips, try Pro mode for precise adjustments and RAW capture when available.
Where to Find Settings on Samsung Camera
On modern Samsung Galaxy devices, camera settings are tucked behind a gear or settings icon in the Camera app. Depending on your model and software version, you may see a gear icon in the upper corner of the screen, or a three-dots menu that reveals Settings. The layout is designed so casual shooters can access basic options quickly, while more advanced users can dive into Pro mode for manual controls. For best results, keep the Camera app updated, and note that some options may vary slightly between One UI versions.
Key takeaway: the gear icon is your gateway to most preferences, and Pro mode unlocks the full suite of manual controls when available.
Understanding the Camera App Layout on Samsung
Samsung’s Camera app typically presents three main modes on the main screen: Photo, Video, and Pro. The Photo and Video modes cover standard adjustments like resolution, aspect ratio, and scene optimizers, while Pro gives you direct control over exposure, ISO, shutter, focus, and white balance. You may also encounter auxiliary features such as Grid lines, Motion Photo, and Auto HDR. Getting familiar with which settings live under Photo versus Video helps you tailor shots quickly in real-world scenarios. Best Camera Tips emphasizes practicing in Pro mode to understand how each knob affects final output.
Recommendation: start with Photo mode for everyday shots, then switch to Pro when you need precise control.
Pro Mode: Mastering Manual Controls
Pro mode is the designer’s playground for photographers who want to dial in exact exposure. In this mode you can adjust ISO to control sensitivity, shutter speed to freeze or blur motion, and white balance to match the scene’s lighting. Exposure compensation lets you push brighter or darker without altering other settings. Refocusing is often manual, and some models support manual focus assist. If your device supports RAW capture, enabling it in Pro mode preserves a higher-fidelity image for post-processing.
Practical tip: begin with ISO 100–200 for bright scenes, then raise the ISO in steps for low light to reduce noise. Use a tripod to stabilize long exposures if needed.
Photo Settings You Should Know
Beyond Pro mode, standard Photo settings influence most casual captures. Resolution and aspect ratio affect file size and framing; choose 4:3 for general photography and 16:9 for widescreen displays. Turn on Grid lines to aid composition and use HDR when lighting is high-contrast, but disable it for scenes with moving subjects where it can ghost motion. White balance presets let you warm or cool color tones to match the mood. Some Samsung cameras also offer color profiles or scene-based optimizations that can be toggled on or off.
Tip: for social media, shoot in the highest available resolution and crop later if needed.
Video Settings: Frame Rate, Resolution, and Stabilization
Video settings control how footage is captured. Common options include 1080p and 4K resolutions, with frame rates like 30fps or 60fps depending on your model. Higher frame rates yield smoother motion but larger files. Stabilization features, such as Optical Image Stabilization (OIS) and digital stabilization, help reduce shake during handheld filming. Some Samsung devices also offer features like 4K60, Super Steady, or HDR10+. Review your intended use (web vs. cinema) to choose the right balance of resolution and frame rate.
Best practice: for talking-head videos, 1080p at 30fps is often sufficient and easy to edit; reserve 4K for high-detail footage when you have storage for larger files.
RAW vs JPEG: When to Use Each
JPEG is convenient—processed to look good out of camera and small in size. RAW files preserve maximum image data for post-processing, enabling better recovery of highlights and shadows at the expense of larger file sizes and more time spent editing. In Pro mode on compatible Samsung phones, you can enable RAW capture to shoot unprocessed data. Remember that RAW requires a capable editing workflow and may not be ideal for quick sharing.
Guidance: use RAW for landscapes or studio shots where you plan-to adjust exposure and color, and switch to JPEG for quick social sharing or fast-turnaround projects.
AI Features and Smart Adjustments
Samsung’s AI-assisted features, such as Scene Optimizer and AI-based enhancements, can dramatically improve results with minimal effort. Scene Optimizer analyzes the scene and suggests enhancements like color boost or brightness adjustments. HDR and AI-powered dynamic range improvements help scenes with bright skies or dark shadows. While helpful, these tools can occasionally oversimplify or over-process, so compare results with and without AI engaged to learn your preferences.
Note: Use AI features as a baseline, then fine-tune manually in Pro mode when you need consistent, repeatable results.
Quick Access Tips to Save Time
If you find yourself tweaking the same settings repeatedly, create mental shortcuts and use quick toggles. Enable Grid lines for composition, set Pro mode as a default when shooting in challenging lighting, and learn where the tripod-friendly settings live. On some models, long-pressing the shutter button starts recording, while swiping left or right can switch modes quickly.
Practical tip: practice a 60-second test routine changing one variable at a time to understand how each setting affects your image before committing longer shoots to memory.
Troubleshooting Common Issues
If you notice sluggish responsiveness or missing options, start with a simple reset of the Camera app settings, or clear the app cache. Check for system updates or camera firmware updates; sometimes new options are introduced with software updates. If RAW capture is unavailable, verify your device supports RAW in Pro mode and that you have sufficient storage. For inconsistent white balance, switch off Auto WB and try a fixed preset for your typical lighting scenarios.
Warning: avoid aggressive third-party camera apps claiming to override Samsung settings, as they may conflict with hardware-based controls and void warranties.
Practice Plan: Testing Your Settings
Create a small, repeatable testing routine to compare results across settings. Shoot the same scene under similar lighting with: (1) Auto mode, (2) Pro mode with fixed ISO and shutter, (3) Pro mode with manual WB, (4) RAW capture if available. Review histograms, color accuracy, sharpness, and noise. Use a consistent subject distance and lighting to see how each parameter changes the image.
Conclusion to practice: use this framework to build a personal reference guide for your most-used scenarios and destinations.
Tools & Materials
- Samsung smartphone with charged battery(Ensure enough storage for RAW photos if used)
- Stable internet connection(For firmware/app updates if needed)
- Phone stand or tripod(Helpful for steady test shots during practice)
Steps
Estimated time: 15-25 minutes
- 1
Open the Camera app
Unlock the phone and tap the Camera app icon to launch. This is your entry point to all camera settings.
Tip: If you don’t see the gear icon, swipe to the left in some versions or tap More (three dots) to reveal Settings. - 2
Access the settings panel
Tap the gear or Settings icon, typically in the top corner of the screen, to open the main camera preferences.
Tip: On some models, you may need to tap a three-dots menu first. - 3
Choose Photo or Video mode
Decide whether you want to adjust stills or motion capture, as options are grouped by mode.
Tip: Note that some settings are mode-specific and won’t apply when you switch modes. - 4
Enable Pro mode (if available)
If your device supports Pro mode, switch to it to access manual controls like ISO, shutter, and WB.
Tip: Pro mode gives you the most control; start with small adjustments. - 5
Adjust exposure and ISO
Set a base ISO (e.g., 100–200 in bright light) and adjust exposure or shutter speed to control brightness.
Tip: Avoid very high ISO in bright light to minimize noise. - 6
Set white balance and focus
Choose a WB preset or manual WB, then focus manually if your subject is not near infinity.
Tip: Tap to focus on the subject, then lock exposure if needed. - 7
Enable RAW capture (if available)
Turn on RAW to preserve maximum detail for post-processing.
Tip: RAW files are larger; ensure you have ample storage. - 8
Test and compare results
Take sample shots in different settings and review on your device or computer.
Tip: Use the same lighting and distance for clean comparisons.
Common Questions
Where are camera settings located in Samsung's Camera app?
Most Samsung devices place settings behind a gear icon in the Camera app. Some versions use a three-dot menu. Open Camera, then tap the icon to access Photo, Video, and Pro options.
Open the Camera app and tap the gear or three-dot menu to access camera settings.
What is Pro mode and why use it?
Pro mode gives manual control over exposure, ISO, shutter speed, white balance, and focus. It’s ideal when you need precise adjustments or want to shoot in challenging lighting.
Pro mode lets you manually adjust exposure and color for precise control.
How do I enable RAW on Samsung cameras?
Raw capture is available in Pro mode on compatible devices. Enable RAW in the Pro settings to capture unprocessed data for advanced editing.
Turn on RAW in Pro mode to get unprocessed image data for editing.
Do camera settings vary by Samsung model?
Yes. UI elements and available options can differ between One UI versions and device models. Check for updates if you don’t see an option you expect.
Settings can differ between Galaxy models and software versions.
Should I use HDR—when is it best?
HDR helps balance bright skies and dark shadows in scenes with high contrast. Use it in landscapes or backlit subjects but disable it for fast action.
HDR is great for scenes with bright skies and dark shadows, but may blur motion in action shots.
How can I reset camera settings?
If you’ve changed many options, you can reset to default in the camera settings or app info. This is useful when a setting behaves unexpectedly.
You can reset camera settings to default in the app’s settings menu.
Watch Video
The Essentials
- Master the gear icon to access Samsung camera settings
- Use Pro mode for precise exposure control
- RAW capture is essential for flexible editing
- AI features help with quick improvements but need manual tweaks for consistency
- Test settings with repeatable shots to build your own reference