How to Fix Camera on Android: A Practical Guide
A comprehensive, educator-led guide to diagnosing and fixing Android camera problems. Learn software checks, hardware considerations, and maintenance tips to restore camera performance on Android devices.

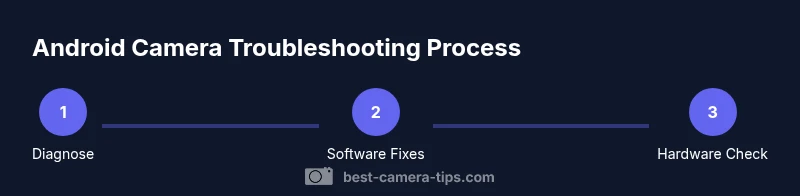
How to fix camera on android typically starts with software checks and simple maintenance. Update the camera app and Android system, clear app cache, and reset preferences. If problems persist, boot into Safe Mode to test, then compare with a third‑party camera app to distinguish software from hardware issues. This guide provides step‑by‑step fixes for common Android camera problems.
Diagnose your Android camera issue
According to Best Camera Tips, most Android camera problems fall into four buckets: software glitches, incorrect permissions, storage constraints, and physical lens issues. Start by identifying which bucket your problem belongs to. Look for symptoms: does the app crash, are photos blurry, is autofocus failing, or is nothing happening when you tap the shutter? Note the device model, Android version, and camera app version; this helps you pick the right fixes and skip steps that won’t apply. If you recently installed a new app or an OS update, that change is often the root cause. By mapping symptoms to categories, you can apply targeted fixes without unnecessary trial and error. This diagnostic step sets the stage for reliable results and minimizes wasted time.
Check app version and Android OS
Software issues are often resolved by keeping the camera app and the Android operating system up to date. Start by checking for updates to the camera app in the Google Play Store and verify there are no pending Android system updates. Updates frequently include bug fixes for camera crashes, stabilization, and autofocus. If your device is on a customized ROM or has manufacturer-specific apps, repeat the check for updates from the device’s official software updater. Keeping software current is a fundamental step in learning how to fix camera on android efficiently and reduces the likelihood of incompatibilities that cause performance drops.
Clear cache and reset camera preferences
Camera apps often store temporary data that can become corrupted and impair performance. Clear the camera app cache and, if possible, reset the camera app preferences to their defaults. This step does not delete your photos or accounts; it clears temporary files that may be causing freezes, focus issues, or unexpected shutter delays. After clearing, reopen the camera app and test basic functions like focus, exposure, and shutter speed. If symptoms persist, you can reconfigure preferences such as grid lines, HDR settings, and video quality to your liking. Regularly performing this maintenance helps address common causes behind how to fix camera on android problems.
Test in Safe Mode to isolate software issues
Safe Mode disables third‑party apps, enabling you to determine whether the problem is caused by software you installed. To enter Safe Mode, press and hold the power button, then touch and hold “Power off” until the Safe Mode prompt appears. Reboot and test the camera in Safe Mode using the stock app. If the camera works in Safe Mode, a third‑party app is likely the culprit—uninstall suspicious apps or disable them one by one until the issue resolves. If the problem persists in Safe Mode, it’s more likely a system or hardware concern. This is a critical step in figuring out how to fix camera on android without guessing.
Compare with a third‑party camera app for hardware vs software clues
Install a reputable third‑party camera app and compare performance against the built‑in camera. If both apps exhibit the same issues (blurry images, poor autofocus, repeated crashes), the root cause is likely hardware or OS-level. If only the stock app misbehaves while the third‑party app performs normally, the problem is software‑centric or tied to the stock app’s integration with the device. This comparative test helps you quickly isolate software vs hardware factors when learning how to fix camera on android.
Inspect and clean the camera lens and housing
Lens cleanliness can dramatically affect image quality and autofocus. Power down the device and use a clean microfiber cloth to gently wipe the lens glass. If smudges persist, use a soft brush or a blower to remove dust from the lens housing. Avoid harsh chemicals and never press hard on the glass. A clean lens is a simple yet powerful fix in many scenarios and a critical part of maintaining your camera’s performance when learning how to fix camera on android.
Check storage, permissions, and app access
Insufficient storage can cause camera apps to fail to save images, while improper permissions can prevent the camera from functioning correctly. Check that there is adequate free storage space on your device and in the camera app’s folder. Review camera and storage permissions in the Settings app, ensuring the camera has access to storage, microphone, and location if required. Grant or revoke permissions carefully; excessive restrictions can impair features like autofocus, stabilization, or video recording. This step is essential when diagnosing how to fix camera on android issues related to permissions and storage.
Advanced fixes: reset app preferences, reset network settings
If software inconsistencies persist, reset the app preferences and, if necessary, reset network settings. Resetting app preferences re-enables all disabled apps and permissions without deleting personal data. Resetting network settings can resolve connectivity‑related anomalies that affect camera apps using online services or cloud backups. Always back up essential data before performing network resets. These advanced fixes address less obvious causes behind how to fix camera on android problems.
Factory reset considerations and data safety
A factory reset is a last resort and should be approached with caution. It returns the device to its original state and can resolve deep software corruption but will erase personal data and installed apps. Back up photos, videos, and messages before proceeding, and note that some camera settings may be reset to defaults. If you still encounter issues after a reset, it’s more likely a hardware problem that requires professional service. This step emphasizes the balance between restoring function and preserving data when learning how to fix camera on android.
Proactive maintenance to prevent future problems
Once your camera is functioning again, adopt a routine to prevent future issues. Keep software updated, regularly clear caches, and perform lens cleaning monthly. Avoid exposing the camera to moisture and dust; store devices in safe environments. Periodically test autofocus, exposure, and stabilization in good lighting to ensure continued reliability. Regular maintenance is a cornerstone of durable Android camera performance and a practical habit when learning how to fix camera on android.
blockDataEndpointNote”:null],
Tools & Materials
- Android smartphone with camera issue(Ensure device is charged; basic OS version (Android 9+ recommended) for testing)
- Microfiber cleaning cloth(Lint-free and dry; avoid scratching lens)
- Soft brush or blower(Used to remove dust from lens housing without contact)
- Isopropyl alcohol 70% (optional)(Only for stubborn smudges; apply sparingly with a cotton swab; never directly on the lens)
- Cotton swabs or toothpick (soft)(Use for precise cleaning around lens edge; avoid touching sensor)
- Backup plan/data backup(Backup photos and app data before factory reset or settings changes)
- Phone stand or safe surface(Keep device stable during testing)
Steps
Estimated time: 45-90 minutes
- 1
Restart and Update
Power cycle the device, then check for camera app and OS updates. Updates fix many known bugs and improve compatibility with accessories. After updating, reopen the camera app and perform a basic test (tap to focus, take a photo, record a short video).
Tip: Always back up data before major updates to avoid loss. - 2
Clear Cache and Reset Camera App
In Settings, find the camera app, clear cache and storage if available, and reset preferences if offered. This removes corrupted temporary files without deleting your photos. Reopen the camera and test again.
Tip: Clearing cache resets fast‑path data that can cause freezes or lag. - 3
Enter Safe Mode to Isolate Software
Boot into Safe Mode to disable third‑party apps. If the camera works here, uninstall recently installed apps one by one to identify the culprit. If it still fails, software/system issues are likely.
Tip: Safe Mode is a quick diagnostic; don't forget to exit Safe Mode after testing. - 4
Test with a Different Camera App
Install a reputable third‑party camera app and compare performance. If issues persist across apps, focus on software/OS or hardware. If the third‑party app works, the problem is with the stock camera app.
Tip: Use a reputable app from a trusted developer for reliable results. - 5
Check Storage and Permissions
Verify there is enough free storage space and confirm camera permissions (storage, microphone, location if needed). Inadequate permissions can prevent saving files or using features like video recording.
Tip: Storage must be free for new captures; consider moving files off the device. - 6
Clean the Lens and Housing
Power off the device and gently clean the lens glass with a microfiber cloth. Remove dust from the housing with a brush or blower. Avoid liquids directly on the lens and never press hard.
Tip: A clean lens often yields immediate improvements in sharpness. - 7
Factory Reset as Last Resort
If all else fails, back up data and perform a factory reset. This can fix deep software corruption but will erase all apps and settings. Restore data selectively and test the camera after each restore.
Tip: Back up everything important before resetting; you may need to reinstall apps gradually.
Common Questions
Why does my Android camera app crash?
Crashes are usually caused by software conflicts, corrupted cache, insufficient memory, or recent updates. Update the app and OS, clear caches, and test in Safe Mode to identify conflicts. If needed, reset app preferences or perform a factory reset as a last resort.
Crashes often come from software conflicts or corrupted data. Start by updating and clearing caches, then use Safe Mode to isolate the issue.
Is the problem hardware or software?
If multiple apps exhibit the same issue or the camera fails regardless of the app, hardware or OS-level problems are likely. If only one app misbehaves, software or app-specific settings are the probable cause.
If several apps fail, hardware or OS is the likely culprit, otherwise it’s software.
Will clearing cache erase my photos or accounts?
Clearing cache for the camera app does not delete photos or account information. It removes temporary files that can cause glitches, letting the app build fresh data.
Clearing the cache won’t erase photos or accounts; it just clears temporary files.
Should I factory reset to fix camera problems?
Factory reset is a last resort. It restores the device to factory settings, which can fix deep software issues but will remove apps and data. Back up crucial data first.
Only try a factory reset if other fixes fail and you’ve backed up your data.
What if the lens is physically damaged?
If the lens is scratched, cracked, or fogged, software fixes won’t help. Professional repair or replacement is usually required to restore image quality.
If the lens is damaged, you’ll likely need professional repair.
Can updates fix camera issues automatically?
Software updates often include bug fixes for camera components. Ensure both the camera app and the Android OS are up to date to take advantage of these fixes.
Updates can fix problems, so keep both the app and OS current.
Watch Video
The Essentials
- Identify whether faults are software or hardware early.
- Use Safe Mode and test with another app to isolate causes
- Regular lens cleaning and software updates prevent many issues
- Back up data before resets or extensive changes
- Factory resets are last-resort options, not first steps