Where Are Camera Settings in Teams: A Practical Guide
Learn where camera settings live in Microsoft Teams across desktop, web, and mobile. Step-by-step instructions, troubleshooting tips, and best practices to improve video quality in Teams meetings and pre-join screens.

In Microsoft Teams, camera settings live in Devices under your profile or during a meeting as Device Settings. You can select the active camera, adjust background effects, and test video before joining. You'll need a compatible webcam, the Teams app (desktop or web), and granted camera permissions. If you use a virtual background or green screen, note that some cameras may require permissions to access the camera driver.
Why camera settings in Teams matter
Your camera is a key part of how others perceive you in Teams calls. Clear framing, proper lighting, and a clean background help you communicate more effectively. The goal of adjusting camera settings in Teams is not just to look better; it also reduces strain on your eyes, enhances collaboration, and minimizes distractions during meetings. When you understand where Teams stores these settings and how to test before joining, you can quickly adapt to different environments—whether you’re dialing in from a home office, a coworking space, or a conference room. In practice, small tweaks—like improving lighting from the front, using a stable tripod, and selecting a dependable camera source—can yield noticeably more professional results. This guide uses the keyword where are camera settings in teams and shows you practical steps to optimize your video experience.
How Teams handles camera permissions and privacy
Teams relies on your device permissions to access the camera. Depending on your operating system, you may need to grant or re-approve access for Teams in Windows Privacy Settings, macOS Security & Privacy, or your browser permissions when using the web app. If camera access is blocked, you’ll see prompts or an icon indicating the device isn’t available. Always verify permissions before an important meeting to avoid last-minute video issues. Best practice is to test your camera in a quick test call or pre-join screen to confirm the correct device is selected and permissions are allowed.
Desktop app vs web app: where to find the camera settings
In the desktop Teams app, camera controls live under the user profile. Navigate to your avatar > Settings > Devices, then look for the Camera dropdown to choose your device. You can also test the camera from this screen and adjust related audio devices if needed. In the Teams web app, the camera is governed by your browser permissions. When prompted, allow the site to access the camera, and in the browser’s settings you can override which camera Teams uses. The web app relies on browser-level permissions and may behave slightly differently across Chrome, Edge, or Firefox.
Choosing the right camera and testing quality
External webcams often offer higher quality than built-in laptop cameras, but the best choice depends on your setup. When selecting a camera, consider resolution, frame rate, and autofocus performance. Lighting dramatically affects perceived quality, so position a light source in front of you rather than behind you. While Teams does not expose advanced camera controls like exposure or white balance within the app, you can optimize these by adjusting your camera’s own software, or by improving lighting and room atmosphere. Always perform a test call to verify color accuracy and framing.
Meeting vs pre-join: where to adjust
During a meeting, you can change devices via More actions > Device settings (or Device options in some builds). This lets you switch cameras on the fly if you have more than one camera connected. Before you join a meeting, use the pre-join screen to test the camera, choose Background effects, and confirm audio and video devices. Pre-join testing is crucial for avoiding mid-meeting calibration and ensures your chosen device is ready when you click Join now.
Common issues and quick fixes
If Teams doesn’t detect a camera, first check that the device is connected and powered on. Verify OS-level camera permissions for Teams and your browser, then restart the app. Update camera drivers if you notice pixelation or lag, and close other applications that may be using the camera. If you experience inconsistent device detection, disconnect and reconnect the camera, or try a different USB port. For web users, clear browser cache or switch to a different browser to rule out a browser-specific issue.
Best practices for clear video during Teams calls
Position the camera at eye level for natural eye contact and avoid placing the light source directly behind you. Use a simple background and avoid clutter to minimize distractions. If possible, enable a subtle background blur or choose a neutral background to improve contrast. Keep your lens clean and reduce lens smudges, which can soften the image. Regularly test your setup before important meetings and share a quick sample frame with a teammate to confirm color and sharpness.
Accessibility considerations and captions
Teams provides live captions and subtitles that can improve accessibility for participants. Ensure captions are enabled if needed and check that your camera placement doesn’t cause glare or confusing shadows that could affect recognition features. If you rely on captions, maintaining good lighting and stable camera framing helps the automatic speech recognition system deliver better results.
Tools & Materials
- Windows PC or Mac(Ensure Teams is installed and updated to the latest version)
- External webcam or built-in camera(If external, connect via USB and test in OS before Teams)
- Stable Internet connection(High bandwidth helps video quality and reduces lag)
- Microsoft Teams app(Desktop or web app; avoid relying solely on outdated clients)
- OS camera permissions(Grant camera access in Windows Privacy or macOS Security & Privacy)
- Lighting setup(A simple front-facing light reduces shadows and improves clarity)
- Browser (for web app)(Chrome/Edge/Firefox with camera permissions enabled)
Steps
Estimated time: 10-15 minutes
- 1
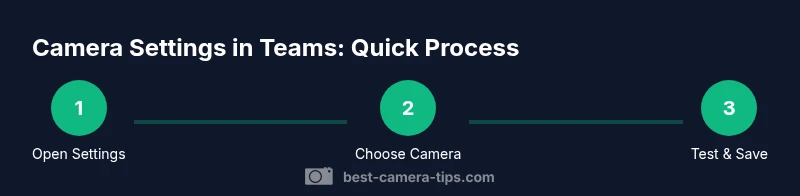
Open Teams and access Settings
Launch the Teams desktop app or web interface. Click your profile avatar in the top-right corner and choose Settings. This opens the global configuration panel where you can locate devices and cameras. This initial step sets the context for device selection.
Tip: If the profile menu is hidden, press Alt+Shift+P (Windows) or Command+Comma (macOS) to open settings quickly. - 2
Navigate to Devices and pick a camera
In Settings, select the Devices tab. Locate the Camera dropdown and choose the camera you want to use. If you’re using multiple cameras, label them in your OS to tell them apart easily.
Tip: Test the camera by clicking Test video if available, or start a quick call to verify the feed. - 3
Test and adjust audio/video pairing
While you’re in the Devices area, test your audio and video pairing to ensure no device conflicts. Confirm the right microphone is active if you plan to speak while presenting. This helps prevent echo and misalignment between audio and video.
Tip: Disable other cameras temporarily if the feed is unstable while testing. - 4
Join a test meeting or pre-join screen
Use the pre-join screen or a quick test meeting to verify video. Check framing, lighting, and background. Adjust camera selection if you notice color or focus issues.
Tip: Place a light source in front of you to improve brightness and reduce shadows. - 5
Enable background effects if needed
In the pre-join screen or during a meeting, choose Background effects to blur or replace your background. This can improve perceived video quality and reduce distraction. Ensure the chosen effect doesn’t degrade your clarity.
Tip: Test different backgrounds to see which works best with your lighting. - 6
Apply changes and monitor performance
After selecting the camera and background, join the meeting and monitor video performance. If you notice lag or blurring, try a different USB port for external cameras or adjust room lighting.
Tip: Keep drivers up to date and close bandwidth-heavy apps during calls.
Common Questions
Where are camera settings located in Teams on desktop?
Open Teams, click your profile avatar, choose Settings, then go to Devices. The Camera dropdown lets you select the active camera and test video. You can adjust related devices from this panel.
In the desktop app, go to Settings under your profile, then Devices, and choose your camera. Test the video there before joining.
Can I change camera during a meeting?
Yes. In the meeting, click More actions, then Device settings or Device options to switch cameras on the fly. This is useful if you connect a new webcam mid-call.
During a meeting, open device settings to switch cameras instantly.
What if Teams doesn’t detect my camera?
First ensure the camera is connected and enabled in OS privacy settings. Restart Teams and update drivers if necessary. Try another USB port or a different camera if available.
If Teams can’t see your camera, check OS permissions and try reconnecting the device.
Does Teams web use the browser camera permissions?
Yes. The web app relies on browser permissions. Allow camera access in the browser’s site settings and select the correct camera in Teams when prompted.
The web version uses browser permissions; allow access and pick the camera in Teams.
How can I improve video quality in Teams?
Use a good lighting setup, keep the camera at eye level, and minimize background clutter. If possible, use an external camera with higher resolution and ensure drivers are current.
Improve lighting and use a higher-quality camera if you can.
Are there accessibility options related to camera in Teams?
Teams offers live captions and simplified background options that can help with accessibility. Ensure captions are enabled and test camera framing for readability.
Turn on live captions and test framing for accessibility.
Watch Video
The Essentials
- Find camera settings in Teams via Profile > Settings > Devices (desktop).
- Web users rely on browser permissions to allow camera access.
- Test before meetings to ensure correct device selection and lighting.
- Use lighting and background adjustments to improve image quality.
- If issues arise, check permissions, drivers, and ports.