How to Check Camera on Teams: A Practical Guide
Learn how to check and fix your camera in Teams with a practical, step-by-step guide, troubleshooting tips, and best practices for reliable video meetings. Perfect for beginners and pros alike.

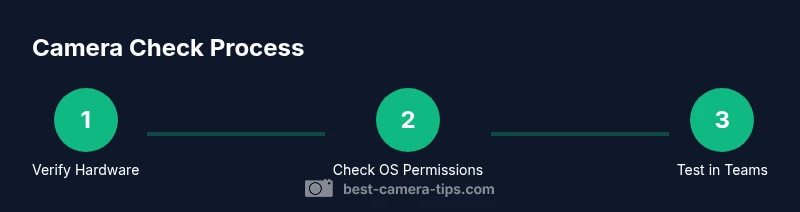
To check your camera on Teams, first ensure Teams has permission to access the camera, then select the correct device in Settings > Devices, and finally test the video in a meeting. If the image won’t appear, verify OS privacy settings and update Teams if needed. According to Best Camera Tips, most issues stem from permissions or incorrect device selection.
Verify hardware and OS permissions
If you're wondering how to check camera on Teams, begin with a hardware health check that addresses the root of most video problems. Start by confirming the camera is physically connected and recognized by your operating system. On Windows, open Device Manager and look under Imaging Devices; on macOS, perform a quick test in Photo Booth or FaceTime to confirm the camera is active. Next, inspect privacy permissions: Windows Settings > Privacy > Camera, and ensure Teams is allowed to access the camera. On macOS, go to System Preferences > Security & Privacy > Camera and allow Teams. If you use an external USB camera, test multiple USB ports and try a known-good cable. Reboot after making changes to ensure the system applies the new settings. This health check often reveals blockers before you adjust Teams configurations. Best Camera Tips notes that many camera problems come from blocked permissions or loose connections rather than complex software faults, so log the device and port for quick reference.
Configure Teams to use the correct camera
Once hardware is confirmed, direct Teams to the right device. Open Teams, click your profile picture, and go to Settings > Devices. In the Camera dropdown, select the camera you want to use—this could be your built-in laptop camera or an external USB webcam. If the external camera doesn’t appear, unplug and replug it, try a different USB port, or restart Teams. While here, briefly check the Audio settings as misassignment can degrade overall call quality. After selecting the correct camera, close the dialog and prepare to test in a controlled environment. Keeping lighting neutral and the background uncluttered helps you accurately gauge the camera’s performance during your test.
Run a live test in Teams
Testing your camera in a controlled scenario is essential. In Teams, go to Settings > Devices and choose Make a test call. This built-in feature provides a live camera preview, microphone check, and speaker playback. Note frame rate, exposure, and color accuracy during the preview. If the image appears laggy or washed out, adjust lighting (soft, front-facing light) and reduce screen brightness to improve contrast. If you see a blank screen, this often signals a driver or hardware issue rather than a Teams setting. Use the test to establish a baseline and compare changes after you update drivers or adjust configuration.
Troubleshooting common issues
Even after a successful test, real meetings can reveal issues. Start with simple fixes: restart Teams and check for updates. Update camera drivers from the manufacturer’s site or through the OS update mechanism, as firmware can affect performance. Disable other apps that may be using the camera in the background and verify that antivirus/firewall settings aren’t blocking access. If problems persist, try a different USB port or a powered hub for external cameras. Finally, test the camera on another device to determine whether the problem is hardware-related or specific to your computer. Keep a short log of steps and results to speed future troubleshooting.
Advanced checks and best practices
To improve reliability, keep software up-to-date and prefer a wired Ethernet connection when possible to stabilize video calls. Lighting significantly affects perceived quality: position a soft light source in front of you at eye level, avoid strong backlight, and ensure the camera sits at or slightly above eye height. For limited bandwidth, consider lowering the camera resolution in Teams settings and minimize other data-heavy tasks during meetings. Regularly review camera permissions and reset them if you install new software. If you rely on an external camera, confirm firmware version and test on another device to isolate hardware versus software issues. A 10-minute routine can keep your Teams camera setup resilient over time.
Privacy, safety, and organization
Privacy and security matter when enabling video in Teams. Only grant camera access to trusted apps and review permissions periodically. In shared or sensitive environments, practice camera etiquette—check what’s visible in the frame and consider turning off the camera when not needed. Maintain a simple log of your configuration, including device names, ports, and driver versions, to reproduce a known-good setup later. This record helps you quickly empower teammates to fix similar issues and keeps your video workflow consistent.
Mobile considerations: Teams on iOS and Android
Mobile devices introduce unique challenges and opportunities for checking the camera. On iOS and Android, ensure Teams has camera access and that no other app is holding the camera lock. Use the in-app camera preview during a meeting test to verify framing and lighting under mobile conditions. If the device switches cameras automatically, re-select your preferred camera from the meeting controls. Remember that cellular networks behave differently from Wi-Fi; perform a quick test on both network types if you frequently work remotely. Adapting your setup for mobile helps maintain video quality across devices.
Common mistakes to avoid
Avoid assuming camera issues are always software-related. Don’t neglect OS updates, ignore privacy toggles, or rush through tests in poor lighting. Don’t rely on a single test; perform repeating checks to catch intermittent problems. Finally, avoid flimsy cables or powered hubs that introduce latency or dropouts; invest in quality accessories and keep firmware current to sustain a stable Teams camera experience.
Tools & Materials
- Camera device (built-in or external)(Ensure it is physically connected and detected by your computer)
- Stable computer or device with Teams installed(Windows, macOS, or mobile app; keep OS up to date)
- USB cable or powered hub (for external cams)(Use a reliable cable; avoid adapters that introduce latency)
- Latest OS updates and camera drivers(Keeps hardware compatible and secure)
- Stable internet connection (prefer Ethernet)(Video calls require consistent bandwidth)
- Privileged access to adjust privacy settings (if needed)(May be restricted in enterprise environments)
Steps
Estimated time: 15-25 minutes
- 1
Verify OS permissions
Open your OS privacy settings and confirm camera access for Teams. On Windows, Settings > Privacy > Camera; on macOS, System Settings > Privacy & Security > Camera. Make sure Teams is allowed. This prevents the app from reading the feed and is a common root cause of failures.
Tip: If you see a blocked prompt, grant permission and relaunch Teams. - 2
Select the camera in Teams
In Teams, go to Settings > Devices and choose the correct Camera from the dropdown. If you’re using an external webcam, ensure it appears and select it. Consider checking Audio settings briefly to ensure you haven’t mixed devices.
Tip: If the device doesn’t show, unplug and replug, then restart Teams. - 3
Run a test call in Teams
Use Make a test call under Settings > Devices to preview video and test audio. Look for proper framing, exposure, and color. If the feed lags, close bandwidth-heavy apps or switch to a lower resolution for stability.
Tip: This test gives you a reliable baseline to compare changes. - 4
Evaluate lighting and framing
Position a soft, front-facing light and place the camera at eye level. Avoid backlighting and cluttered backgrounds. Good lighting dramatically improves perceived video quality in Teams.
Tip: A simple desk lamp at 45 degrees can make a big difference. - 5
Update drivers or firmware
Visit the camera manufacturer’s site or use OS update to install the latest drivers. Reboot after installation to ensure changes take effect.
Tip: Driver updates fix compatibility issues that cause blank screens or flicker. - 6
Test on another device
If possible, test the camera on a second computer or mobile device to determine whether the issue is hardware- or software-related.
Tip: Hardware issues usually travel with the device; software problems stay on one machine.
Common Questions
Why can’t Teams access my camera even though it works elsewhere?
This often happens when an app-specific permission is blocked or the selected camera is not the one Teams is using. Verify OS permissions and reselect the camera in Teams Settings > Devices.
If Teams can’t access your camera, check app permissions and reselect the camera in Settings.
Can I test my Teams camera without starting a meeting?
Yes. Use the Make a test call option in Teams Settings > Devices to preview video and test audio without inviting others.
Use Make a test call to check your camera without starting a real meeting.
What should I do if the camera works in other apps but not in Teams?
This suggests a Teams-specific setting or a driver issue. Update Teams, reconnect the camera in Settings > Devices, and reinstall camera drivers if needed.
If it works elsewhere but not in Teams, focus on Teams settings and drivers.
Does lighting affect Teams video quality?
Yes. Proper, even lighting reduces noise and improves contrast, making your image look clearer in Teams.
Lighting is key—good, frontal light beats dark, uneven lighting every time.
Should I update Teams or the camera driver first when trouble arises?
Start with updating Teams to ensure software compatibility, then update camera drivers if issues persist.
Update the app first, then the driver if problems remain.
Watch Video
The Essentials
- Verify OS permissions first
- Select the correct camera in Teams
- Use a test call to verify video
- Update drivers and review privacy settings