iPhone Back Camera Not Working: Troubleshooting Guide
Facing an iPhone back camera not working? This urgent guide covers quick fixes, diagnostic steps, step-by-step repairs, and when to seek Apple Support for hardware issues.

Most likely causes are a blocked lens, software glitch, or camera app issue. Quick fix: restart the iPhone, force quit the Camera app, test by taking a photo, clean the lens, and update iOS. If the problem persists, contact Apple Support for hardware diagnostics.
Understanding the problem and scope
If your iPhone back camera is not delivering sharp images or won’t take pictures at all, you’re not alone. The phrase i phone back camera not working appears often in search queries because the symptom can stem from several root causes, from lens cleanliness to software glitches or hardware damage. At Best Camera Tips, we see this issue frequently and know the quickest paths to relief. Start by noting when the problem started, what app you were using, and whether the camera ever worked after a recent update or drop. This context helps you narrow down whether a software hiccup or a hardware fault is the culprit. Remember: many times the remedy is simple, like cleaning the lens or updating iOS, but in other cases you may need professional service. By understanding the scope of the problem, you can save time and avoid unnecessary trips to an Apple Store. Our guidance emphasizes urgent, practical steps you can take right now to restore camera function or determine if you need expert help.
This article continually emphasizes a practical, urgent approach to resolving camera issues while keeping user safety and data integrity in focus. The steps below help you quickly identify whether the issue is software-related or hardware-related, which in turn determines whether you can fix it at home or need professional diagnostics. The guidance is designed for aspiring photographers and home security enthusiasts who rely on reliable mobile imaging for everyday tasks.
Quick checks you can perform
Before diving into diagnostics, perform fast, non-invasive checks to rule out trivial causes. Start by inspecting the lens for smudges or scratches and clean it with a microfiber cloth. Ensure the lens is not obstructed by a case or shield. Check that the Camera app is up to date and that you have granted the required camera permissions to third-party apps. Restart the iPhone to reset background processes that could interfere with camera functioning. If you recently installed a new app or completed an iOS update, consider whether that change might be contributing to the problem. If the issue occurs only within a single app, reinstalling that app can help. Finally, verify there’s enough storage, as a full disk can degrade camera performance or prevent new captures. If any of these checks resolves the issue, you’ve saved a trip to service and preserved your data.
Common causes for iPhone back camera not working
Several common causes can explain why the back camera on an iPhone stops functioning. Software glitches or a corrupted camera app data can derail autofocus, exposure, or video capture. Hardware issues—while less common—include damaged camera modules, loose connectors after a drop, or moisture ingress that affects sensors. Lens obstruction or a dirty sensor can create blurry images or failure to focus. In some cases, a recent iOS update or a conflicting camera app can cause the camera to misbehave. If an app has permission to access the camera but still fails, the issue may be tied to the app itself rather than the hardware. Finally, physical damage from a fall or exposure to moisture is a major concern that almost always requires professional evaluation. By understanding these causes, you can prioritize fixes that match the problem’s origin and avoid unnecessary repairs.
Diagnostic flow you should follow
Start with a simple symptom check: does the back camera fail to capture any image, or is the image blurry or out of focus? If you observe no image at all, the issue is likely a hardware or sensor problem; software resets may not help. If the image is blurry, misfocused, or shows color bands, suspect a cleaning or sensor issue. Proceed with a staged diagnostic: 1) basic software checks (restart, update, permissions); 2) physical inspection (lens, housing, moisture); 3) test with built-in camera vs. third-party apps; 4) advanced steps (reset settings, restore the device). During testing, document results to help if you must contact Apple Support. If you confirm hardware damage, plan a service appointment. Safety note: back up data before steps that may reset settings or erase content.
Step-by-step fixes for the most likely causes
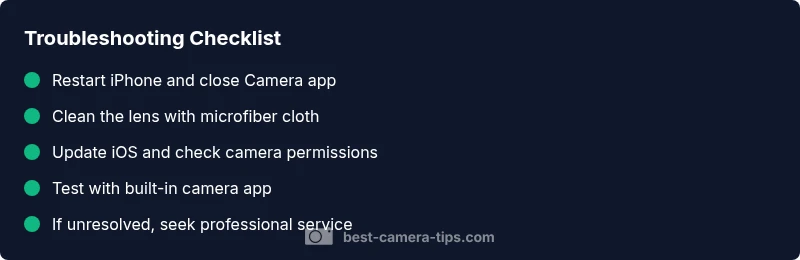
These steps address the most common culprits in a structured way. Start with the easiest fixes and progress to more involved options if needed. 1) Restart the iPhone and force-quit the Camera app to clear transient software issues. 2) Clean the camera lens with a microfiber cloth and ensure no case or screen protector obstructs the lens. 3) Update iOS to the latest version and verify camera permissions for apps. 4) Test with the built-in Camera app; if third-party apps cause issues, uninstall or update them. 5) Reset all settings (back up first) to undo misconfigurations without erasing personal data. 6) If problems persist, back up data and consider a factory reset or professional diagnostics to inspect hardware connections. The goal is to determine if this is a software hiccup you can fix at home or a hardware issue needing service. Pro tip: keep your device within warranty windows or plan for authorized service if hardware repair is needed.
Prevention and maintenance to avoid future issues
To reduce the risk of repeated camera problems, establish routine device maintenance. Regularly check for iOS updates and camera app updates, avoid exposing the device to moisture, and store the phone in a protective case when drops or impacts are possible. Clean the lens monthly and after outdoor use to maintain sharp image quality. Reserve camera-intensive tasks for well-charged devices to prevent unexpected shutdowns. If you use the iPhone for security or critical photography, enable automatic backups to prevent data loss in case of a reset. Finally, keep an eye on warning messages about hardware damage, and seek professional assessment if you notice unusual sounds, foggy panels, or a camera that refuses to turn on. By adopting these habits, you’ll reduce the likelihood of recurring problems and maintain reliable imaging capabilities.
Steps
Estimated time: 30-60 minutes
- 1
Restart iPhone and close Camera app
Perform a simple restart to clear stuck processes. Double-check that the Camera app isn’t running in the background, then reopen and test the back camera by taking a photo.
Tip: If you can’t access the Camera app, force quit from the app switcher and relaunch. - 2
Inspect lens and housing
Look for smudges, fingerprints, or cracks on the lens. Clean gently with a microfiber cloth. Check that a case, lens protector, or screen protector isn’t obstructing the lens.
Tip: Never scrub hard; use light, circular motions to avoid scratching. - 3
Update iOS and app permissions
Install the latest iOS update if available. Verify that the Camera app has permission to access the camera in Settings > Privacy > Camera and that no conflicting apps are grabbing the camera resources.
Tip: A conflicting app can mimic a camera failure. - 4
Test with built-in Camera vs third-party apps
Open the native Camera app and take photos. If it works there but not in other apps, the issue may be app-specific or a permission problem in those apps.
Tip: Reinstall problematic apps if needed. - 5
Reset settings (preserve data)
Reset all settings to restore default camera configurations without erasing data. This can fix misconfigured options affecting camera behavior.
Tip: Back up important data before performing a reset. - 6
Seek professional hardware assessment
If the camera still won’t function, especially after resets and updates, schedule a visit with Apple Support or an authorized service provider to inspect the camera module and connectors.
Tip: Hardware issues often require professional calibration or replacement.
Diagnosis: Back camera not working
Possible Causes
- highSoftware glitch or corrupted camera data
- mediumLens obstruction, dirt, or moisture affecting the sensor
- lowHardware damage to camera module or connections
Fixes
- easyRestart the iPhone and force quit the Camera app
- easyUpdate iOS and check camera permissions
- mediumReset all settings (data preserved) and re-test
- hardIf unresolved, contact Apple Support for hardware diagnostics
Common Questions
Why is my iPhone back camera blurry after an update?
Software updates can temporarily affect camera focus or exposure. Restart the device, clear cache, update all apps, and re-test. If the issue persists after subsequent updates, you may need to reset camera settings or contact support.
Blurry after an update? Restart, update apps, and test again. If it continues, reset camera settings or contact support.
Will water damage cause the back camera to stop working?
Moisture can affect the camera sensor and connectors. If you suspect moisture, power off the device, dry it carefully, and seek professional inspection—water damage often needs replacement parts.
Water damage can affect the camera. Power off, dry carefully, and get a professional check.
Can third-party camera apps cause issues with the iPhone camera?
Yes. Some apps can conflict with the camera hardware or permissions. Test with the built-in Camera app; if it works, investigate or reinstall problematic apps.
Yes, some apps can interfere. Try the built-in camera first.
Is it safe to reset all settings to fix camera problems?
Resetting settings resets system preferences but not your data. It can fix camera problems caused by misconfigurations. Back up before proceeding.
Reset settings can fix misconfigurations. Back up first.
When should I replace my iPhone camera module?
If hardware damage is confirmed to the camera module or connectors, Apple Support or an authorized service provider should handle replacement. Warranty status may affect options.
If hardware damage is confirmed, a replacement is usually needed.
Watch Video
The Essentials
- Inspect lens for obstructions and clean gently
- Prioritize software checks before hardware service
- Backup before resets or restores
- Seek authorized service for hardware issues
- Test with both stock and third-party apps to isolate causes