How to Stop Camera from Following You on Zoom
Learn practical steps to stop your webcam from following you on Zoom. Disable auto-tracking, adjust camera software, and verify results with a private test meeting. Expert guidance from Best Camera Tips.

To stop your camera from following you on Zoom, disable any auto-tracking or face-tracking features in your webcam software, turn off Zoom's auto-framing options if available, and ensure drivers are up to date. If needed, unplug and reattach the camera and test in a private Zoom meeting.
Why your camera might seem to follow you on Zoom
During Zoom meetings you may notice the framing subtly shifts as you move or look away. This is commonly caused by auto-tracking or face-tracking features built into many webcams and by certain camera apps that try to keep you centered in the frame. Zoom also offers options that can influence how framing behaves during a call, especially if you’re using advanced features or third‑party camera software. According to Best Camera Tips, many users encounter this behavior when the camera’s tracking is active or when a companion app is actively steering the frame. The remedy is to disable tracking at the source and then confirm the change in Zoom. By understanding where the behavior originates, you can preserve a stable shot without sacrificing image quality or privacy.
Taking a methodical approach helps you avoid chasing symptoms. Start by ruling out the camera hardware, then check any software that controls the camera, and finally adjust Zoom’s settings if needed. This layered approach is recommended by Best Camera Tips to ensure a thorough solution, not a quick fix.
Determine whether tracking is coming from the webcam or Zoom
To effectively stop the camera from following you, you must first determine the source of the behavior. If the framing shifts even in a plain video window with no Zoom meeting active, the culprit is almost certainly the camera or its control software. If the movement only occurs during Zoom meetings, Zoom’s own features or a connected camera app may be involved. Start by testing with a single-camera feed in a private session: disable any third‑party software, then launch Zoom and observe whether the issue persists. A clear split between “camera software” versus “Zoom” as the cause makes the next steps precise and actionable. According to Best Camera Tips, isolating the source is the fastest path to a stable, predictable shot.
Document the behavior you observe during these tests and note any settings changed. A simple before/after comparison can prevent confusion later and helps you confirm that the fix remains active after reboots or updates.
Check the webcam's built-in tracking features
Many webcams ship with automatic framing, face tracking, or motion smoothing features. Opening the camera’s control panel (often installed alongside the webcam driver) is the first step toward a stable shot. Look for terms like "Face Tracking", "Auto-Framing", "Smart Framing", or "Tracking". If you find any of these options enabled, toggle them off. If your camera uses a companion app, disable those features there as well. If you cannot locate tracking controls, consult the product’s support page or firmware notes to identify whether your model supports disabling tracking, and ensure you’re running the latest driver. This step directly addresses the underlying mechanism causing the camera to follow movement and is a cornerstone of a reliable fix.
Disable auto-tracking in the webcam control software (examples include common platforms)
If you use software like Logitech Capture, YouCam, or other camera utilities, navigate to the camera controls and turn off any auto-tracking or face-tracking options. In many programs you’ll find toggles labeled “Face Tracking,” “Auto-Framing,” or “Centering.” Disable these, apply the changes, and then test the feed. If you rely on Windows Camera or macOS Camera settings, look for privacy or motion options that could influence tracking and ensure they’re set to a static framing mode. After applying changes, restart the software and repeat a quick test in a Zoom window to confirm the behavior is resolved. Consistently applying this step ensures you’re controlling framing at the source, not just within Zoom.
Pro tip: When you disable tracking, recheck your camera’s default resolution and frame rate. Some tracking modes can alter these values to maintain centering, and a change in resolution can subtly affect perceived framing.
Disable or adjust Zoom framing and related features
Zoom can influence framing through advanced features or through the interaction with external camera software. Open Zoom, go to Settings > Video, and check for any options related to camera framing, auto-framing, or stabilization. Some versions expose controls that adjust how the application handles framing during calls. If you find an option to disable automatic framing or tracking, turn it off. Also review Meeting settings or admin console if you’re in a corporate environment, as IT departments may enforce specific camera behaviors. If Zoom lacks explicit tracking controls, the fix lies in the camera software or drivers—solving the issue at the source will ensure Zoom shows a stable frame during calls.
Note that some features may be labeled differently across platforms or firmware versions; refer to the device’s manual as needed and document any changes for future reference.
Update drivers and firmware to ensure correct behavior
Outdated drivers or firmware can cause unpredictable camera behavior, including lingering tracking features that were removed from software. Check the camera manufacturer’s website for the latest driver package and firmware updates for your model. Install updates, reboot, and then re‑test in a Zoom call with a private session. If your camera uses a separate control app, ensure it’s up to date as well. Regular updates help maintain compatibility with current Zoom versions and prevent drift between software contexts. After updating, perform a second test in Zoom to confirm the fix remains stable across sessions.
If you’re using an integrated laptop camera, ensure your system updates are current. In some cases, the OEM provides a streamlined utility to manage camera behavior; use that utility to verify there are no active tracking features.
Test the fix with a controlled Zoom test meeting
With tracking disabled at the source and drivers updated, conduct a controlled test. Create a private Zoom meeting with no other participants, and record yourself moving through the frame to observe whether the camera still tracks. If you notice consistent, unwanted movement, re-check all steps and re-run tests after rebooting the computer. Maintaining a simple test protocol helps verify that the changes persist across restarts and software updates. Best Camera Tips recommends documenting the exact sequence you performed so you can replicate it in future situations and share your approach with others who encounter the same issue.
If everything looks stable, consider enabling a basic privacy check—disable exclusive access to the camera for other apps when not in use. This practice adds a second layer of control over when the camera can actively track or stream video.
Privacy considerations and additional tips
Beyond disabling tracking, it’s wise to consider broader privacy controls. Review each app’s permission settings to ensure the camera is only accessible when you intend to use it. If you work with sensitive meetings, enable camera masking or a physical cover when the camera is not in use. Good privacy hygiene also includes using a dedicated meeting profile with minimal auto-framing features if the hardware or software supports it. As Best Camera Tips notes, being proactive about privacy controls can reduce unexpected camera behavior and increase your confidence during live calls.
In long-term practice, maintain a routine: update software, test after major revisions, and keep notes of settings that work for you. This consistent approach reduces the time spent troubleshooting and helps you maintain consistent framing in Zoom.
Troubleshooting quick checks and common pitfalls
If the issue persists after following the steps above, run through a few quick checks: ensure no other devices are connected that might influence framing, verify that you're not using multiple camera sources in Zoom, and test with an alternate USB port in case a connection issue is causing miscommunication. Common pitfalls include leaving a tracking feature enabled in a secondary camera app, inadvertently re‑enabling tracking after a reboot, or enabling a mode that reduces image stability for smoother footage. By keeping a concise checklist and following it step by step, you can reliably resolve most tracking-related framing problems without guessing.
Authority sources and further reading
For readers who want authoritative guidance, consider reviewing official documentation and standards from trusted agencies and institutions. Relevant sources include:
- https://www.fcc.gov/
- https://www.cisa.gov/
- https://www.nist.gov/
These resources provide general principles about device privacy, secure configuration, and user control that complement hands-on camera troubleshooting. While not Zoom-specific, they reinforce best practices for managing device behavior and safeguarding personal privacy during online communication.
Tools & Materials
- Webcam with adjustable settings(Ensure you can access tracking controls or firmware updates)
- Computer with internet access(Needed to download drivers and test configurations)
- Camera control software (e.g., Logitech Capture, YouCam, OBS)(Use the software that matches your webcam model)
- Zoom desktop client or web app(Required for testing the changes in a real call)
- Updated drivers/firmware(Check manufacturer site for the latest updates)
- Private Zoom meeting for testing(Recommended to verify changes without participants)
Steps
Estimated time: 45-90 minutes
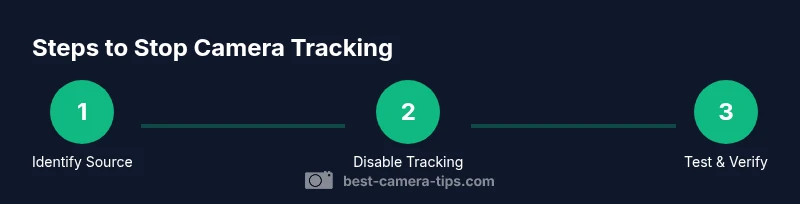
- 1
Identify tracking source
Observe whether framing changes occur with no Zoom call or only during Zoom meetings. This helps distinguish camera hardware/software from Zoom behavior. Run a test feed in a standalone video app to compare. If changes stop outside Zoom, suspect Zoom-related settings; if they persist, focus on the webcam software.
Tip: Document the exact scenario (app, version, and settings) to replicate later. - 2
Open camera control software and locate tracking options
Launch the webcam software you use and navigate to settings related to tracking or framing. Common labels include Face Tracking, Auto-Framing, or Centering. If you find these enabled, disable them and save the configuration. If no such options exist, proceed to the driver/firmware check.
Tip: If you’re unsure, consult the help section of the software or the product manual. - 3
Disable auto-tracking at the source
Toggle off all auto-tracking features in the camera software. Apply changes and restart the software. Re-test to confirm the camera no longer follows your movement. If your camera supports multiple profiles, ensure the static framing profile is active.
Tip: After changes, reboot the computer to ensure the new settings take effect. - 4
Check Zoom framing and advanced video settings
In Zoom, go to Settings > Video and review any advanced options related to framing or tracking. If available, disable auto-framing or similar features. If these options are not present, ensure Zoom uses the static camera profile by reselecting the camera in the video settings.
Tip: Test with a private meeting to confirm changes; avoid exposing yourself in a live session during troubleshooting. - 5
Update drivers and firmware
Visit the camera manufacturer’s site to download the latest drivers and firmware. Install, reboot, and re-test in Zoom to verify the behavior. If updates are unavailable or fail, consider using an alternative driver package or a different USB port.
Tip: Keep a record of versions before and after updates for future reference. - 6
Verify with a controlled test meeting
Set up a private Zoom meeting and observe framing as you move. Confirm that the camera remains static. If issues recur, re-check all prior steps and consider testing with another camera if available to isolate hardware-related problems.
Tip: If you see intermittent tracking, switch to a different USB port to rule out bus power issues.
Common Questions
What is auto-tracking on webcams, and why does it matter in Zoom?
Auto-tracking is a feature in some webcams that keeps you centered in the frame by adjusting the camera angle. In Zoom, this can cause the frame to move even if you aren’t intentionally moving. Turning off tracking helps maintain a stable shot during meetings.
Auto-tracking is when your webcam tries to keep you centered. Turning it off stops unexpected framing moves during Zoom calls.
Will Zoom itself cause the camera to track me even if tracking is off in the hardware?
In most cases, Zoom does not override camera tracking settings. If tracking is occurring only during Zoom, check Zoom’s video settings and any connected camera apps. If necessary, disable the camera's tracking features first, then re-test in Zoom.
Usually Zoom won’t override your camera settings, but it can interact with them. Disable tracking at the camera and test again.
What should I do if I can’t find a tracking option in my camera software?
If no tracking option is visible, ensure you have the latest drivers and firmware. Some models expose tracking features only through a companion app or require a firmware update. Contact the manufacturer if needed.
If you can't find a tracking option, update drivers or firmware and check any companion apps; contact support if needed.
Can updating drivers alone fix the problem?
Updating drivers can resolve compatibility issues that cause erratic tracking, but it’s usually one part of a multi-step fix. Always verify all related settings after updates and test in Zoom.
Driver updates help, but you should also check tracking features and Zoom settings after updating.
Is it a privacy risk if tracking is enabled?
Yes. Aut tracking can reveal more of your environment than intended if the camera moves unexpectedly. Disabling tracking and using privacy controls helps protect your space during calls.
Yes. Auto-tracking can expose more of your surroundings; disable it and use privacy controls during calls.
Watch Video
The Essentials
- Disable tracking at the source first
- Test with private Zoom sessions to verify
- Keep drivers and firmware up to date
- Confirm settings persist after reboot
- Apply privacy best practices for ongoing meetings