How to fix camera quality on iPhone: a practical guide
A detailed, step-by-step guide to diagnose and improve iPhone camera quality through hardware checks, software tweaks, lighting, and stabilization.

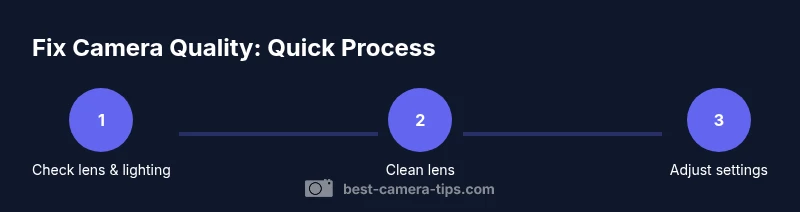
To fix iPhone camera quality, start with a quick diagnostic and a few hardware checks, then adjust settings and lighting. Clean the lens, update iOS, free storage, and test shots in varying light and modes. If quality remains off, use a stable setup and reset camera settings before seeking further help.
What Really Affects iPhone Photo Quality
iPhone photo quality is not dictated by a single factor. It’s the outcome of sensor capabilities, lens sharpness, processing power, and shooting conditions. The device captures light with the sensor, but the resulting image is sculpted by computational photography: noise reduction, tone mapping, color rendering, and sharpening are all performed after capture. Common culprits behind flat or blurry images include a dirty lens, motion during capture, underexposure in dim scenes, and aggressive digital sharpening that can make detail look harsh. Lighting matters more than you might think; even a modest improvement in ambient light can transform a photo from grainy to crisp. As part of Best Camera Tips analysis, we find that the most reliable gains come from a disciplined routine: maintain clean optics, keep the camera hardware up to date, shoot with steady technique, and understand how your iPhone’s default processing handles contrast and color. This article walks you through a structured approach to diagnose and fix quality issues without needing special gear, so you can reliably capture better photos in everyday conditions.
Quick Diagnostics You Can Do Right Now
Before investing time on settings, perform a quick diagnostic to rule out obvious culprits. Check how much free storage remains; low space can throttle processing and reduce image quality. Verify you’re running the latest iOS, as camera improvements are often rolled out through software updates. Test the camera in different modes: Photo, Portrait, and Video across both rear and front cameras. If the problem only shows in one mode, it’s likely mode-specific; if all modes look off, there might be a hardware or systemic software issue. Make sure the lens isn’t covered by a case, screen protector, or film; remove or adjust accessories if needed. Also confirm that you haven’t disabled essential camera permissions for apps that access the camera. If you see consistent issues across apps, it’s a strong sign the root cause is device-wide rather than one app. Based on Best Camera Tips research, addressing storage, updates, and a quick hardware check eliminates the majority of everyday camera quality problems.
Hardware Cleaning: Lens, Case, and Sensors
Hardware cleanliness is the baseline for sharp images. Start by powering off the device and removing the case to expose the lens area. Use a dry microfiber cloth in gentle circular motions to lift smudges; if the lens is heavily smudged, dampen the cloth slightly with water or a dedicated lens cleaner and wipe again. Never spray liquids directly onto the camera module; apply cleaner to the cloth instead. Use a soft brush or air blower to clear dust from the lens rim and speaker openings that can reflect light oddly in photos. Recheck the lens surface under good light; if you still see smears or fingerprints, repeat the cleaning once more and inspect for scratches. It’s common for cases or screen protectors to trap dust that lands on the camera lens whenever you remove the phone; ensure the lens area is clean before shooting. A clean lens does not fix a hardware defect, but it prevents subtle softness and halos from optics contamination.
Software and Settings: Optimizing for Clarity
Software optimization is often the quickest route to better image quality. Ensure your iPhone is updated to the latest iOS release, as manufacturers frequently refine camera processing algorithms. In Settings > Camera, enable features that improve tone and detail when appropriate, such as HDR support and Photographic Styles if your model supports them. If you’re using Night mode, allow it to complete the capture normally; avoid forcing extremely long exposure unless you’re using a tripod. For regular daylight photography, keep the default mode and avoid excessive digital zoom; cropping later preserves more detail than digital magnification in-camera. Tap to focus on your subject, then press and hold to lock AE/AF (exposure and focus) for uniform results in scenes with changing light. If you shoot in RAW (ProRAW) on supported models, you’ll gain latitude in post-processing, but it requires substantial storage; turn it on only if you plan to edit extensively. Some users benefit from adjusting the iPhone’s color rendering through Photographic Styles to suit their scene; if the look is too warm or cool, switch styles and re-test. Lastly, reset any custom camera presets you’ve created to default if results become inconsistent.
Lighting, Exposure, and Framing: Practical Tips
Quality lives in light and framing. When possible, shoot in soft, diffuse light—overcast days or shaded indoor spaces reduce harsh shadows and blown highlights. Position the subject so that the main light source is at a 45-degree angle for depth, and avoid backlit scenes where the camera struggles to balance highlights and shadows. Use the grid to compose shots following the rule of thirds; this simple tool helps you frame more compelling portraits and landscapes. In close-ups, ensure the subject is at an appropriate distance to maximize detail without triggering autofocus hunting. If exposure seems off, tap to focus and slide your finger up or down on the screen to adjust brightness manually, then take a test shot. For video, lighting quality and color consistency across scenes matter; consider using a simple light panel or a stable lamp to maintain constant white balance. Remember that color accuracy is partly a product of white balance — keep it consistent with the light source to avoid unnatural skin tones.
Stabilization and Shutter Speed in Low Light
Low-light performance hinges on stabilization and optimized shutter behavior. Night mode automatically activates on compatible iPhones in darker scenes; use it when available and keep the phone as still as possible—set it on a stable surface or tripod if you can. To minimize motion blur when shooting stills, hold the device steady or use a timer to avoid a shaky press on the shutter button. For video, enable the appropriate frame rate and resolution that your storage can handle while maintaining optical stabilization. If you find performance inconsistent, check for firmware updates and hardware issues; older devices may struggle with newer camera processing demands, and you may need to adjust expectations accordingly. In extremely low light, add a portable light source to improve brightness without forcing high ISO, which can introduce grain. Stabilization is a practical lever you can pull before considering more drastic steps like device replacement.
Testing and Calibration: How to Verify Improvements
After applying fixes, run a controlled test to verify improvements. Take a set of photos across three scenes: bright daylight, mixed indoor lighting, and backlit conditions. Use the same framing, distance, and camera settings for each shot to compare results fairly. Save RAW or high-quality JPEGs (where available) for a side-by-side comparison; use a photo comparison tool or a simple side-by-side view on your device. Evaluate sharpness, color accuracy, dynamic range, and noise levels in each image. If you notice consistent improvements in detail and reduced noise, you’ve likely addressed the root causes; if not, revisit steps (directionally, start with a software fix and re-check the lens). If you still observe persistent issues, consider leveraging a professional calibration service or Apple Support for deeper diagnostics. Document your findings with a few example images to track progress over time.
When to Seek Professional Help
If quality issues persist across all lighting conditions and modes after trying the above steps, there may be a hardware fault in the camera module or sensor. Visit an Apple Store or authorized service provider for diagnostics; discuss whether the problem could be resolved with a repair, part replacement, or software re-imaging. If your device is still in warranty, leverage support options and keep a record of your test shots and steps you’ve tried. For non-warranty devices, compare the cost of repair with the price of updating to a newer model, especially if performance has degraded with age. The intent is to restore performance safely and cost-effectively while preserving device longevity.
Tools & Materials
- Microfiber cleaning cloth(Lint-free, gentle on lens surface)
- Lens-cleaning spray or isopropyl alcohol 70%(Apply to cloth, never directly onto the lens)
- Air blower or soft brush(Gently remove dust from lens area)
- Stable surface or tripod(Helpful for low-light shots)
- Portable lighting(Test under consistent lighting conditions)
Steps
Estimated time: 20-45 minutes
- 1
Prepare your device and environment
Back up your data and ensure the iPhone is updated to the latest iOS. Clear the area around the camera to avoid accidental lens contact during steps, and set up stable lighting to observe changes clearly.
Tip: Back up before making major settings changes; this protects data if you later reset settings. - 2
Clean the camera lens
Power off (optional) and remove the case to expose the lens. Wipe the lens with a microfiber cloth in gentle circular motions, inspecting for smudges and fingerprints. If needed, dampen the cloth slightly with cleaner and wipe again.
Tip: Never spray liquids directly on the camera lens; apply to the cloth instead. - 3
Update iOS and verify camera settings
Check for available iOS updates and install them. Open Settings > Camera and review features like HDR and Photographic Styles; enable them if appropriate for your shooting style. If supported, consider RAW capture for post-processing latitude.
Tip: After updating, reboot the device if prompted to ensure fresh camera processing. - 4
Lock exposure and focus
In a scene, tap and hold the subject to lock AE/AF; adjust brightness with the exposure slider if needed. Reframe to maintain consistent exposure as lighting changes. This helps prevent flickering or drifting exposure in dynamic scenes.
Tip: Locking helps when lighting changes, such as moving from shade to sunlight. - 5
Test across modes and scenes
Take photos in Photo, Portrait, and Video across rear and front cameras. Use similar distances and framing to compare results fairly. Note differences in sharpness, color, and contrast between modes.
Tip: Limit one variable per test to identify what truly helps. - 6
Stabilize and improve lighting
If possible, use a tripod or stable surface; in low light, add a portable light source. Avoid excessive shake by bracing your elbows and using a timer when shooting stills.
Tip: Even modest stabilization reduces blur in dim scenes. - 7
Review test shots and compare
Compare before/after shots side by side; evaluate sharpness, color accuracy, and noise. If improvements are evident, you’ve addressed the main issues; if not, revisit steps starting with software and lens cleaning.
Tip: Keep notes on which changes produced the clearest results. - 8
If issues persist, reset or seek help
If problems remain after all fixes, reset camera settings to defaults and test again. If issues persist, contact Apple Support or visit an authorized service provider.
Tip: Document your tests with sample images to aid troubleshooting.
Common Questions
Why are my iPhone photos blurry?
Blurry photos can result from a dirty lens, camera motion, or autofocus issues. Start by cleaning the lens, stabilizing the shoot, and ensuring the subject is in focus.
Blurry photos are usually caused by a dirty lens or motion—start with a clean lens and stable framing.
Is a software update likely to improve camera quality?
Yes. Updates often include camera processing improvements and bug fixes. Keeping iOS and apps up to date helps maintain image quality.
Yes, updating iOS can improve camera performance.
Should I reset camera settings?
Resetting camera settings can restore defaults that address odd exposure or focus behavior. It does not erase your photos.
Reset settings to defaults if exposure or focus behaves oddly.
Can ProRAW improve image quality?
ProRAW preserves more image data for editing, which can improve quality in post-processing, at the cost of larger file sizes.
ProRAW gives more editing latitude but uses more storage.
What if my photos look fine in good light but not in low light?
Low light requires stabilization and proper exposure. Use Night mode when available and consider a stable mount or extra lighting.
Night mode and a steady setup help in low light.
Do third-party camera apps fix quality?
Some apps provide manual controls and enhanced processing, but most improvements come from lighting, stabilization, and proper exposure rather than apps alone.
Apps can help, but lighting and stability matter most.
Watch Video
The Essentials
- Clean the lens and test under good light.
- Update iOS and clear storage space.
- Lock focus and exposure for consistent results.
- Stabilize camera and improve lighting for low light.
- Test across modes to verify improvements.