How to Fix Camera Quality: A Practical, Step-by-Step Guide
Learn practical, step-by-step methods to improve camera quality, from lens care to sensor checks, and optimizing exposure and lighting. This guide helps beginners and enthusiasts achieve clearer, more accurate images without expensive gear.

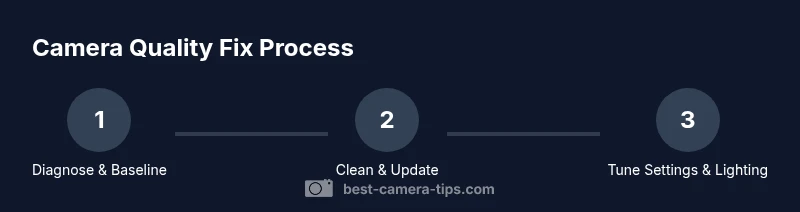
To fix camera quality, start with a clean lens, update firmware, and test your capture settings. Establish a baseline with a simple test shot, then address exposure, white balance, and noise through lighting tweaks and in-camera controls. These steps work for most cameras and yield noticeable improvements quickly. Keep expectations realistic; results vary by model and lighting.
Why camera quality can drift and what you can fix
Camera quality is a product of several interacting components: the lens, the sensor, the processor, and the compression pipeline. A small smear on the front glass or a dusty sensor can degrade sharpness, while misfocusing can soften details. Lighting has a huge role in perceived quality; underexposed shots appear noisy and flat. According to Best Camera Tips, most readers see noticeable improvements by focusing on the basics: lens cleanliness, stable support, and choosing the right encoding. When any of these parts drift, you can compensate with deliberate checks and quick fixes. In this section we’ll break down the most common culprits and give you practical actions you can take today to raise your image quality without expensive gear. You’ll learn how to recognize the symptoms, evaluate potential causes, and apply fixes in a repeatable way that keeps your workflow efficient.
Baseline testing: measure your current results
Establishing a repeatable baseline is the first critical step. Use a simple scene — a neutral target under steady lighting — and capture RAW if possible. Compare the result to a known reference image and note differences in sharpness, color accuracy, noise, and dynamic range. Best Camera Tips analysis shows that documenting baseline measurements helps isolate which variable to tackle first and avoids chasing vanity metrics. Keep a small log of settings and conditions for each test so you can track what truly moves the needle over time. This approach prevents guesswork and accelerates meaningful improvements.
Practical fixes you can try today
Start with the low-hanging fruit: clean the lens with a microfiber cloth and manufacturer-approved cleaner; inspect for smudges or fingerprints; remove dust using a gentle air blower. Next, ensure your firmware or app is up to date, and reset any problematic custom settings to factory defaults if needed. If you shoot with multiple lenses, test with a known-good option to identify whether the issue is lens-specific. Finally, compare RAW versus JPEG to see how much control you gain in post-processing. Small, deliberate changes tend to yield the most reliable gains.
Settings that materially affect image quality
Your camera’s settings can either amplify flaws or maximize detail. Use the highest native resolution and prefer RAW when possible to preserve color and tonal information. Keep ISO as low as your lighting allows to minimize noise, and use appropriate white balance for consistent colors. Turn off overly aggressive in-camera sharpening and chromatic aberration correction if you’re post-processing extensively. Familiarize yourself with your device’s color profile options and choose the one that best matches your subject and lighting. Remember, quality is often a product of deliberate settings rather than brute force.
Lighting, environment, and post-processing basics
Light is the single most influential factor in image quality. Favor diffuse, directional light, and avoid harsh, mixed lighting that creates hard shadows and color casts. When possible, shoot during times with even light or use light modifiers (diffusers, reflectors) to balance exposure. In post-processing, balance exposure, color, and sharpness thoughtfully rather than heavily editing to mask issues. According to Best Camera Tips, consistently evaluating your lighting setup alongside camera settings yields substantial, repeatable improvements in overall camera quality.
Tools & Materials
- Microfiber lens cloth(Lint-free and designed for optical surfaces)
- Lens cleaning solution(Use manufacturer-approved solution; never apply directly to the sensor)
- Air blower or soft brush(Blow dust from lens surfaces gently before wiping)
- Firmware/software update(Have a charged battery and a stable internet connection)
- Spare memory card (optional)(Helpful to test RAW vs JPEG without changing existing files)
Steps
Estimated time: 60-90 minutes
- 1
Power on and baseline shot
Power on the camera and take a baseline shot of a simple scene under current lighting. Note sharpness, color, exposure, and any noise. Use the same lens when possible to maintain consistency for future comparisons.
Tip: Capture a reference image before making changes to compare improvements later. - 2
Inspect lens and exterior for smudges
Carefully inspect the lens surface and housing for fingerprints, smudges, or dust. Clean the exterior with a microfiber cloth using gentle, straight strokes; if needed, use a small amount of cleaning solution on the cloth. Do not contact the sensor.
Tip: If you see smudges, clean in small circles from center outward to avoid streaks. - 3
Update firmware/software
Check the manufacturer’s site or app for the latest firmware. Install updates with the camera powered and connected to a reliable power source or battery. Updates can improve compatibility, autofocus, and noise handling.
Tip: Back up your current settings first in case you need to revert. - 4
Reset to factory defaults if needed
If quality issues persist, consider resetting to factory defaults to remove misconfigured settings. After reset, reconfigure core options like resolution, color profile, and white balance.
Tip: Note your preferred defaults before resetting so you can restore quickly. - 5
Tune exposure and white balance
Experiment with exposure compensation or manual exposure to avoid clipping and underexposure. Set white balance for the lighting in your scene; use a neutral gray card if available for accuracy.
Tip: If your camera offers a histogram, use it to guide exposure adjustments. - 6
Test with varied lighting and formats
Capture test shots under different lighting conditions and compare RAW vs JPEG results. Look for retained detail in shadows/highlights and consistent color rendition.
Tip: Document each test with notes to track what helped most.
Common Questions
Why does camera quality look worse at higher ISO?
Higher ISO introduces more noise and color noise, reducing apparent sharpness. To fix this, keep ISO as low as lighting allows, expose carefully, and use post-processing denoising if needed.
Higher ISO can increase noise, so try to keep ISO low and brighten with lighting or longer exposure where possible, then touch up in post-processing.
How can I tell if the lens is dirty or scratched?
Inspect the lens surface under good light for smudges or fingerprints. Clean gently with a microfiber cloth. If you notice scratches or internal haze, the lens may need professional evaluation or replacement.
Check the lens for smudges, clean gently, and look for scratches or haze. If the problem persists, consider lens replacement.
Is a firmware update necessary for better image quality?
Firmware updates can improve processing efficiency, autofocus performance, and noise handling. Keep your device up to date from the manufacturer’s site to gain incremental benefits.
Yes, updates can improve how your camera processes images. Check regularly for new releases.
Can I fix camera quality without new gear?
Often yes. Correct lens cleaning, exposure optimization, and lighting improvements can yield noticeable gains without buying new equipment.
You can improve quality with better lighting, cleaner optics, and wiser settings before considering new gear.
When should I upgrade hardware for better quality?
If your sensor is older, the lens is not capable of sharp results, or you frequently shoot in challenging lighting, upgrading the camera body or lens may provide the most significant benefits.
If you’re repeatedly hitting limits with your gear, consider upgrading key components like sensor size or lens speed.
Watch Video
The Essentials
- Start with a clean lens and baseline measurements.
- Use RAW when possible to preserve detail.
- Balance exposure and white balance for natural color.
- Lighting quality often determines perceived camera quality.