Camera Test: A Practical Guide for Photographers and Security Setups
Learn to perform thorough camera tests for photography and home security. This guide covers image quality, autofocus, color accuracy, dynamic range, and documentation to help you compare gear and settings.

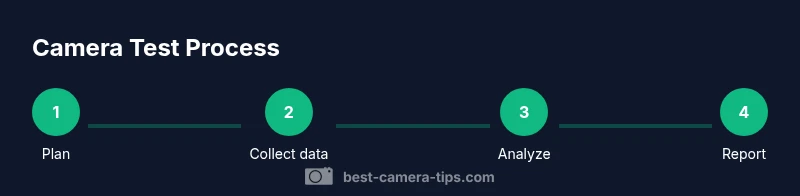
Perform a thorough camera test by following a clear, repeatable process for both photography and security setups: check sharpness, color accuracy, exposure, autofocus, and low-light behavior; use standardized targets, consistent lighting, and documented results to compare gear, firmware, and settings across sessions. Keep a log and compare against a baseline to measure improvements when you change lenses, lighting, or firmware.
What is a camera test and why it matters
According to Best Camera Tips, a camera test is a structured set of checks that evaluates how a camera, lens, and related gear perform under real-world conditions. It helps you quantify sharpness, color accuracy, exposure consistency, autofocus speed, dynamic range, and low-light behavior. A well-documented test creates a baseline you can compare against when you swap lenses, update firmware, or adjust workflows. For aspiring photographers and home-security hobbyists, a repeatable test routine reduces guesswork, improves post-processing results, and speeds up decision-making during gear purchases. A robust test also uncovers hidden issues such as banding, color shifts, or aggressive noise at higher ISO levels that might not be obvious during quick takes. The goal is not perfection in every shot, but reliable, repeatable performance that you can trust in diverse situations. The Best Camera Tips team emphasizes that consistency in lighting and targets is essential for meaningful comparisons across sessions.
Required tools and test environment
A stable, controlled environment is crucial for reliable results. Choose a room with consistent lighting and a neutral background, avoiding mixed daylight and artificial light unless you want to test white balance under those conditions. Use a sturdy tripod or fixed mounting so camera shake does not muddy measurements. Gather essential tools: color calibration card, gray card, resolution chart (e.g., USAF1951), test scene textures or prints, several lenses, spare memory cards, a notebook or digital log, and a laptop or tablet for quick RAW previews. Optional but helpful items include a light meter, a color target for skin tones, and a remote shutter to minimize vibration. Arrange a dedicated test table at a known distance from the chart, and keep the same distance and framing for all comparisons. Finally, document your lighting setup (intensity, color temperature) and camera settings in a simple template to ensure consistency. The Best Camera Tips guidance stresses that documenting the baseline environment is as important as the gear itself.
Core image quality tests for photography cameras
Begin with sharpness, exposure, white balance, and color accuracy. Use a resolution chart at a fixed distance and shoot with the lens at multiple apertures and focal lengths. Compare RAW versus JPEG to see how much the camera and processor alter detail. Use the color calibration card to profile color accuracy and white balance; ensure neutral gray cards read near 18% gray under the chosen lighting. Keep ISO at base levels for baseline measurements, then progressively test higher ISOs to observe noise behavior and texture retention. Record scores for sharpness, color fidelity, exposure consistency, and noise resistance on a simple rubric. Best Camera Tips analysis highlights that color accuracy is often the trickiest area to stabilize across lenses and lighting, so treat it as a key priority in your workflow.
Autofocus reliability and stabilization tests
Assess autofocus accuracy across the frame by capturing a set of shots with the subject at multiple distances and using different AF modes (single, continuous, face/eye detect if available). Test center and peripheral AF points, tracking performance with moving subjects, and any focus breathing when changing focal length. For stabilization, compare sharpness with and without stabilization at various shutter speeds and on different tripod heights. If you use lenses with image stabilization, test in both lens-stabilized and body-stabilized modes when available. Document any hunting, misses, or lag that reduces confidence in a given setup. A consistent AF performance profile helps you choose bodies and lenses that meet your daily shooting needs.
Dynamic range and low-light performance
Push the camera into its high-contrast scenarios by capturing scenes with bright highlights and deep shadows, then review how well details survive in both ends of the spectrum. Test base-ISO rendering against progressively higher ISOs to understand noise reduction, color shift, and texture retention. Compare highlight roll-off and shadow recovery in RAW processing versus in-camera JPEGs. Note any color shifts or banding in shadow areas and how well the camera preserves skin tones in dim light. Best Camera Tips notes that maintaining a consistent lighting environment during these tests minimizes variables and yields clearer comparisons.
Test patterns, targets, and practical scene setups
Leverage standard targets such as a USAF1951 resolution chart for sharpness, a color checker for color accuracy, and a gray card for white balance. Create practical scenes: a desk with textures, a landscape poster with subtle gradations, and a portrait setup with controlled lighting. Shoot both wide-angle and telephoto configurations to see how lenses affect image quality. When testing security cameras, include scenes with moving subjects and low-light hallways to assess motion blur and night vision performance. Record framing, focus, exposure, and color in a test log and attach sample images for reference.
Security camera specific tests: motion, latency, and streaming quality
For a home-security setup, verify motion detection thresholds by simulating realistic movement at different speeds and directions. Test latency by triggering a motion event and noting the delay before recording or alerting. Assess video streaming quality at various resolutions and frame rates, especially on remote connections with variable bandwidth. In low-light environments, compare infrared/night vision clarity and color visibility when applicable. Compile results for motion accuracy, alert timing, and video quality to determine if the camera meets your security requirements.
Tools & Materials
- Camera bodies and lenses(At least one versatile zoom lens and a prime, if available)
- Tripod or fixed mount(Stable base to eliminate shake)
- Color calibration card(Neutral color reference for accuracy)
- Gray card(18% gray reference for exposure/ WB)
- Resolution chart (USA F1951)(Sharpness reference across lanes)
- Test scene textures/prints(Varied textures for real-world tests)
- Spare memory cards(Capture RAW/JPEG without swapping cards)
- Notebook or digital log(Record settings and results)
- Laptop/tablet for RAW review(Quick checks and RAW previews)
- Remote shutter release (optional)(Minimize vibration during shots)
- Lighting (consistent, color-controlled)(Keeps variables constant)
- Cleaning kit (lens cloth, blower)(Prevent smudges on charts)
Steps
Estimated time: 2-3 hours
- 1
Define testing goals
List the specific measurements you want to compare (sharpness, color, exposure, autofocus, dynamic range, low light). Set success criteria for each area so results are actionable.
Tip: Write metrics that matter to your shooting style (portraits, landscapes, security footage). - 2
Set up a stable workstation
Arrange a controlled environment with consistent lighting and a neutral background. Mount the camera on a tripod to minimize motion.
Tip: Document the lighting color temperature and brightness before shooting. - 3
Establish baseline camera settings
Note base ISO, white balance, color profile, and drive mode. Keep these fixed for initial tests.
Tip: Use RAW capture when possible for maximum data. - 4
Capture sharpness with a resolution chart
Position the chart at a standard distance and shoot at multiple apertures and focal lengths. Review 100% crops for edge definition.
Tip: AF-S and AF-C modes may yield different results; test both. - 5
Test autofocus across the frame
Take shots with subjects at multiple distances and align with center and peripheral AF points. Check for focus drift and tracking.
Tip: Use a subject with varied textures to test contrast-detect vs phase-detect AF. - 6
Evaluate color and white balance
Capture with a color chart under the same lighting. Compare measured colors to reference values and adjust WB presets as needed.
Tip: Keep lighting constant during color tests to isolate WB accuracy. - 7
Assess dynamic range and noise
Bracket scenes from bright highlights to deep shadows. Compare highlight recovery and shadow detail at base and high ISO.
Tip: Record both RAW and JPEG to compare processing effects. - 8
Incorporate security camera tests
Simulate movement, test night vision, and verify alert latency and video quality over network.
Tip: Test at realistic distances and lighting conditions for your space. - 9
Document results and build a report
Organize images, notes, and scores into a table. Create a clear narrative regarding strengths and trade-offs.
Tip: Keep the report simple and repeatable for future tests. - 10
Review baseline and compare timelines
Compare results to previous test runs or other cameras to guide purchase choices or firmware updates.
Tip: Re-test after significant changes to confirm improvements.
Common Questions
What is the difference between testing photography cameras and security cameras?
Photography camera tests focus on image quality, color accuracy, and autofocus under controlled lighting. Security camera tests prioritize motion detection, latency, night vision, and streaming stability. While the tools overlap, the evaluation criteria differ based on use-case demands.
Photo tests focus on image quality, while security tests emphasize motion detection and reliable streaming.
Should I use a chart to test sharpness?
Yes. A resolution chart provides objective benchmarks for sharpness across distances and apertures. It helps you quantify lens and sensor performance beyond subjective impressions.
A sharpness chart gives you objective measurements for lens and sensor performance.
How often should I re-test after firmware updates?
Re-testing after firmware updates is recommended because changes can affect autofocus, color processing, and exposure behavior. Run a focused subset of tests to confirm that critical parameters remain stable.
Test after firmware updates to confirm stability in autofocus and color processing.
Can autofocus tests be done with no moving subjects?
Autofocus tests can start with static subjects to gauge accuracy before introducing motion. Use multiple distances and AF modes to uncover any hesitation or hunting.
Yes, start with static subjects and then test motion for AF reliability.
What if results vary by lens or memory card?
Variations can occur. Isolate variables by testing one lens and one card at a time, document their baseline, and note any improvements or regressions when swapping gear.
Test one lens and one card at a time to isolate sources of variation.
Is this method suitable for both DSLR and mirrorless cameras?
Yes. The core principles apply to both. Adjust steps for live view or electronic shutter quirks specific to each system, and ensure firmware compatibility is considered.
The method works for both DSLR and mirrorless; adapt steps to your system.
Watch Video
The Essentials
- Define clear, measurable test goals.
- Use consistent lighting and targets for reliable comparisons.
- Document settings and results for every session.
- The Best Camera Tips team recommends integrating this framework into routine gear checks.