Fix Camera Near Me: A Practical Repair Guide
Learn how to diagnose, fix, and decide between DIY or professional help for cameras near you. This comprehensive guide covers common issues, safety, budgeting, and maintenance to keep your cameras reliable in 2026.

By following this guide, you can confidently fix camera near me issues and decide whether to DIY or hire local help. You’ll learn how to diagnose common faults, verify results, and protect your device during the process. The approach emphasizes safe practices, necessary tools, and knowing when professional repair is the better option.
Why fix camera near me matters
According to Best Camera Tips, having a local repair option is crucial for both reliability and security. When your camera stops functioning, it can leave your home or project vulnerable and your peace of mind shaken. A nearby repair specialist can offer faster troubleshooting, hands-on hardware checks, and firmware updates that remote support cannot provide. This guide focuses on practical, safe steps you can take to evaluate the problem, decide on a service path, and protect your investment. In 2026, many common faults are easily diagnosed with basic tools and a clear plan, so you don’t waste time chasing phantom issues. The best outcomes come from a mix of careful DIY checks and knowing when to call in professionals who have the right equipment and parts.
Common camera issues and quick checks
Cameras can fail for several reasons, including power instability, faulty cables, firmware glitches, and environmental exposure. Start with simple, non-destructive checks before opening anything:
- Verify power supply integrity and ensure the camera is receiving steady voltage.
- Inspect the power adapter, connectors, and weather seals for wear.
- Confirm network status if it’s an IP camera; test with a different Ethernet cable or Wi‑Fi channel.
- Review recent firmware updates and reset options that won’t erase critical settings.
- Observe the image sensor for dark frames, fogging, or lens fog that could indicate moisture. Visible signs such as flickering video, frequent reboots, or unresponsive menus often point to a handful of root causes. Keep a simple incident log to track when symptoms occur and any changes you’ve made. This data helps you decide whether a DIY fix is feasible or if you should engage a local technician for a deeper inspection.
Safety first: handling power and wiring
Working on cameras involves electrical components, even when devices are expected to be low voltage. Always unplug power sources before inspecting connections, and avoid touching exposed conductors. Use an anti-static wrist strap to minimize electrostatic discharge when handling circuit boards. If the camera is mounted outdoors or exposed to moisture, wear gloves and dry the area first. Never attempt rewiring high-voltage components yourself. If you’re unsure, pause and consult a professional; rushing can cause damage or injury. A calm, methodical approach yields safer, more reliable results.
DIY fixes you can safely perform
Not all repairs require a pro. Simple, low-risk tasks can often restore function:
- Clean lenses with a microfiber cloth; foggy optics degrade image quality.
- Re-seat connectors and tighten loose screws that may cause intermittent power loss.
- Reboot the device and reapply a factory reset if you’ve recorded backup settings.
- Update firmware from the vendor site and verify compatibility with your existing network.
- Test alternate power sources or USB cables to rule out a faulty supply. If you notice burnt smells, smoke, or unusual heat during any step, stop immediately and seek professional help. These steps are designed to address minor, non-destructive faults that don’t require disassembly of critical components.
When to call professional repair
Some faults are safety-sensitive or require specialized tools. If you observe persistent power faults, water intrusion, persistent error codes after a reset, or damaged connectors, it’s prudent to contact a local repair service. A technician can perform advanced diagnostics, inspect internal boards, and replace worn parts with manufacturer-approved components. The decision to bring in a pro is also influenced by the device’s age, warranties, and the cost of potential repairs relative to replacement.
How to choose a local repair service
Selecting the right local repair partner matters as much as the fix itself. Consider these criteria:
- Credentials and reviews: Look for technicians with hands-on camera experience and positive community feedback.
- Warranty and parts policy: Ask about parts availability, warranty on repairs, and turnaround times.
- Authorization and brand compatibility: Some brands require certified technicians for certain repairs to preserve warranties.
- Transparent pricing: Request a written estimate that itemizes labor, parts, and inspection fees.
- On-site vs. drop-off: Determine what works best for your schedule and device sensitivity. A qualified local shop should provide clear next steps and a reasonable timeline.
What to ask a technician before hiring
To avoid surprises, prepare a short list of questions for any prospective technician:
- What is the suspected cause based on your initial assessment?
- Do you provide a written estimate and a warranty on labor and parts?
- Are you able to source manufacturer-approved parts if needed?
- What is the expected turnaround time, and will you notify me of changes?
- Do you offer on-site service and data-safe handling during repair? These questions help you compare quotes and ensure the work aligns with your expectations and security requirements.
Cost considerations and budgeting
Repair costs vary widely based on issue complexity, parts availability, and local labor rates. In many cases, a simple fix may be affordable if addressed quickly, while more extensive repairs could approach the cost of a replacement. Rather than focusing on a single price, request a comprehensive estimate with ranges for common scenarios and a best/worst-case plan. If the device is essential for security, factor in downtime and potential risk when budgeting for a repair versus replacement. Always confirm whether software updates and diagnostics are included in the quoted price.
Protecting cameras after repair and maintenance routine
Once the camera is repaired, adopt a routine to prolong reliability. Clean lenses regularly, check seals against moisture and dust, and update firmware on a schedule. Create a simple maintenance calendar that includes checking power, network status, and sensor integrity every few weeks. Consider installing surge protection for power supplies and using weather-rated housings for outdoor units. Routine checks catch issues early and reduce the chance of repeat failures.
Maintenance checklist for ongoing reliability
Use this lean checklist as a quick monthly reference:
- Confirm power supply stability and cable condition.
- Inspect seals and mounting hardware for vibration wear.
- Run a firmware update if available and verify compatibility.
- Review default camera settings for security and privacy compliance.
- Back up critical configurations and test alarm/notification features.
- Document any changes and outcomes for future reference.
Special tips for home security cameras
Home security cameras demand extra vigilance because they protect lives and property. Ensure encryption for wireless networks, enable automatic firmware updates, and regularly verify recorded footage integrity. Position cameras to minimize blind spots while avoiding privacy violations. If your system integrates with other smart devices, test interoperability after every update and maintain a quick reference for contact support and replacement parts. A proactive routine keeps your home secure and your system resilient.
Troubleshooting quick-start for different models
Different camera families—IP cameras, USB webcams, and standalone DVR/DVR-NVR hybrids—share some troubleshooting principles but differ in access methods. Start with model-specific manuals, then use universal checks: power, cables, firmware, and network status. If you’re unsure, begin with a conservative approach and document everything. Remember: never force hardware components beyond their designed limits. When in doubt, consult a professional who can interpret model-specific indicators.
Tools & Materials
- Multimeter(Digital preferred for testing power lines)
- Screwdriver set(Phillips #2 and Torx T8/T10 as needed)
- Anti-static wrist strap(To prevent static damage to electronics)
- Non-abrasive microfiber cloth(For lens cleaning)
- Replacement screws and spare parts kit(Only if you know what you're replacing)
- Owner manual or model schematic(Helpful to locate connectors)
- Cable tester or spare cables(Useful for testing network or power cables)
- Thread-locking compound and small zip ties(Secure loose cable routes)
- Safety gloves(If working with power connectors)
Steps
Estimated time: 60-120 minutes
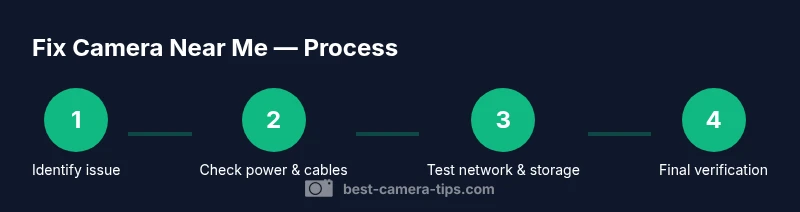
- 1
Identify symptoms and gather details
Begin by noting the exact symptoms (e.g., no power, no video, flickering image) and collect the camera model, serial number, and current firmware version. Document any recent changes or events that could affect function.
Tip: Keep a notes log for symptoms and dates of changes. - 2
Check power supply and cabling
Unplug the camera, inspect the power adapter, cables, and connectors. Try an alternate power source if available and verify the outlet is functioning. Re-seat all power cables and ensure weatherproof seals are intact if outdoors.
Tip: Use a known-good power cable to rule out supply faults. - 3
Test network and storage connections
For IP cameras, verify network connectivity by testing with a different Ethernet cable or Wi‑Fi channel. Check storage status if the device saves footage locally or to a network drive. Confirm the device appears in your router's connected devices list.
Tip: Disable firewall rules that might block camera traffic during testing. - 4
Reset firmware and perform a soft reboot
If safe to do so, perform a soft reboot or factory reset per the user manual. Back up settings if possible. After reset, reapply critical configurations and ensure the device reappears on the network.
Tip: Only reset if you can reconfigure essential features afterward. - 5
Inspect hardware for damage
Look for loose connectors, lens misalignments, moisture intrusion, or signs of wear on seals and housings. If you see visible damage, do not continue without professional assessment.
Tip: Take clear photos of any damage for your service report. - 6
Decide on DIY vs professional repair
If symptoms persist after basic checks or involve internal components, plan for professional intervention. Consider warranty status and part availability when deciding.
Tip: When in doubt, schedule a diagnostic visit with a local shop. - 7
Document the process and plan maintenance
Record the steps taken and results, plus a schedule for future maintenance. This creates a reference for future issues and supports any warranty claims.
Tip: Keep a digital folder with photos, logs, and technician receipts.
Common Questions
What does fix camera near me actually entail?
Fix camera near me means diagnosing local camera issues, deciding between DIY steps and professional repair, and ensuring the device functions properly again. It emphasizes safety, available tools, and appropriate service paths.
Fix camera near me is about diagnosing issues and choosing between do-it-yourself fixes or professional help to get your camera working again.
Can I safely repair most cameras myself?
Many minor issues can be handled by non-experts, such as cleaning lenses or reseating connectors. More complex problems involving internal boards or moisture require a trained technician and proper parts.
You can fix some small issues yourself, but for internal problems, seek professional help.
How long does local repair typically take?
Turnaround depends on issue complexity and parts availability. Simple inspections may take a day, while hardware replacements could require several days or a scheduled visit.
Repair time varies; expect a day for basic checks and longer for major parts replacement.
What costs should I expect for local camera repair?
Costs vary by issue and parts. Request a written estimate that includes labor and potential parts, and compare with the cost of a replacement when outcomes are uncertain.
Costs depend on the issue and parts; ask for a detailed estimate before proceeding.
What if replacement parts are unavailable?
A reputable shop will source manufacturer-approved parts or offer an alternative, and will discuss impact on warranty and performance. If parts are unavailable, consider evaluating new camera options.
If parts aren’t available, ask for alternatives and warranty implications.
Is it safe to disassemble indoor security cameras?
Disassembly can void warranties and risk damaging sensitive electronics. Only proceed if you have proper guidance and understand the risks; otherwise, contact a pro.
Disassembling can be risky—when in doubt, contact a professional.
Watch Video
The Essentials
- Diagnose with a structured checklist.
- Know when to DIY and when to call a pro.
- Document everything for warranties and future maintenance.
- Maintain cameras to prevent recurring issues.