How Cameras Are Made: A Practical Guide
Explore the step-by-step process of camera manufacturing, from design and materials to assembly, calibration, and quality checks. Learn how cameras are made and what to look for when evaluating gear with insights from Best Camera Tips.

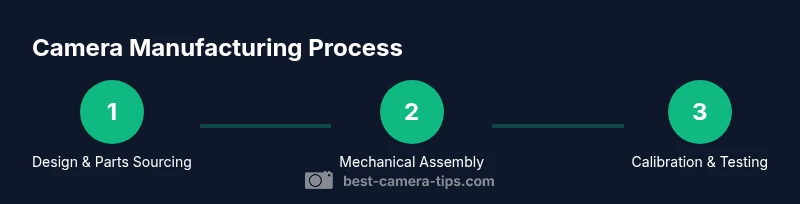
To understand how cameras are made, you’ll explore the core components (body, sensor, optics, and electronics) and the assembly steps from housing to final calibration. This guide outlines design choices, manufacturing processes, material selection, and quality testing, plus safety considerations for assembly environments. You’ll see how precision, cleanliness, and calibration merge to produce reliable, high-performance cameras for photographers and enthusiasts.
The core components of a camera
Cameras are built from several tightly integrated systems: a rugged body that houses the electronics, a light-sensitive image sensor, precision optics that form the image, and a circuit board stack that handles processing, storage, and power management. Understanding how cameras are made starts with these subsystems and how they align inside a compact chassis. Quality hinges on tolerances, clean assembly environments, and repeatable calibration. In practice, engineers optimize each subsystem to meet target performance, durability, and user experience. The phrase "how cameras are made" sums up the careful choreography between mechanical fit, optical alignment, and electronic coordination. As you read, note how material choices affect weight, heat, and longevity, and how factory practices reduce drift over time. According to Best Camera Tips, component quality often defines the camera’s long-term value for enthusiasts and professionals alike.
- Core subsystems: body, sensor, optics, electronics, and power management.
- The interplay between mechanical precision and electronic calibration determines image quality.
- Cleanroom-like assembly areas minimize dust and contamination on delicate sensors.
Designing the optical path
The optical path is the heart of image quality. Lens design, focal length, aperture control, and anti-reflective coatings all influence sharpness, contrast, and color rendition. In manufacturing, lenses are produced in controlled environments and then precisely mounted to the camera body with calibration tools that ensure correct flange distance and alignment. The engineering goal is to minimize aberrations while preserving brightness and dynamic range. Many cameras now offer interchangeable lenses, which adds another layer of precision: aligning the lens mount to the sensor plane so focus remains accurate across wavelengths. This section explains how manufacturers balance cost, weight, and image characteristics when choosing materials and coatings for each lens element.
- Key factors: focal length, aperture, coatings, and tolerances.
- Lens-to-sensor alignment is critical for sharpness across the frame.
- Interchangeable lens systems require robust mounting and calibration processes.
Image sensor and electronics
The image sensor converts light into electrical signals. Sensor fabrication involves advanced semiconductor processes, ultra-clean environments, and meticulous defect control. Once fabricated, sensors are tested for quantum efficiency, readout noise, and fixed-pattern noise, then sealed behind protective layers. Electronics behind the sensor—processors, memory, and image signal processors—handle color demosaic, noise reduction, and compression. In mass production, boards are assembled with surface-mount components, tested in automated regimes, and routed through software calibration routines that tune exposure, white balance, and color profiles. The goal is consistent, low-noise performance across temperatures and usage scenarios, which is why sensor placement and shielding are as important as the sensor itself.
- Sensor fabrication and testing are central to image quality.
- Electronics calibration ensures consistent color and exposure.
- Thermal management affects long-term sensor performance.
The build process: from parts to prototype to mass production
Camera manufacture starts with design validation and builds a prototype, followed by pilot runs and full-scale production. Engineers verify mechanical fits, electrical interfaces, and software integration with a live test bench. If a discrepancy appears in assembly, technicians refine jigs and tolerances. For mass production, rugged fixtures, automated screw placement, and robotic arms enable repeatable assembly. Quality gates at each stage catch misalignments, contaminants, or functional faults before a unit leaves the line. This process reveals how decisions made during early design stages impact manufacturability, cost, and the end-user experience.
- Prototyping helps verify fit and function before scaling.
- Jigs and fixtures ensure repeatability in high-volume environments.
- Early-stage decisions influence cost, reliability, and throughput.
Quality control and testing
Quality control (QC) ensures every camera meets performance standards. QC checks cover optical alignment, autofocus accuracy, color fidelity, exposure consistency, and sensor cleanliness. Environmental tests assess performance under heat, cold, and humidity conditions. In many factories, automated test rigs simulate real-world use, capturing sample images to verify processing pipelines and storage integrity. Final inspection often includes cosmetic checks, firmware validation, and battery safety tests. The emphasis on QC is why a well-made camera retains performance over years of use and multiple firmware updates. Best Camera Tips notes that rigorous QC correlates with fewer recalls and higher customer satisfaction.
- Alignment and autofocus are validated with automated rigs.
- Environmental tests guard against field failure.
- Firmware and storage tests ensure reliability across updates.
Materials and manufacturing techniques used today
Modern cameras incorporate advanced materials like lightweight composites for the body, high-precision aluminum alloys for rigidity, and anti-scratch coatings on housings. Electronics employ densely packed printed circuit boards with multi-layer traces and sophisticated heat management. Soldering, robotic assembly, and precision adhesive application are standard in many facilities. To keep costs predictable, manufacturers standardize parts across models, using adaptable frames and modular components where possible. Advanced robotics improve repeatability while reducing human error, yet skilled technicians remain essential for final calibration and QC. The combination of materials science and precision engineering defines the durability and image quality of today’s cameras.
- Lightweight, durable housings reduce fatigue and wear.
- Heat management preserves sensor longevity.
- Modular design aids customization and maintenance.
Variations: mirrorless vs DSLR assembly differences
Mirrorless cameras simplify the optical path by removing the mirror and pentaprism, which reduces size and weight but shifts emphasis toward robust electronic control and autofocus systems. DSLR cameras retain a complex mirror mechanism, adding more mechanical components to assembly and calibration, especially around the optical viewfinder system. In manufacturing, mirrorless bodies require precise lens mount mates and electronic shutter synchronization, while DSLRs emphasize mechanical timing and mirror-box tolerances. Understanding these differences helps explain why assembly lines for these families differ in fixture design, testing routines, and firmware requirements.
- Mirrorless: lighter, electronics-focused assembly.
- DSLR: extra mechanical assembly with mirror timing.
- Testing varies based on the chosen optical path and user experience goals.
How consumer cameras are assembled in factories: a practical overview
Factory assembly for consumer cameras follows a disciplined, repeatable workflow designed to maximize yield and minimize variance. Operators assemble the body, mount the sensor, attach the optics, wire the power and data pathways, and finalize with the display and user controls. Automated conveyors transport sub-assemblies between stations, while technicians perform critical alignments under magnification and tight tolerances. The final steps involve extensive calibration, quality checks, and packaging. Throughout, environmental controls and safety protocols, including ESD precautions, ensure fragile components remain pristine. This overview ties together the mechanical, optical, and electronic threads that create the finished product.
Tools & Materials
- Workstation with dust-free surface(Clean, non-static work area for sensor handling)
- ESD wrist strap(Attach to ground before handling components)
- Precision screwdrivers (PH0, PH1, Torx T5-T8)(Use appropriate sizes for tiny fasteners)
- Calipers or micrometer(For precise measurements and tolerances)
- Tweezers and magnification loupe(Handling small parts with care)
- Static-safe mat and cleaning wipes(Prevent dust and static discharge)
- Lens alignment jig or mount fixture(Ensures correct flange distance)
- Dust-free storage bags or clean containers(Optional for component protection)
Steps
Estimated time: 6-8 hours per unit (rough estimate)
- 1
Prepare the assembly workspace
Set up a clean, dust-free area and verify all tools are ready. Ground yourself with the ESD strap and wipe surfaces to remove particulates that could contaminate sensors.
Tip: Always double-check that the area is free of dust before handling the sensor or lens mounts. - 2
Inspect and organize components
Unpack body shell, lenses, and electronics. Inspect for defects and organize parts by function to streamline the assembly flow.
Tip: Group parts by downstream station to reduce movement and contamination risk. - 3
Install the mechanical housing
Mount the bottom and side panels, ensuring the chassis aligns within tolerance. Secure fasteners using the torque guidelines from the fixture.
Tip: Use calibrated torque drivers to prevent over-tightening that could warp frames. - 4
Mount the image sensor
Place the sensor onto the alignment stage, align with the mount plane, and secure with minimal force to avoid damage.
Tip: Avoid touching the sensor surface; handle with soft tools and anti-static gloves. - 5
Attach electronics and power pathways
Connect the main board stack, sensor readout, and power distribution. Verify connectors latch and routing is clean.
Tip: Label cables clearly to prevent misconnection during testing. - 6
Install the optics mount and lens elements
Assemble the lens mount in the correct order and align optics with the sensor, confirming focus plane alignment.
Tip: Use the lens alignment jig to maintain precise flange distance. - 7
Seal, calibrate, and test
Seal the body, perform software initialization, and run autofocus, color calibration, and exposure tests.
Tip: Document calibration results to track performance across units. - 8
Final QC and packaging
Run the final cosmetic check and firmware validation, then package with protective materials for shipping.
Tip: Ensure protective inserts prevent movement during transit.
Common Questions
What are the most important components in a camera's production?
The body, image sensor, lens mount, and optics, along with electronics for processing and power, are the most important components. Production focuses on precise assembly, alignment, and calibration to ensure consistent performance.
Key components are the body, sensor, and optics, with precise alignment making a big difference.
How does sensor quality impact manufacturing decisions?
Sensor quality drives decisions on cleanroom controls, handling protocols, and testing regimes. Variations in sensor performance lead to adjustments in calibration and firmware.
Sensor quality determines cleaning standards and calibration needs.
Are cameras assembled in a single factory or multiple facilities?
Many manufacturers source components globally and perform final assembly in selected factories. This approach balances supply chain resilience with the need for consistent quality control.
Final assembly often happens in a few key factories, with parts sourced worldwide.
What safety considerations are involved in camera assembly?
Factories implement ESD protocols, chemical handling safety, and controlled environments to protect sensitive components and workers.
ESD and cleanroom safety are essential in camera assembly.
How long does it take to produce a camera unit?
Production time varies by model and facility, but typical cycles include prototyping, pilot runs, and full-scale manufacturing with multiple QA gates.
Timing varies, but QC steps are a core part of the process.
What role do firmware and calibration play in manufacturing?
Firmware and calibration scripts ensure consistent color, exposure, and focus across units, even as hardware tolerances differ.
Firmware ensures consistent performance across all units.
Watch Video
The Essentials
- Understand the camera’s core subsystems and how they interconnect
- Precise mechanical alignment and calibration drive image quality
- Quality control gates prevent defects from reaching customers
- Mirrorless vs DSLR assembly differ in mechanics and electronics
- Factory practices emphasize repeatability, cleanliness, and safety